mNo edit summary Tag: Visual edit |
(added chest probabilities) Tag: Visual edit |
||
| (41 intermediate revisions by 7 users not shown) | |||
| Line 1: | Line 1: | ||
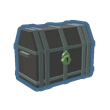
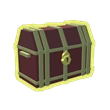
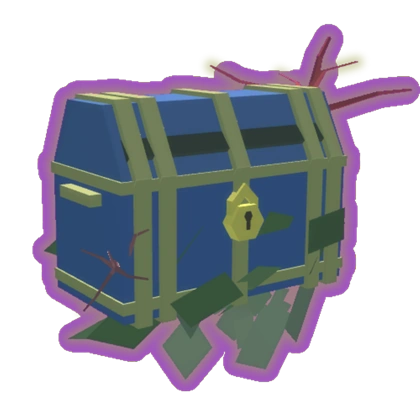
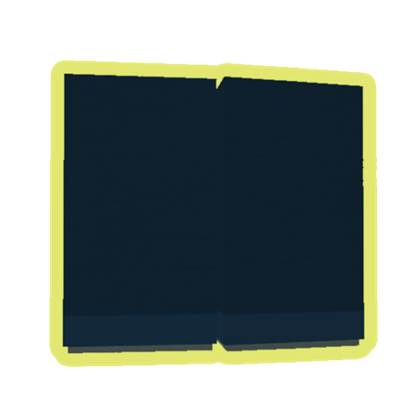
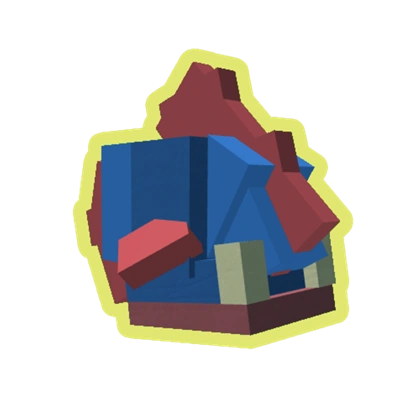
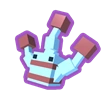
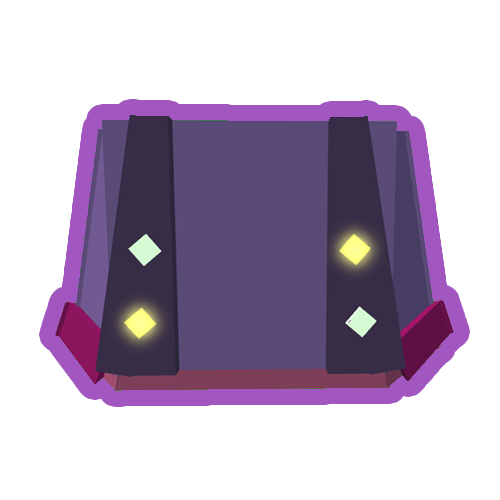
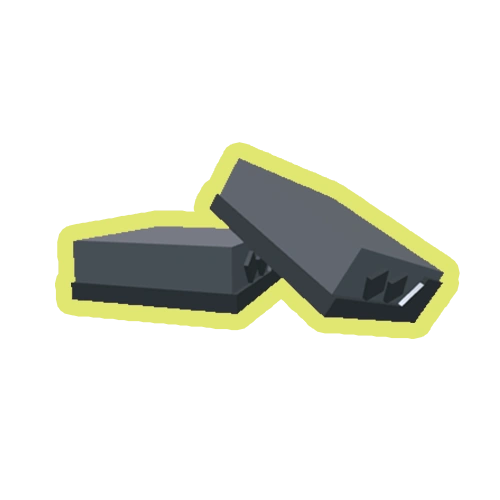
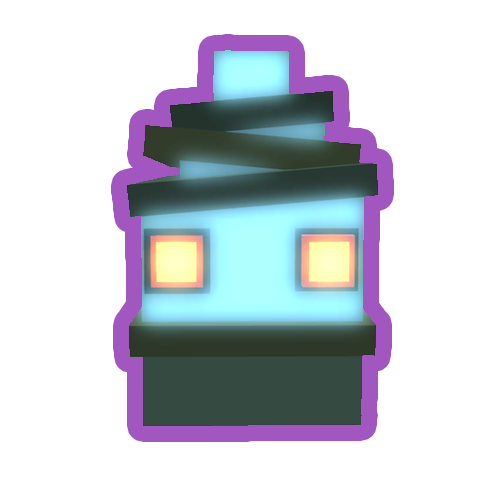
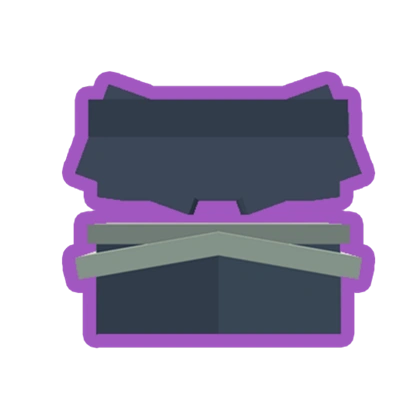
Treasure Chests are chests that can be obtained in the Frontier via fishing in a body of water. Different treasure chests will reward players different tiered-rewards when opened in the player's inventory. These chests will give items based on the rarity of the treasure chest that the player has obtained. As of the 1.10 Update, there are 3 tiers of treasure chests that can be obtained in the Frontier. |
Treasure Chests are chests that can be obtained in the Frontier via fishing in a body of water. Different treasure chests will reward players different tiered-rewards when opened in the player's inventory. These chests will give items based on the rarity of the treasure chest that the player has obtained. As of the 1.10 Update, there are 3 tiers of treasure chests that can be obtained in the Frontier. |
||
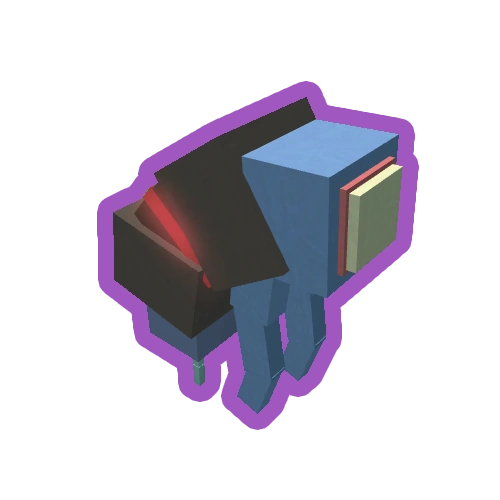
| + | Treasure chests may be obtainable by purchasing it from vendors. The only currently known treasure chest that can be purchased is the Deep Sea Treasure Chest. It can be purchased from [[Linkman the Junkman]] or [[Vhitmire's Mystery Traveling Store|Vhitmire]]. Linkman the Junkman sells the chest at a cheaper price of 3,200,000 gold, while Vhitmire sells the chest at a price of 3,400,000 gold. Treasure Chests may also be obtained from certain mobs, such as the [[Plasma Ghost]], or obtained from quests such as [[Giant Toad's Tasks]]. |
||
| + | == Technical == |
||
| − | Treasure chests may be obtainable through purchasing it from vendors. The only currently known treasure chest that can be purchased is the Deep Sea Treasure Chest. It can be purchased from [[Linkman the Junkman]] or [[Vhitmire's Mystery Traveling Store|Vhitmire]]. Linkman the Junkman sells the chest at a cheaper price of 3,200,000 gold, while Vhitmire sells the chest at a price of 3,400,000 gold. |
||
| + | Treasure Chests have a random chance of being fished up, with this probability varying depending on which location you choose to fish. Such locations and probabilities are: |
||
| − | |||
| + | * Rabbit Hole: 10% |
||
| + | * Coasts: 3-4% |
||
| + | * Elsewhere: 2% |
||
| + | When you fish up a chest, the type of chest you would get is also a random process, with the probabilities being: |
||
| + | {| class="article-table" |
||
| + | |Type |
||
| + | |% Chance |
||
| + | |- |
||
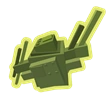
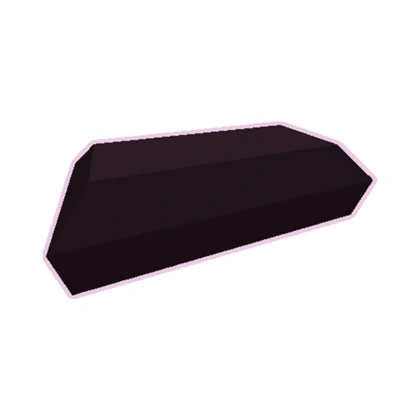
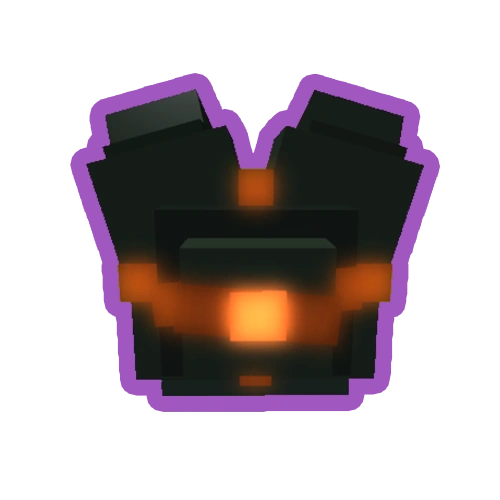
| + | |[[File:Treasure Chest.png|centre|thumb|110x110px]] <center>Treasure Chest</center> |
||
| + | |60% |
||
| + | |- |
||
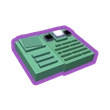
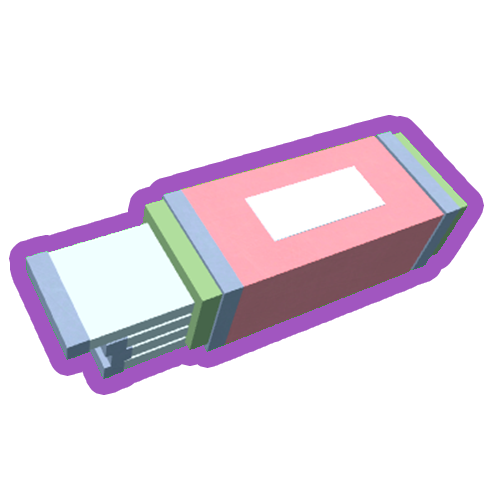
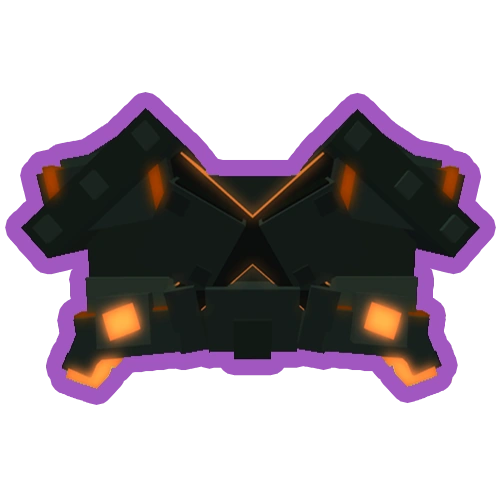
| + | |[[File:Grand Treasure Chest.png|centre|thumb|110x110px]] <center>Grand Treasure Chest</center> |
||
| + | |35% |
||
| + | |- |
||
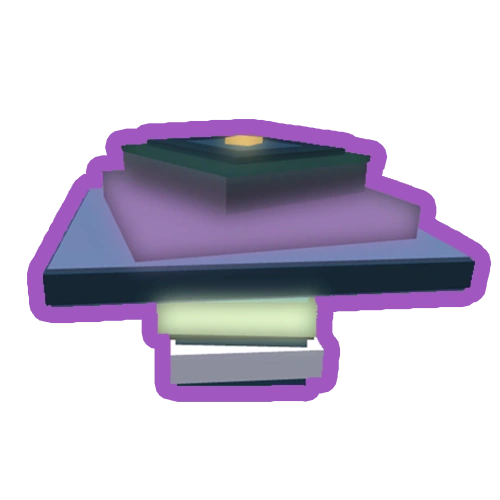
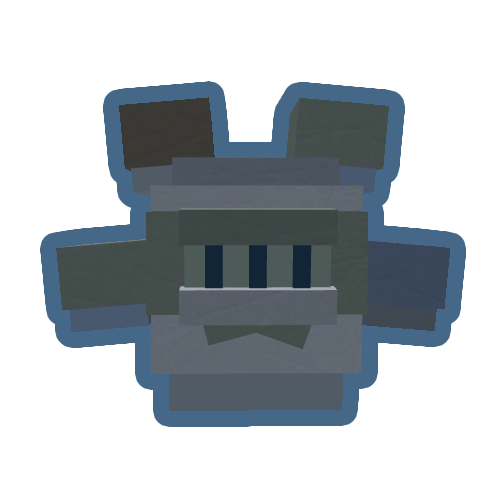
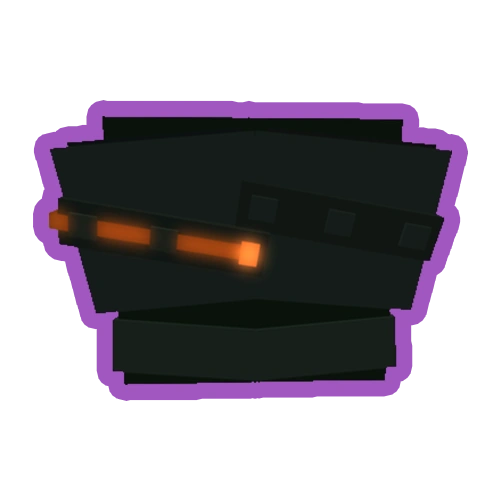
| + | |[[File:Deep Sea Treasure Chest.png|centre|thumb|110x110px]] <center>Deep Sea Treasure Chest </center> |
||
| + | |5% |
||
| + | |} |
||
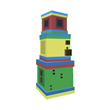
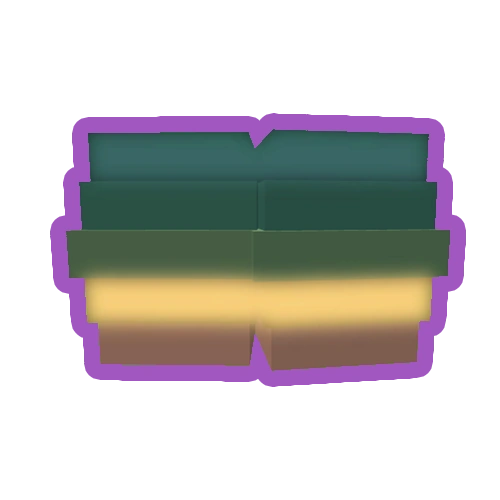
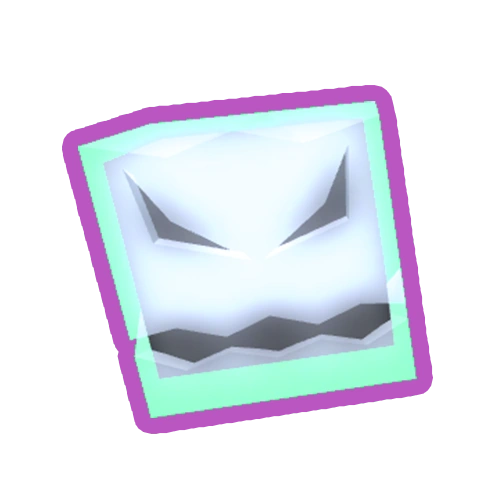
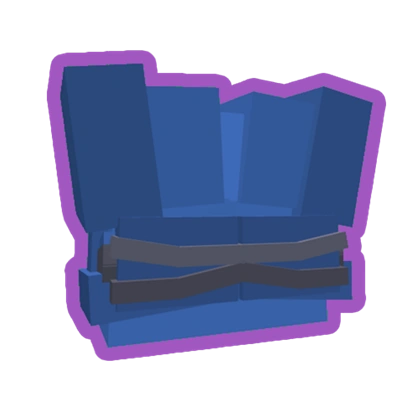
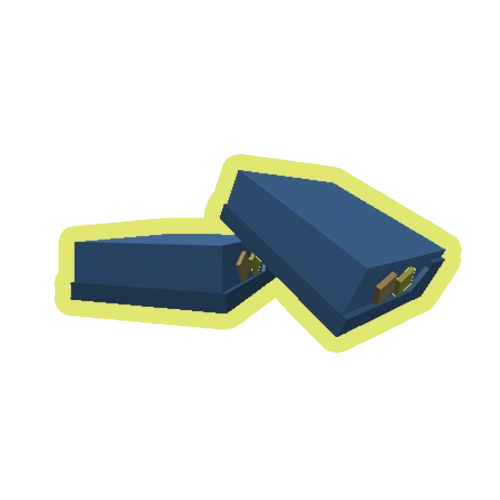
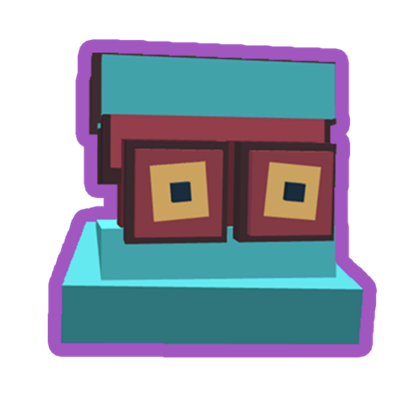
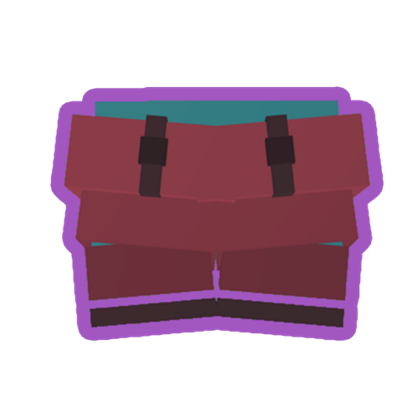
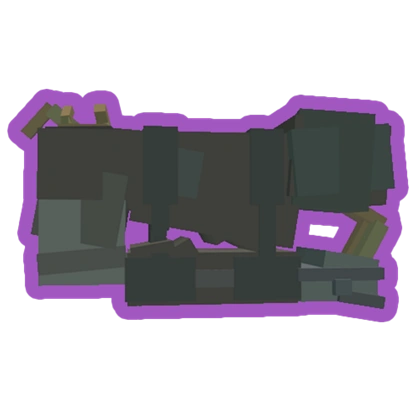
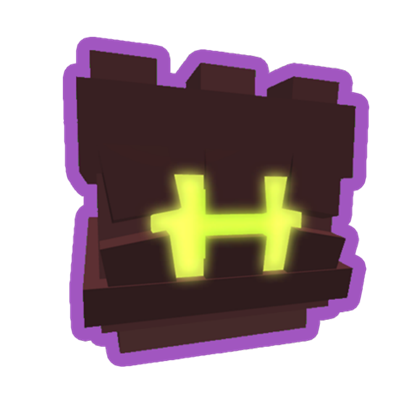
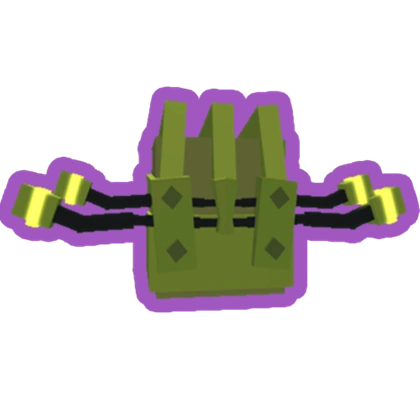
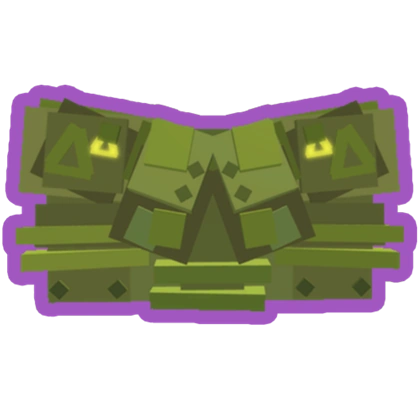
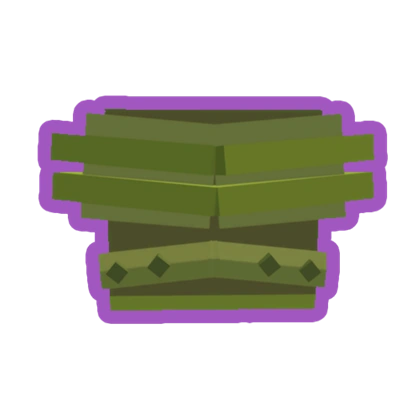
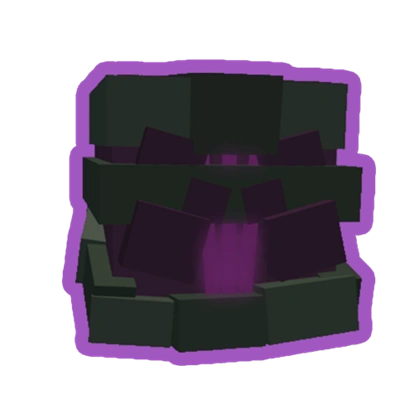
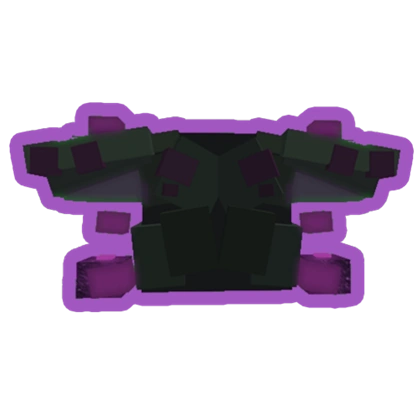
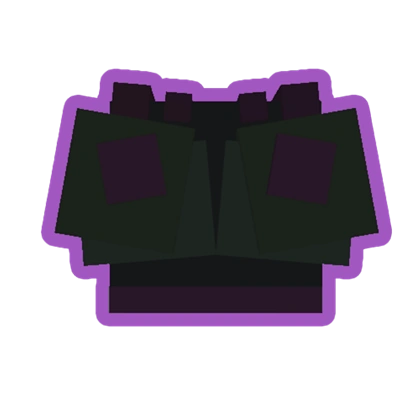
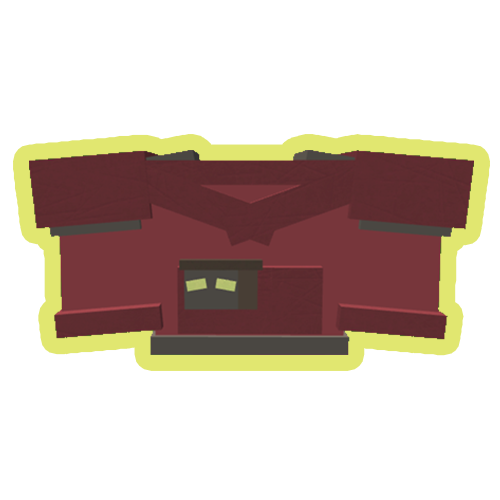
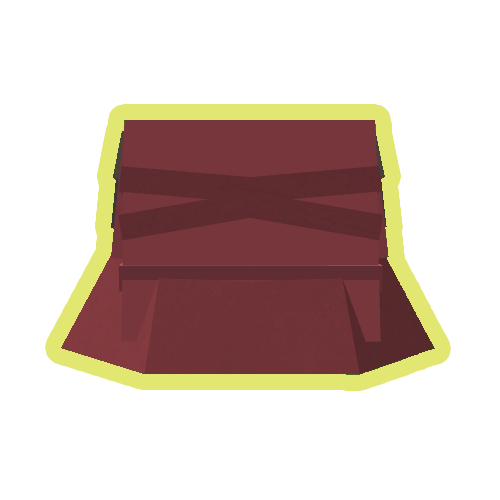
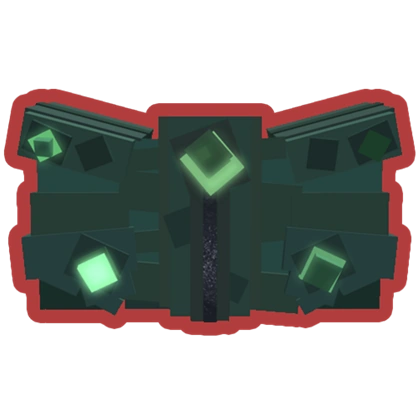
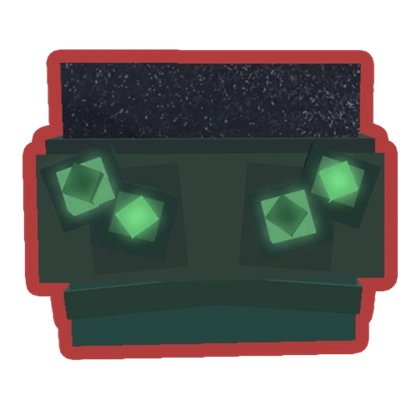
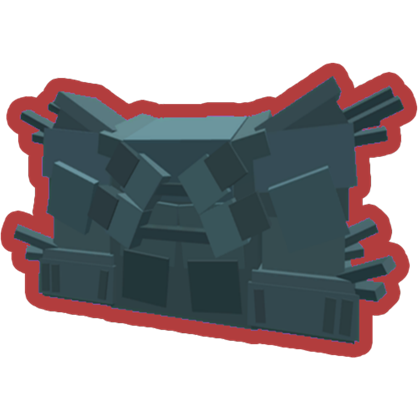
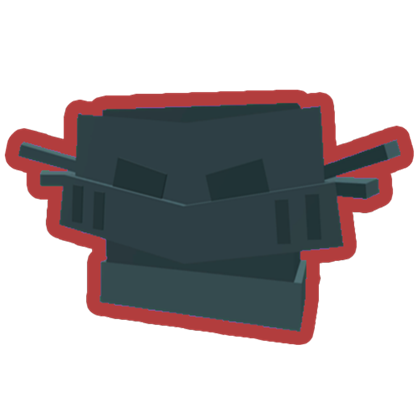
== Treasure Chests == |
== Treasure Chests == |
||
{| class="article-table" |
{| class="article-table" |
||
| Line 10: | Line 28: | ||
* Reward lesser-valued items |
* Reward lesser-valued items |
||
* An 'uncommon' treasure chest |
* An 'uncommon' treasure chest |
||
| − | |||
* Selling price = 10,000 gold |
* Selling price = 10,000 gold |
||
|- |
|- |
||
| Line 18: | Line 35: | ||
* Reward intermediate/somewhat sought-after items |
* Reward intermediate/somewhat sought-after items |
||
* An "epic" treasure chest |
* An "epic" treasure chest |
||
| − | |||
* Selling price = 50,000 gold |
* Selling price = 50,000 gold |
||
|- |
|- |
||
| Line 25: | Line 41: | ||
| |
| |
||
* Reward very sought-after items |
* Reward very sought-after items |
||
| − | |||
* A "legendary" treasure chest |
* A "legendary" treasure chest |
||
* Selling price = 200,000 gold |
* Selling price = 200,000 gold |
||
|} |
|} |
||
| − | |||
== List of Rewards == |
== List of Rewards == |
||
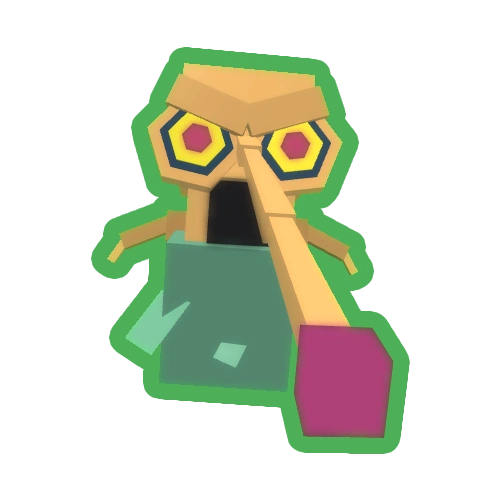
| − | Each treasure chest will reward players with various rewards based off on the tier of the treasure chest. For example, all of the possible rewards of the Treasure Chest will be below the List of Rewards (Treasure Chest), all of the possible rewards of the Grand Treasure Chest will be below the List of Rewards (Grand Treasure Chest), and so forth. |
+ | Each treasure chest will reward players with various rewards based off on the tier of the treasure chest. For example, all of the possible rewards of the Treasure Chest will be below the List of Rewards (Treasure Chest), all of the possible rewards of the Grand Treasure Chest will be below the List of Rewards (Grand Treasure Chest), and so forth. If you would like to see the reward chances for the Deep Sea Treasure Chest, please click this link --> https://pastebin.com/edEuETpw. Unfortunately, we do not have the Treasure Chest nor the Grand Treasure Chest's percentages, however, you may refer to the [[Otherworld Tower]] rewards' pastebin list as a reference. |
| − | |||
=== Treasure Chest Rewards === |
=== Treasure Chest Rewards === |
||
| − | + | <div class="grid-table"> |
|
| + | {{GridItem|Checklist item id = |Quantity text = | Article name =Abandoned Flower|Image=Abandoned Flower.png}} |
||
| − | !Category |
||
| + | {{GridItem|Checklist item id = |Quantity text = | Article name =Advanced Rapier|Image=Advanced Rapier.png}} |
||
| − | !List of Item(s) |
||
| + | {{GridItem|Checklist item id = |Quantity text = | Article name =Angry Bushdweller|Image=AngryBushdweller.png}} |
||
| − | !Preview(s) |
||
| + | {{GridItem|Checklist item id = |Quantity text = | Article name =Antennae|Image=Antennae.png}} |
||
| − | |- |
||
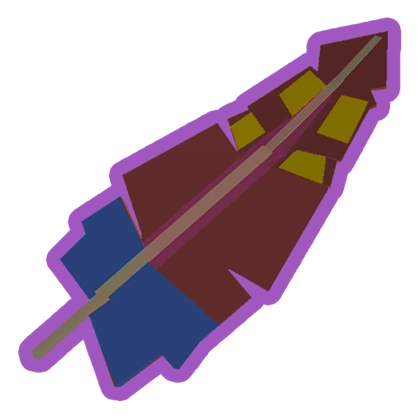
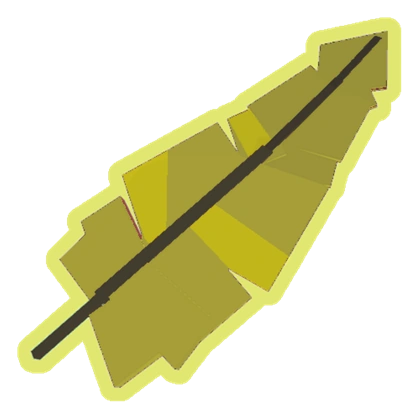
| + | {{GridItem|Checklist item id = |Quantity text = | Article name =Applebird Feather|Image=ApplebirdFeather.png}} |
||
| − | |[[Armor]] |
||
| + | {{GridItem|Checklist item id = |Quantity text = | Article name =Bandolier|Image=Bandolier.png}} |
||
| − | | |
||
| + | {{GridItem|Checklist item id = |Quantity text = | Article name =Bear Claw|Image=BearClaw.png}} |
||
| − | * [[Celestial Moon Set]] |
||
| + | {{GridItem|Checklist item id = |Quantity text = | Article name =Big Orange Eyes|Image=Big Orange Eyes Large.png}} |
||
| − | * [[Galaxy Wizard Set]] |
||
| + | {{GridItem|Checklist item id = |Quantity text = | Article name =Bignose Angler|Image=Bignose Angler Large.png}} |
||
| − | * Ghost Mask |
||
| + | {{GridItem|Checklist item id = |Quantity text = | Article name =Black Suit Top|Image=Black Suit Top Large.png}} |
||
| − | * Monster Mask |
||
| + | {{GridItem|Checklist item id = |Quantity text = | Article name =Black Suit Pants|Image=Black Suit Pants Large.png}} |
||
| − | * [[Patched Set]] |
||
| + | {{GridItem|Checklist item id = |Quantity text = | Article name =Blue Ogrefish|Image=Blue Ogrefish Large.png}} |
||
| − | * [[Spikeout Set]] |
||
| + | {{GridItem|Checklist item id = |Quantity text = | Article name =Bonefish|Image=Bonefish.png}} |
||
| − | * [[Tomb Prowler Set]] |
||
| + | {{GridItem|Checklist item id = |Quantity text = | Article name =Boomba Mushroom|Image=Boomba Mushroom.png}} |
||
| + | {{GridItem|Checklist item id = |Quantity text = | Article name =Bozo|Image=Bozo.png}} |
||
| + | {{GridItem|Checklist item id = |Quantity text = 1-20| Article name =Bullets|Image=Bullets.png}} |
||
| + | {{GridItem|Checklist item id = |Quantity text = | Article name =Celestial Moon Set#Hat|Image=CelestialMoonHat.png}} |
||
| + | {{GridItem|Checklist item id = |Quantity text = | Article name =Celestial Moon Set#Top|Image=CelestialMoonTop.png}} |
||
| + | {{GridItem|Checklist item id = |Quantity text = | Article name =Celestial Moon Set#Robe Bottom|Image=CelestialMoonRobeBottom.png}} |
||
| + | {{GridItem|Checklist item id = |Quantity text = | Article name =Clownbird Feather|Image=ClownbirdFeather-0.png}} |
||
| + | {{GridItem|Checklist item id = |Quantity text = | Article name =Ores|Image=Cobalt Bar.png}} |
||
| + | {{GridItem|Checklist item id = |Quantity text = | Article name =Croc Rags|Image=Croc Rags.png}} |
||
| + | {{GridItem|Checklist item id = |Quantity text = | Article name =Dragon Dice|Image=Dragon Dice.png}} |
||
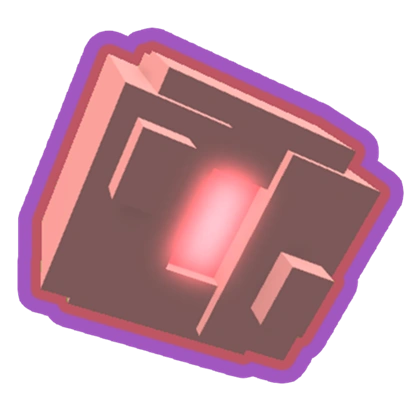
| + | {{GridItem|Checklist item id = |Quantity text = | Article name =Esteemed Heirloom|Image=Esteemed Heirloom.png}} |
||
| + | {{GridItem|Checklist item id = |Quantity text = | Article name =Floor 20 Skip Ticket|Image=Floor 20 Skip Ticket.png}} |
||
| + | {{GridItem|Checklist item id = |Quantity text = | Article name =Galaxy Wizard Set#Hat|Image=GalaxyWizardHat.png}} |
||
| + | {{GridItem|Checklist item id = |Quantity text = | Article name =Galaxy Wizard Set#Top|Image=GalaxyWizardTorso.png}} |
||
| + | {{GridItem|Checklist item id = |Quantity text = | Article name =Galaxy Wizard Set#Bottom|Image=GalaxyWizardLegs.png}} |
||
| + | {{GridItem|Checklist item id = |Quantity text = | Article name =Ghost Mask|Image=GhostMask.png}} |
||
| + | {{GridItem|Checklist item id = |Quantity text = | Article name =Giant Mushroom Stump|Image=Giant Mushroom Stump.png}} |
||
| + | {{GridItem|Checklist item id = |Quantity text = | Article name =Giant's Bone|Image=GiantsBone.png}} |
||
| + | {{GridItem|Checklist item id = |Quantity text = | Article name =Ores|Image=Gold Ore.png}} |
||
| + | {{GridItem|Checklist item id = |Quantity text = | Article name =Gold Rapier|Image=Gold Rapier.png}} |
||
| + | {{GridItem|Checklist item id = |Quantity text = | Article name =Gold Scimitar|Image=Gold Scimitar.png}} |
||
| + | {{GridItem|Checklist item id = |Quantity text = | Article name =Golem Core|Image=GolemCore.png}} |
||
| + | {{GridItem|Checklist item id = |Quantity text = | Article name =Goliath Algae Worm|Image=Goliath Algae Worm.png}} |
||
| + | {{GridItem|Checklist item id = |Quantity text = | Article name =Grass Rapier|Image=Grass Rapier.png}} |
||
| + | {{GridItem|Checklist item id = |Quantity text = | Article name =Hammer Scraps|Image=Hammer Scraps.png}} |
||
| + | {{GridItem|Checklist item id = |Quantity text = | Article name =Hungry Flower|Image=Hungry Flower.png}} |
||
| + | {{GridItem|Checklist item id = |Quantity text = | Article name =Ores|Image=Iron Bar.png}} |
||
| + | {{GridItem|Checklist item id = |Quantity text = | Article name =Keemal Feather|Image=Keemal Feather.png}} |
||
| + | {{GridItem|Checklist item id = |Quantity text = | Article name =Khaki Suit Top|Image=Khaki Suit Top.png}} |
||
| + | {{GridItem|Checklist item id = |Quantity text = | Article name =Khaki Suit Pants|Image=Khaki Suit Pants.png}} |
||
| + | {{GridItem|Checklist item id = |Quantity text = | Article name =Kotono|Image=Kotono.png}} |
||
| + | {{GridItem|Checklist item id = |Quantity text = | Article name =Lagoonneck Fish|Image=Lagoonneck Fish.png}} |
||
| + | {{GridItem|Checklist item id = |Quantity text = 3-25| Article name =Lesser Dungeon Candy|Image=Lesser Dungeon Candy.png}} |
||
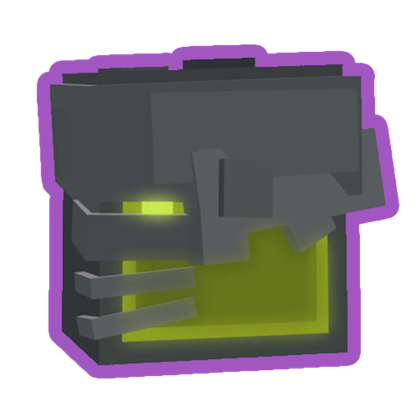
| + | {{GridItem|Checklist item id = |Quantity text = | Article name =Magma Brain Core|Image=Magma Brain Core.png}} |
||
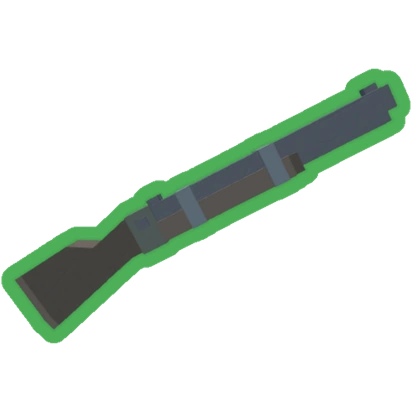
| + | {{GridItem|Checklist item id = |Quantity text = | Article name =Marksman's Rifle|Image=Marksman Rifle.png}} |
||
| + | {{GridItem|Checklist item id = |Quantity text = | Article name =Moneybird Feather|Image=Moneybird Feather.png}} |
||
| + | {{GridItem|Checklist item id = |Quantity text = | Article name =Monster Mask|Image=Monster Mask.png}} |
||
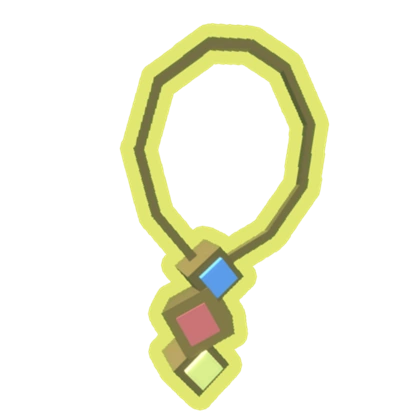
| + | {{GridItem|Checklist item id = |Quantity text = | Article name =Mud Ring|Image=Mud Ring.png}} |
||
| + | {{GridItem|Checklist item id = |Quantity text = | Article name =Mustache Mushroom|Image=Mustache Mushroom.png}} |
||
| + | {{GridItem|Checklist item id = |Quantity text = | Article name =Nightmare Mushroom|Image=Nightmare Mushroom.png}} |
||
| + | {{GridItem|Checklist item id = |Quantity text = | Article name =Odd Cape|Image=Odd Cape.png}} |
||
| + | {{GridItem|Checklist item id = |Quantity text = | Article name =Ores|Image=Onyx Bar.png}} |
||
| + | {{GridItem|Checklist item id = |Quantity text = | Article name =Pack of Gum|Image=PackofGum.png}} |
||
| + | {{GridItem|Checklist item id = |Quantity text = | Article name =Patched Set#Helmet|Image=PatchedHelmet.png}} |
||
| + | {{GridItem|Checklist item id = |Quantity text = | Article name =Patched Set#Torso|Image=PatchedTorso.png}} |
||
| + | {{GridItem|Checklist item id = |Quantity text = | Article name =Patched Set#Legs|Image=PatchedLegs.png}} |
||
| + | {{GridItem|Checklist item id = |Quantity text = 50| Article name =Pellets|Image=Pellets.png}} |
||
| + | {{GridItem|Checklist item id = |Quantity text = | Article name =Pipe Rife|Image=Pipe Rifle.png}} |
||
| + | {{GridItem|Checklist item id = |Quantity text = | Article name =Power Axe|Image=Power Axe.png}} |
||
| + | {{GridItem|Checklist item id = |Quantity text = | Article name =Preobird Feather|Image=Preobird-0.png}} |
||
| + | {{GridItem|Checklist item id = |Quantity text = | Article name =Ratboy Secrets|Image=RatboySecrets.png}} |
||
| + | {{GridItem|Checklist item id = |Quantity text = | Article name =Red Clapper|Image=Red Clapper.png}} |
||
| + | {{GridItem|Checklist item id = |Quantity text = | Article name =Rednal Feather|Image=RednalFeather.png}} |
||
| + | {{GridItem|Checklist item id = |Quantity text = | Article name =Rich Man's Delight|Image=Rich Man's Delight.png}} |
||
| + | {{GridItem|Checklist item id = |Quantity text = | Article name =Ores|Image=2b6c4d8973d31b0d66e7afe2a4fabfad.png}} |
||
| + | {{GridItem|Checklist item id = |Quantity text = | Article name =Shockjaw|Image=Shockjaw.png}} |
||
| + | {{GridItem|Checklist item id = |Quantity text = | Article name =Spikeout Set#Helmet|Image=SpikeoutHelmet.png}} |
||
| + | {{GridItem|Checklist item id = |Quantity text = | Article name =Spikeout Set#Chestpiece|Image=SpikeoutChestpiece.png}} |
||
| + | {{GridItem|Checklist item id = |Quantity text = | Article name =Spikeout Set#Legs|Image=SpikeoutLegs.png}} |
||
| + | {{GridItem|Checklist item id = |Quantity text = | Article name =Spinner Rattle|Image=Spinner Rattle.png}} |
||
| + | {{GridItem|Checklist item id = |Quantity text = | Article name =Spirit Bird Feather|Image=SpiritBirdFeather.png}} |
||
| + | {{GridItem|Checklist item id = |Quantity text = | Article name =Strangeman's Shell|Image=StrangemansShell.png}} |
||
| + | {{GridItem|Checklist item id = |Quantity text = | Article name =Thinker's Box|Image=Thinker's Box.png}} |
||
| + | {{GridItem|Checklist item id = |Quantity text = | Article name =Tomb Prowler Set#Hat|Image=TombProwlerHat.png}} |
||
| + | {{GridItem|Checklist item id = |Quantity text = | Article name =Tomb Prowler Set#Torso|Image=TombProwlerTorso.png}} |
||
| + | {{GridItem|Checklist item id = |Quantity text = | Article name =Tomb Prowler Set#Legs|Image=TombProwlerLegs.png}} |
||
| + | {{GridItem|Checklist item id = |Quantity text = | Article name =Toy Blocks|Image=ToyBlocks.png}} |
||
| + | {{GridItem|Checklist item id = |Quantity text = | Article name =Trash Friend|Image=Trash Friend.png}} |
||
| + | {{GridItem|Checklist item id = |Quantity text = | Article name =Tri-Color Necklace|Image=Tri-Color Necklace.png}} |
||
| + | {{GridItem|Checklist item id = |Quantity text = | Article name =Void Monster Set#Mask|Image=VoidMonsterMask.png}} |
||
| + | {{GridItem|Checklist item id = |Quantity text = | Article name =Void Monster Set#Torso|Image=VoidMonsterTorso.png}} |
||
| + | {{GridItem|Checklist item id = |Quantity text = | Article name =Void Monster Set#Legs|Image=VoidMonsterLegs.png}} |
||
| + | {{GridItem|Checklist item id = |Quantity text = | Article name =Xenoculous|Image=Xenoculous.png}} |
||
| + | {{GridItem|Checklist item id = |Quantity text = | Article name =Zhuulaczar Set#Crown|Image=Zhuu.png}} |
||
| + | {{GridItem|Checklist item id = |Quantity text = | Article name =Zhuulaczar Set#Armored Body|Image=ZhuuTorso.png}} |
||
| + | {{GridItem|Checklist item id = |Quantity text = | Article name =Zhuulaczar#Legs|Image=ZhuuLegs.png}} |
||
| + | </div> |
||
| − | * [[Void Monster Set]] |
||
| − | |||
| − | * [[Zhuulaczar Set]] |
||
| − | | |
||
| − | {| class="article-table" |
||
| − | |[[File:CelestialMoonHat.png|centre|thumb|80x80px]] |
||
| − | |[[File:CelestialMoonTop.png|centre|thumb|80x80px]] |
||
| − | |[[File:CelestialMoonRobeBottom.png|centre|thumb|80x80px]] |
||
| − | |- |
||
| − | |[[File:GalaxyWizardHat.png|centre|thumb|80x80px]] |
||
| − | |[[File:GalaxyWizardTorso.png|centre|thumb|80x80px]] |
||
| − | |[[File:GalaxyWizardLegs.png|centre|thumb|80x80px]] |
||
| − | |- |
||
| − | |[[File:GhostMask.png|centre|thumb|80x80px]] |
||
| − | |[[File:Monster Mask.png|centre|thumb|80x80px]] |
||
| − | | |
||
| − | |- |
||
| − | |[[File:PatchedHelmet.png|centre|thumb|80x80px]] |
||
| − | |[[File:PatchedTorso.png|centre|thumb|80x80px]] |
||
| − | |[[File:PatchedLegs.png|centre|thumb|80x80px]] |
||
| − | |- |
||
| − | |[[File:SpikeoutHelmet.png|centre|thumb|80x80px]] |
||
| − | |[[File:SpikeoutChestpiece.png|centre|thumb|80x80px]] |
||
| − | |[[File:SpikeoutLegs.png|centre|thumb|80x80px]] |
||
| − | |- |
||
| − | |[[File:TombProwlerHat.png|centre|thumb|80x80px]] |
||
| − | |[[File:TombProwlerTorso.png|centre|thumb|80x80px]] |
||
| − | |[[File:TombProwlerLegs.png|centre|thumb|80x80px]] |
||
| − | |- |
||
| − | |[[File:VoidMonsterMask.png|centre|thumb|80x80px]] |
||
| − | |[[File:VoidMonsterTorso.png|centre|thumb|80x80px]] |
||
| − | |[[File:VoidMonsterLegs.png|centre|thumb|80x80px]] |
||
| − | |- |
||
| − | |[[File:Zhuu.png|centre|thumb|80x80px]] |
||
| − | |[[File:ZhuuTorso.png|centre|thumb|80x80px]] |
||
| − | |[[File:ZhuuLegs.png|centre|thumb|80x80px]] |
||
| − | |} |
||
| − | |- |
||
| − | |[[Back Equipment]] |
||
| − | | |
||
| − | * Odd Cape |
||
| − | | |
||
| − | {| class="article-table" |
||
| − | |[[File:Odd Cape.png|centre|thumb|80x80px]] |
||
| − | |} |
||
| − | |- |
||
| − | |[[Clothing]] |
||
| − | | |
||
| − | * Black Suit Pants |
||
| − | * Black Suit Top |
||
| − | * Khaki Suit Pants |
||
| − | * Khaki Suit Top |
||
| − | | |
||
| − | {| class="article-table" |
||
| − | |[[File:Black Suit Pants.png|centre|thumb|80x80px]] |
||
| − | |[[File:Black Suit Top.png|centre|thumb|80x80px]] |
||
| − | |- |
||
| − | |[[File:Khaki Suit Pants.png|centre|thumb|80x80px]] |
||
| − | |[[File:Khaki Suit Top.png|centre|thumb|80x80px]] |
||
| − | |} |
||
| − | |- |
||
| − | |[[Consumables]] |
||
| − | | |
||
| − | * 3-25 Lesser Dungeon Candies |
||
| − | * Rich's Man Delight |
||
| − | | |
||
| − | {| class="article-table" |
||
| − | |[[File:Lesser Dungeon Candy.png|centre|thumb|80x80px]] |
||
| − | |[[File:Rich Man's Delight.png|centre|thumb|80x80px]] |
||
| − | |} |
||
| − | |- |
||
| − | |[[Feathers]] |
||
| − | | |
||
| − | * Applebird Feather |
||
| − | * Clownbird Feather |
||
| − | * Keemal Feather |
||
| − | * Preobird Feather |
||
| − | * Rednal Feather |
||
| − | | |
||
| − | {| class="article-table" |
||
| − | |[[File:ApplebirdFeather.png|centre|thumb|80x80px]] |
||
| − | |[[File:ClownbirdFeather-0.png|centre|thumb|80x80px]] |
||
| − | |[[File:Keemal Feather.png|thumb|80x80px|centre]] |
||
| − | |- |
||
| − | |[[File:Preobird-0.png|centre|thumb|80x80px]] |
||
| − | |[[File:RednalFeather.png|centre|thumb|80x80px]] |
||
| − | | |
||
| − | |} |
||
| − | |- |
||
| − | |[[Fishes]] |
||
| − | | |
||
| − | * [[Bignose Angler]] |
||
| − | * [[Blue Ogrefish]] |
||
| − | * [[Bonefish]] |
||
| − | * [[Bozo]] |
||
| − | * [[Goliath Algae Worm]] |
||
| − | * [[Red Clapper]] |
||
| − | * [[Shockjaw]] |
||
| − | | |
||
| − | {| class="article-table" |
||
| − | |[[File:Bignose Angler.png|centre|thumb|80x80px]] |
||
| − | |[[File:Blue Ogrefish.png|centre|thumb|80x80px]] |
||
| − | |[[File:Bonefish.png|centre|thumb|80x80px]] |
||
| − | |- |
||
| − | |[[File:Bozo.png|centre|thumb|80x80px]] |
||
| − | |[[File:Goliath Algae Worm.png|centre|thumb|80x80px]] |
||
| − | |[[File:Red Clapper.png|centre|thumb|80x80px]] |
||
| − | |- |
||
| − | |[[File:Shockjaw.png|centre|thumb|80x80px]] |
||
| − | | |
||
| − | | |
||
| − | |} |
||
| − | |- |
||
| − | |[[Harvestables]] |
||
| − | | |
||
| − | * [[Abandoned Flower]] |
||
| − | * [[Boomba Mushroom]] |
||
| − | * [[Hungry Flower]] |
||
| − | * [[Mushtache Mushroom]] |
||
| − | * [[Nightmare Mushroom]] |
||
| − | * [[Strangeman's Shell]] |
||
| − | | |
||
| − | {| class="article-table" |
||
| − | |[[File:Abandoned Flower.png|centre|thumb|80x80px]] |
||
| − | |[[File:Boomba Mushroom.png|centre|thumb|80x80px]] |
||
| − | |[[File:Hungry Flower.png|centre|thumb|80x80px]] |
||
| − | |- |
||
| − | |[[File:Mustache Mushroom.png|centre|thumb|80x80px]] |
||
| − | |[[File:Nightmare Mushroom.png|centre|thumb|80x80px]] |
||
| − | |[[File:StrangemansShell.png|centre|thumb|80x80px]] |
||
| − | |} |
||
| − | |- |
||
| − | |[[Melee Weapons]] |
||
| − | | |
||
| − | * Gold Rapier |
||
| − | * Gold Scimitar |
||
| − | * Grass Rapier |
||
| − | * [[Kotono]] |
||
| − | |||
| − | * Power Axe |
||
| − | | |
||
| − | {| class="article-table" |
||
| − | |[[File:Gold Rapier.png|centre|thumb|80x80px]] |
||
| − | |[[File:Gold Scimitar.png|centre|thumb|80x80px]] |
||
| − | |[[File:Grass Rapier.png|centre|thumb|80x80px]] |
||
| − | |- |
||
| − | |[[File:Kotono.png|centre|thumb|80x80px]] |
||
| − | |[[File:Power Axe.png|centre|thumb|80x80px]] |
||
| − | | |
||
| − | |} |
||
| − | |- |
||
| − | |[[Misc Equipment]] |
||
| − | | |
||
| − | * Antennae |
||
| − | * Big Orange Eyes |
||
| − | |||
| − | * Xenoculous |
||
| − | | |
||
| − | {| class="article-table" |
||
| − | |[[File:Antennae.png|thumb|80x80px|centre]] |
||
| − | |[[File:Big Orange Eyes.png|centre|thumb|80x80px]] |
||
| − | |[[File:Xenoculous.png|centre|thumb|80x80px]] |
||
| − | |} |
||
| − | |- |
||
| − | |[[Miscellaneous items|Misc. Items]] |
||
| − | | |
||
| − | * Floor 20 Skip Ticket |
||
| − | | |
||
| − | {| class="article-table" |
||
| − | |[[File:Floor 20 Skip Ticket.png|centre|thumb|80x80px]] |
||
| − | |} |
||
| − | |- |
||
| − | |[[Monster Drops]] |
||
| − | | |
||
| − | * Croc Rags |
||
| − | * Dragon Dice |
||
| − | * [[Esteemed Heirloom]] |
||
| − | * Ghost Mask |
||
| − | * Giant's Bone |
||
| − | * Giant Mushroom Stump |
||
| − | * Golem Core |
||
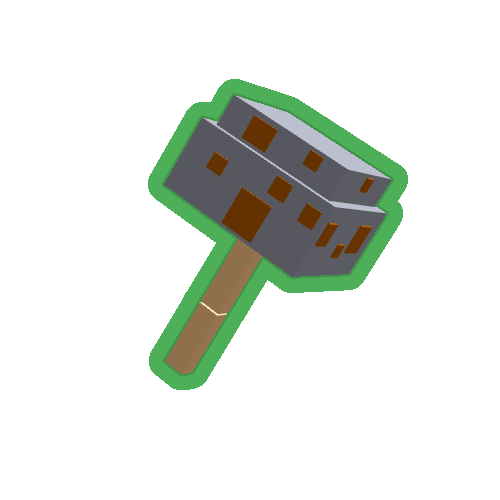
| − | * Hammer Scraps |
||
| − | * Magma Brain Core |
||
| − | * Pack of Gum |
||
| − | |||
| − | * Ratboy Secrets |
||
| − | * [[Thinker's Box]] |
||
| − | |||
| − | * Toy Blocks |
||
| − | * Trash Friend |
||
| − | | |
||
| − | {| class="article-table" |
||
| − | |[[File:Croc Rags.png|centre|thumb|80x80px]] |
||
| − | |[[File:Dragon Dice.png|centre|thumb|80x80px]] |
||
| − | |[[File:Esteemed Heirloom.png|centre|thumb|80x80px]] |
||
| − | |- |
||
| − | |[[File:GhostMask.png|centre|thumb|80x80px]] |
||
| − | |[[File:GiantsBone.png|centre|thumb|80x80px]] |
||
| − | |[[File:Giant Mushroom Stump.png|centre|thumb|80x80px]] |
||
| − | |- |
||
| − | |[[File:GolemCore.png|centre|thumb|80x80px]] |
||
| − | |[[File:Hammer Scraps.png|centre|thumb|80x80px]] |
||
| − | |[[File:Magma Brain Core.png|centre|thumb|80x80px]] |
||
| − | |- |
||
| − | |[[File:PackofGum.png|centre|thumb|80x80px]] |
||
| − | |[[File:RatboySecrets.png|centre|thumb|80x80px]] |
||
| − | |[[File:Thinker's Box.png|centre|thumb|80x80px]] |
||
| − | |- |
||
| − | |[[File:ToyBlocks.png|centre|thumb|80x80px]] |
||
| − | |[[File:Trash Friend.png|centre|thumb|80x80px]] |
||
| − | | |
||
| − | |} |
||
| − | |- |
||
| − | |[[Neck Equipment]] |
||
| − | | |
||
| − | * [[Tri-Color Necklace]] |
||
| − | | |
||
| − | {| class="article-table" |
||
| − | |[[File:Tri-Color Necklace.png|centre|thumb|80x80px]] |
||
| − | |} |
||
| − | |- |
||
| − | |[[Ores]] |
||
| − | | |
||
| − | * Cobalt Bar |
||
| − | * Gold Ore |
||
| − | * Sapphire |
||
| − | | |
||
| − | {| class="article-table" |
||
| − | |[[File:Cobalt Bar.png|centre|thumb|80x80px]] |
||
| − | |[[File:Gold Ore.png|centre|thumb|80x80px]] |
||
| − | |[[File:2b6c4d8973d31b0d66e7afe2a4fabfad.png|centre|thumb|80x80px]] |
||
| − | |} |
||
| − | |- |
||
| − | |[[Rifle/Ranged Weapons]] |
||
| − | | |
||
| − | * 1-20 Bullets |
||
| − | * Marksman's Rifle |
||
| − | * 50 Pellets |
||
| − | | |
||
| − | {| class="article-table" |
||
| − | |[[File:Bullets.png|centre|thumb|80x80px]] |
||
| − | |[[File:Marksman Rifle.png|centre|thumb|80x80px]] |
||
| − | |[[File:Pellets.png|centre|thumb|80x80px]] |
||
| − | |} |
||
| − | |- |
||
| − | |[[Ring Equipment]] |
||
| − | | |
||
| − | * [[Mud Ring]] |
||
| − | | |
||
| − | {| class="article-table" |
||
| − | |[[File:Mud Ring.png|thumb|80x80px|centre]] |
||
| − | |} |
||
| − | |} |
||
=== Grand Treasure Chest Rewards === |
=== Grand Treasure Chest Rewards === |
||
| − | + | <div class="grid-table"> |
|
| + | {{GridItem|Checklist item id = |Quantity text = | Article name =Advanced Rapier|Image=Advanced Rapier.png}} |
||
| − | !Category |
||
| + | {{GridItem|Checklist item id = |Quantity text = | Article name =Angel Greatsword|Image=Angel Greatsword.png}} |
||
| − | !List of Item(s) |
||
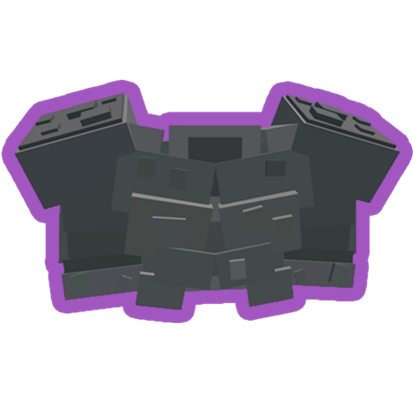
| + | {{GridItem|Checklist item id = |Quantity text = | Article name =Aquatic Explorer Set#Helmet|Image=Aquatic Explorer Helmet Large.png}} |
||
| − | !Preview(s) |
||
| + | {{GridItem|Checklist item id = |Quantity text = | Article name =Aquatic Explorer Set#Armor|Image=Aquatic Explorer Armor Large.png}} |
||
| − | |- |
||
| + | {{GridItem|Checklist item id = |Quantity text = | Article name =Aquatic Explorer Set#Platelegs|Image=Aquatic Explorer Platelegs Large.png}} |
||
| − | |[[Armor]] |
||
| + | {{GridItem|Checklist item id = |Quantity text = | Article name =Big Orange Eyes|Image=Big Orange Eyes.png}} |
||
| − | | |
||
| + | {{GridItem|Checklist item id = |Quantity text = | Article name =Black Supershoes|Image=BlackSupershoes.png}} |
||
| − | * Aquatic Explorer Set |
||
| + | {{GridItem|Checklist item id = |Quantity text = | Article name =Blade of the Throne|Image=Blade of the Throne.png}} |
||
| − | * Black Supershoes |
||
| + | {{GridItem|Checklist item id = |Quantity text = | Article name =Bonefish|Image=Bonefish.png}} |
||
| − | * Brickland |
||
| + | {{GridItem|Checklist item id = |Quantity text = | Article name =Brickland|Image=Brickland.png}} |
||
| − | * [[Celestial Moon Set]] |
||
| + | {{GridItem|Checklist item id = |Quantity text = | Article name =Celestial Moon Set#Hat|Image=CelestialMoonHat.png}} |
||
| − | * Crabsuit Set |
||
| + | {{GridItem|Checklist item id = |Quantity text = | Article name =Celestial Moon Set#Top|Image=CelestialMoonTop.png}} |
||
| − | * Crescent Coralhead |
||
| + | {{GridItem|Checklist item id = |Quantity text = | Article name =Celestial Moon Set#Robe Bottom|Image=CelestialMoonRobeBottom.png}} |
||
| − | * [[Dark Hunter Set]] |
||
| + | {{GridItem|Checklist item id = |Quantity text = | Article name =Crabsuit Set#Headgear|Image=Crabsuit Headgear Large.png}} |
||
| − | * Detour Cone |
||
| + | {{GridItem|Checklist item id = |Quantity text = | Article name =Crabsuit Set#Top|Image=Crabsuit Top Large.png}} |
||
| − | * Far North Mask |
||
| + | {{GridItem|Checklist item id = |Quantity text = | Article name =Crabsuit Set#Legs|Image=Crabsuit Legs Large.png}} |
||
| − | * Forgotten Life Set |
||
| + | {{GridItem|Checklist item id = |Quantity text = | Article name =Crescent Coralhead|Image=Crescent Coralhead.png}} |
||
| − | * [[Furnace Mummy Set|Furnace Mummy]] |
||
| + | {{GridItem|Checklist item id = |Quantity text = | Article name =Crypt Blade|Image=Crypt Blade.png}} |
||
| − | * [[Galaxy Wizard Set]] |
||
| + | {{GridItem|Checklist item id = |Quantity text = | Article name =Dark Hunter Set#Hat|Image=DarkHunterHat.png}} |
||
| − | * Gardendweller Set |
||
| + | {{GridItem|Checklist item id = |Quantity text = | Article name =Dark Hunter Set#Top|Image=DarkHunterTop.png}} |
||
| − | * Gauntlet Fury Set |
||
| + | {{GridItem|Checklist item id = |Quantity text = | Article name =Dark hunter Set#Legs|Image=DarkHunterLegs.png}} |
||
| − | * Grey Supershoes |
||
| + | {{GridItem|Checklist item id = |Quantity text = | Article name =Darktoad Spellbook|Image=DarktoadSpellbook.png}} |
||
| − | * Guild Knight Set |
||
| + | {{GridItem|Checklist item id = |Quantity text = | Article name =Demon Greatsword|Image=Demon Greatsword.png}} |
||
| − | * Knight's Army Set |
||
| + | {{GridItem|Checklist item id = |Quantity text = | Article name =Detour Cone|Image=Detour Cone.png}} |
||
| − | * Krunkston Four |
||
| + | {{GridItem|Checklist item id = |Quantity text = | Article name =Dragon King's Lance|Image=Dragon King's Lance.png}} |
||
| − | * [[Lagoon Spirit Set]] |
||
| + | {{GridItem|Checklist item id = |Quantity text = | Article name =Dreamnet|Image=Dreamnet.png}} |
||
| − | * [[Minion]] |
||
| + | {{GridItem|Checklist item id = |Quantity text = | Article name =Esteemed Heirloom|Image=Esteemed Heirloom.png}} |
||
| − | * Outlaw's Cap |
||
| + | {{GridItem|Checklist item id = |Quantity text = | Article name =Eyes of the Sword|Image=Eyes of the Sword.png}} |
||
| − | * [[Poison Construct Set]] |
||
| + | {{GridItem|Checklist item id = |Quantity text = | Article name =Far North Mask|Image=Far North Mask.png}} |
||
| − | * [[Razed General Set]] |
||
| + | {{GridItem|Checklist item id = |Quantity text = | Article name =Firesoul Spellbook|Image=FiresoulSpellbook.png}} |
||
| − | * [[Red Wizard Set]] |
||
| + | {{GridItem|Checklist item id = |Quantity text = | Article name =Floor 20 Skip Ticket|Image=Floor 20 Skip Ticket.png}} |
||
| − | * Spellbound Mage Set |
||
| + | {{GridItem|Checklist item id = |Quantity text = | Article name =Floor 40 Skip Ticket|Image=Floor 40 Skip Ticket.png}} |
||
| − | * [[Spikeout Set]] |
||
| + | {{GridItem|Checklist item id = |Quantity text = | Article name =Forgotten Life Set#Skater Helm|Image=Helm of the Skater Large.png}} |
||
| − | * [[Springtwig Set]] |
||
| + | {{GridItem|Checklist item id = |Quantity text = | Article name =Forgotten Life Set#Platebody|Image=Platebody of a Forgotten Life Large.png}} |
||
| − | * The Earth King Regalia Set |
||
| + | {{GridItem|Checklist item id = |Quantity text = | Article name =Forgotten Life Set#Platelegs|Image=Platelegs of a Forgotten Life Large.png}} |
||
| − | * [[Tomb Prowler Set]] |
||
| + | {{GridItem|Checklist item id = |Quantity text = | Article name =Frontier Greatsword|Image=Frontier Greatsword.png}} |
||
| − | * Tower Armor Set (Excluding The Pommel's Helmet) |
||
| + | {{GridItem|Checklist item id = |Quantity text = | Article name =Frontier Stargun|Image=Frontier Stargun.png}} |
||
| − | * [[Void Monster Set]] |
||
| + | {{GridItem|Checklist item id = |Quantity text = | Article name =Funky Driftlander|Image=Funky Driftlander.png}} |
||
| − | * [[Von Jerry's Hat of Illusion]] |
||
| + | {{GridItem|Checklist item id = |Quantity text = | Article name =Furnace Mummy Set#Helmet|Image=FurnaceMummyHelmet.png}} |
||
| − | * Wolfram Leader Set |
||
| + | {{GridItem|Checklist item id = |Quantity text = | Article name =Furnace Mummer Set#Platebody|Image=FurnaceMummyPlatebody.png}} |
||
| − | * Woodwhack Legionnaire Set |
||
| + | {{GridItem|Checklist item id = |Quantity text = | Article name =Furnace Mummy Set#Platelegs|Image=FurnaceMummyPlatelegs.png}} |
||
| − | * World Sculptor Set |
||
| + | {{GridItem|Checklist item id = |Quantity text = | Article name =Galaxy Wizard Set#Hat|Image=GalaxyWizardHat.png}} |
||
| − | * Yaaxil Flame |
||
| + | {{GridItem|Checklist item id = |Quantity text = | Article name =Galaxy Wizard Set#Top|Image=GalaxyWizardTorso.png}} |
||
| − | * [[Zhuulaczar Set]] |
||
| + | {{GridItem|Checklist item id = |Quantity text = | Article name =Galaxy Wizard Set#Bottom|Image=GalaxyWizardLegs.png}} |
||
| − | | |
||
| + | {{GridItem|Checklist item id = |Quantity text = | Article name =Gardendweller Set#Hat|Image=Gardendweller Hat Large.png}} |
||
| − | {| class="article-table" |
||
| + | {{GridItem|Checklist item id = |Quantity text = | Article name =Gardendweller Set#Top|Image=Gardendweller Top Large.png}} |
||
| − | |[[File:Aquatic Explorer Helmet.png|centre|thumb|80x80px]] |
||
| + | {{GridItem|Checklist item id = |Quantity text = | Article name =Gardendweller Set#Pants|Image=Gardendweller Pants Large.png}} |
||
| − | |[[File:Aquatic Explorer Armor.png|centre|thumb|80x80px]] |
||
| + | {{GridItem|Checklist item id = |Quantity text = | Article name =Gauntlet Fury Set#Helmet|Image=Gauntlet Fury Helmet Large.png}} |
||
| − | |[[File:Aquatic Explorer Platelegs.png|centre|thumb|80x80px]] |
||
| + | {{GridItem|Checklist item id = |Quantity text = | Article name =Gauntlet Fury Set#Platebody|Image=Gauntlet Fury Platebody Large.png}} |
||
| − | |- |
||
| + | {{GridItem|Checklist item id = |Quantity text = | Article name =Gauntlet Fury Set#Platelegs|Image=Gauntlet Fury Platelegs Large.png}} |
||
| − | |[[File:BlackSupershoes.png|centre|thumb|80x80px]] |
||
| + | {{GridItem|Checklist item id = |Quantity text = | Article name =Genie's Rings|Image=Genie Rings.png}} |
||
| − | |[[File:Brickland.png|centre|thumb|80x80px]] |
||
| + | {{GridItem|Checklist item id = |Quantity text = | Article name =Giant's Bone|Image=GiantsBone.png}} |
||
| − | | |
||
| + | {{GridItem|Checklist item id = |Quantity text = | Article name =Grass Rapier|Image=Grass Rapier.png}} |
||
| − | |- |
||
| + | {{GridItem|Checklist item id = |Quantity text = 5-100| Article name =Greater Dungeon Candy|Image=Greater Dungeon Candy.png}} |
||
| − | |[[File:CelestialMoonHat.png|centre|thumb|80x80px]] |
||
| + | {{GridItem|Checklist item id = |Quantity text = | Article name =Greater Storms Spellbook|Image=StormsSpellbook.png}} |
||
| − | |[[File:CelestialMoonTop.png|centre|thumb|80x80px]] |
||
| + | {{GridItem|Checklist item id = |Quantity text = | Article name =Grey Supershoes|Image=GreySupershoes.png}} |
||
| − | |[[File:CelestialMoonRobeBottom.png|centre|thumb|80x80px]] |
||
| + | {{GridItem|Checklist item id = |Quantity text = | Article name =Guild Knight Set#Helmet|Image=Guild Knight Helmet Large.png}} |
||
| − | |- |
||
| + | {{GridItem|Checklist item id = |Quantity text = | Article name =Guild Knight Set#Platebody|Image=Guild Knight Platebody Large.png}} |
||
| − | |[[File:Crabsuit Headgear.png|centre|thumb|80x80px]] |
||
| + | {{GridItem|Checklist item id = |Quantity text = | Article name =Guild Knight Set#Platelegs|Image=Guild Knight Platelegs Large.png}} |
||
| − | |[[File:Crabsuit Top.png|centre|thumb|80x80px]] |
||
| + | {{GridItem|Checklist item id = |Quantity text = | Article name =Hunting Rifle|Image=Hunter Rifle.png}} |
||
| − | |[[File:Crabsuit Legs.png|centre|thumb|80x80px]] |
||
| + | {{GridItem|Checklist item id = |Quantity text = | Article name =Keemal Feather|Image=Keemal Feather.png}} |
||
| − | |- |
||
| + | {{GridItem|Checklist item id = |Quantity text = | Article name =Knight's Army Set#Core|Image=Knight's Army Core Large.png}} |
||
| − | |[[File:Crescent Coralhead.png|centre|thumb|80x80px]] |
||
| + | {{GridItem|Checklist item id = |Quantity text = | Article name =Knight's Army Set#Platebody|Image=Knight's Army Platebody Large.png}} |
||
| − | | |
||
| + | {{GridItem|Checklist item id = |Quantity text = | Article name =Knight's Army Set#Platelegs|Image=Knight's Army Platelegs Large.png}} |
||
| − | | |
||
| + | {{GridItem|Checklist item id = |Quantity text = | Article name =Kotono|Image=Kotono.png}} |
||
| − | |- |
||
| + | {{GridItem|Checklist item id = |Quantity text = | Article name =Krunkston Four|Image=Krunkston Four.png}} |
||
| − | |[[File:DarkHunterHat.png|centre|thumb|80x80px]] |
||
| + | {{GridItem|Checklist item id = |Quantity text = | Article name =Lagoon Spirit Set#Head|Image=LagoonSpiritHead.png}} |
||
| − | |[[File:DarkHunterTop.png|centre|thumb|80x80px]] |
||
| + | {{GridItem|Checklist item id = |Quantity text = | Article name =Lagoon Spirit Set#Torso|Image=LagoonSpiritTorso.png}} |
||
| − | |[[File:DarkHunterLegs.png|centre|thumb|80x80px]] |
||
| + | {{GridItem|Checklist item id = |Quantity text = | Article name =Lagoon Spirit Set#Legs|Image=LagoonSpiritLegs.png}} |
||
| − | |- |
||
| + | {{GridItem|Checklist item id = |Quantity text = 25-100| Article name =Lesser Dungeon Candy|Image=Lesser Dungeon Candy.png}} |
||
| − | |[[File:Detour Cone.png|centre|thumb|80x80px]] |
||
| + | {{GridItem|Checklist item id = |Quantity text = | Article name =Minion|Image=Minion.png}} |
||
| − | |[[File:Far North Mask.png|centre|thumb|80x80px]] |
||
| + | {{GridItem|Checklist item id = |Quantity text = | Article name =Moneybird Feather|Image=Moneybird Feather.png}} |
||
| − | | |
||
| + | {{GridItem|Checklist item id = |Quantity text = | Article name =Mud Ring|Image=Mud Ring.png}} |
||
| − | |- |
||
| + | {{GridItem|Checklist item id = |Quantity text = | Article name =Nightmare Clock|Image=Nightmare Clock.png}} |
||
| − | |[[File:Helm of the Skater.png|centre|thumb|80x80px]] |
||
| + | {{GridItem|Checklist item id = |Quantity text = | Article name =Odd Cape|Image=Odd Cape.png}} |
||
| − | |[[File:Platebody Of a Forgotten Life.png|centre|thumb|80x80px]] |
||
| + | {{GridItem|Checklist item id = |Quantity text = | Article name =Ores|Image=Onyx Bar.png}} |
||
| − | |[[File:Platelegs Of a Forgotten Life.png|centre|thumb|80x80px]] |
||
| + | {{GridItem|Checklist item id = |Quantity text = | Article name =Onyx Greatsword|Image=Onyx Greatsword.png}} |
||
| − | |- |
||
| + | {{GridItem|Checklist item id = |Quantity text = | Article name =Outlaw's Cap|Image=Outlaw's Cap.png}} |
||
| − | |[[File:FurnaceMummyHelmet.png|centre|thumb|80x80px]] |
||
| + | {{GridItem|Checklist item id = |Quantity text = | Article name =Poison Construct Set#Helmet|Image=Poison Construct Helmet Large.png}} |
||
| − | |[[File:FurnaceMummyPlatebody.png|centre|thumb|80x80px]] |
||
| + | {{GridItem|Checklist item id = |Quantity text = | Article name =Poison Construct Set#Torso|Image=Poison Construct Torso Large.png}} |
||
| − | |[[File:FurnaceMummyPlatelegs.png|centre|thumb|80x80px]] |
||
| + | {{GridItem|Checklist item id = |Quantity text = | Article name =Poison Construct Set#Legs|Image=Poison Construct Legs Large.png}} |
||
| − | |- |
||
| + | {{GridItem|Checklist item id = |Quantity text = | Article name =Power Axe|Image=Power Axe.png}} |
||
| − | |[[File:GalaxyWizardHat.png|centre|thumb|80x80px]] |
||
| + | {{GridItem|Checklist item id = |Quantity text = | Article name =Ranger's Backpack|Image=Ranger's Backpack.png}} |
||
| − | |[[File:GalaxyWizardTorso.png|centre|thumb|80x80px]] |
||
| + | {{GridItem|Checklist item id = |Quantity text = | Article name =Razed General Set#Hat|Image=Razed General Hat.png}} |
||
| − | |[[File:GalaxyWizardLegs.png|centre|thumb|80x80px]] |
||
| + | {{GridItem|Checklist item id = |Quantity text = | Article name =Razed General Set#Torso|Image=Razed General Torso.png}} |
||
| − | |- |
||
| + | {{GridItem|Checklist item id = |Quantity text = | Article name =Razed General Set#Legs|Image=Razed General Legs.png}} |
||
| − | |[[File:Gardendweller's Hat.png|centre|thumb|80x80px]] |
||
| + | {{GridItem|Checklist item id = |Quantity text = | Article name =Red Wizard Set#Hat|Image=RedWizardHat.png}} |
||
| − | |[[File:Gardendweller's Top.png|centre|thumb|80x80px]] |
||
| + | {{GridItem|Checklist item id = |Quantity text = | Article name =Red Wizard Set#Top|Image=RedWizardRobeTop.png}} |
||
| − | |[[File:Gardendweller's Pants.png|centre|thumb|80x80px]] |
||
| + | {{GridItem|Checklist item id = |Quantity text = | Article name =Red Wizard Set#Bottom|Image=RedWizardRobeBottom.png}} |
||
| − | |- |
||
| + | {{GridItem|Checklist item id = |Quantity text = | Article name =Ring of the Five Knights|Image=Ring of the Five Knights.png}} |
||
| − | |[[File:Gauntlet Fury Helmet.png|centre|thumb|80x80px]] |
||
| + | {{GridItem|Checklist item id = |Quantity text = | Article name =Rusted Coin Scythe|Image=Rusted Coin Scythe.png}} |
||
| − | |[[File:Gauntlet Fury Platebody.png|centre|thumb|80x80px]] |
||
| + | {{GridItem|Checklist item id = |Quantity text = | Article name =Spellbound Mage Set#Hood|Image=Spellbound Mage Hood Large.png}} |
||
| − | |[[File:Gauntlet Fury Platelegs.png|centre|thumb|80x80px]] |
||
| + | {{GridItem|Checklist item id = |Quantity text = | Article name =Spellbound Mage Set#Battledress|Image=Spellbound Mage Battledress Large.png}} |
||
| − | |- |
||
| + | {{GridItem|Checklist item id = |Quantity text = | Article name =Spellbound Mage Set#Battleskirt|Image=Spellbound Mage Battleskirt Large.png}} |
||
| − | |[[File:GreySupershoes.png|thumb|80x80px|centre|link=http://fantastic-frontier-roblox.wikia.com/wiki/File:GreySupershoes.png]] |
||
| + | {{GridItem|Checklist item id = |Quantity text = | Article name =Spikeout Set#Helmet|Image=SpikeoutHelmet.png}} |
||
| − | | |
||
| + | {{GridItem|Checklist item id = |Quantity text = | Article name =Spikeout Set#Chestpiece|Image=SpikeoutChestpiece.png}} |
||
| − | | |
||
| + | {{GridItem|Checklist item id = |Quantity text = | Article name =Spikeout Set#Legs|Image=SpikeoutLegs.png}} |
||
| − | |- |
||
| + | {{GridItem|Checklist item id = |Quantity text = | Article name =Spinner Rattle|Image=Spinner Rattle.png}} |
||
| − | |[[File:Guild Knight Helmet.png|centre|thumb|80x80px]] |
||
| + | {{GridItem|Checklist item id = |Quantity text = | Article name =Springtwig Set#Eye|Image=Springtwig Eye.png}} |
||
| − | |[[File:Guild Knight Platebody.png|centre|thumb|80x80px]] |
||
| + | {{GridItem|Checklist item id = |Quantity text = | Article name =Springtwig Set#Torso|Image=Springtwig Torso.png}} |
||
| − | |[[File:Guild Knight Platelegs.png|centre|thumb|80x80px]] |
||
| + | {{GridItem|Checklist item id = |Quantity text = | Article name =Springtwig Set#Legs|Image=Springtwig Legs.png}} |
||
| − | |- |
||
| + | {{GridItem|Checklist item id = |Quantity text = | Article name =Strange Creature Ring|Image=Strange Creature Ring.png}} |
||
| − | |[[File:Knight Army's Core.png|centre|thumb|80x80px]] |
||
| + | {{GridItem|Checklist item id = |Quantity text = | Article name =The Earth King Regalia Set#Crown|Image=The Earth King Regalia Large.png}} |
||
| − | |[[File:Knight Army's Platebody.png|centre|thumb|80x80px]] |
||
| + | {{GridItem|Checklist item id = |Quantity text = | Article name =The Earth King Regalia Set#Platebody|Image=The Earth King Regalia Platebody Large.png}} |
||
| − | |[[File:Knight Army's Platelegs.png|centre|thumb|80x80px]] |
||
| + | {{GridItem|Checklist item id = |Quantity text = | Article name =The Earth King Regalia Set#Platelegs|Image=The Earth King Regalia Platelegs Large.png}} |
||
| − | |- |
||
| + | {{GridItem|Checklist item id = |Quantity text = | Article name =The Shirt with the Big Pocket|Image=The Shirt with the Big Pocket.png}} |
||
| − | |[[File:Krunkston Four.png|centre|thumb|80x80px]] |
||
| + | {{GridItem|Checklist item id = |Quantity text = | Article name =The Vengeful Visage Set#Visage|Image=The Vengeful Visage Large.png}} |
||
| − | | |
||
| + | {{GridItem|Checklist item id = |Quantity text = | Article name =The Vengeful Visage Set#Top|Image=The Vengeful Visage Top Large.png}} |
||
| − | | |
||
| + | {{GridItem|Checklist item id = |Quantity text = | Article name =The Vengeful Visage Set#Bottoms|Image=The Vengeful Visage Bottoms Large.png}} |
||
| − | |- |
||
| + | {{GridItem|Checklist item id = |Quantity text = | Article name =Thinker's Box|Image=Thinker's Box.png}} |
||
| − | |[[File:LagoonSpiritHead.png|centre|thumb|80x80px]] |
||
| + | {{GridItem|Checklist item id = |Quantity text = | Article name =Tomb Prowler Set#Hat|Image=TombProwlerHat.png}} |
||
| − | |[[File:LagoonSpiritTorso.png|centre|thumb|80x80px]] |
||
| + | {{GridItem|Checklist item id = |Quantity text = | Article name =Tomb Prowler Set#Torso|Image=TombProwlerTorso.png}} |
||
| − | |[[File:LagoonSpiritLegs.png|centre|thumb|80x80px]] |
||
| + | {{GridItem|Checklist item id = |Quantity text = | Article name =Tomb Prowler Set#Legs|Image=TombProwlerLegs.png}} |
||
| − | |- |
||
| + | {{GridItem|Checklist item id = |Quantity text = | Article name =Tower Armor Platebody|Image=Tower Armor Platebody Large.png}} |
||
| − | |[[File:Minion.png|centre|thumb|80x80px]] |
||
| + | {{GridItem|Checklist item id = |Quantity text = | Article name =Tower Armor Platelegs|Image=Tower Armor Platelegs.png}} |
||
| − | |[[File:Outlaw's Cap.png|centre|thumb|80x80px]] |
||
| + | {{GridItem|Checklist item id = |Quantity text = | Article name =Traveler Plant|Image=TravelerPlant-0.png}} |
||
| − | | |
||
| + | {{GridItem|Checklist item id = |Quantity text = | Article name =Traveling Human Element|Image=Traveling Human Element.png}} |
||
| − | |- |
||
| + | {{GridItem|Checklist item id = |Quantity text = | Article name =Tri-Color Necklace|Image=Tri-Color Necklace.png}} |
||
| − | |[[File:Poison Construct Helmet.png|centre|thumb|80x80px]] |
||
| + | {{GridItem|Checklist item id = |Quantity text = | Article name =Ultrablade|Image=Ultrablade.png}} |
||
| − | |[[File:Poison Construct Torso.png|centre|thumb|80x80px]] |
||
| + | {{GridItem|Checklist item id = |Quantity text = | Article name =Void Monster Set#Mask|Image=VoidMonsterMask.png}} |
||
| − | |[[File:PoisonConstructLegs.png|centre|thumb|80x80px]] |
||
| + | {{GridItem|Checklist item id = |Quantity text = | Article name =Void Monster Set#Torso|Image=VoidMonsterTorso.png}} |
||
| − | |- |
||
| + | {{GridItem|Checklist item id = |Quantity text = | Article name =Void Monster Set#Legs|Image=VoidMonsterLegs.png}} |
||
| − | |[[File:Razed General Hat.png|centre|thumb|80x80px]] |
||
| + | {{GridItem|Checklist item id = |Quantity text = | Article name =Von Jerry's Hat of Illusion|Image=Von Jerry's Hat of Illusion.png}} |
||
| − | |[[File:Razed General Torso.png|centre|thumb|80x80px]] |
||
| + | {{GridItem|Checklist item id = |Quantity text = | Article name =Wolfram Leader Set#Helmet|Image=Wolfram Leader Helmet Large.png}} |
||
| − | |[[File:Razed General Legs.png|centre|thumb|80x80px]] |
||
| + | {{GridItem|Checklist item id = |Quantity text = | Article name =Wolfram Leader Set#Platebody|Image=Wolfram Leader Platebody Large.png}} |
||
| − | |- |
||
| + | {{GridItem|Checklist item id = |Quantity text = | Article name =Wolfram Leader Set#Platelegs|Image=Wolfram Leader Platelegs Large.png}} |
||
| − | |[[File:RedWizardHat.png|centre|thumb|80x80px]] |
||
| + | {{GridItem|Checklist item id = |Quantity text = | Article name =Woodwhack Legionnaire Set#Helmet|Image=Woodwhack Legionnaire Headpiece Large.png}} |
||
| − | |[[File:RedWizardRobeTop.png|centre|thumb|80x80px]] |
||
| + | {{GridItem|Checklist item id = |Quantity text = | Article name =Woodwhack Legionnaire Set#Chestpiece|Image=Woodwhack Legionnaire Chestpiece Large.png}} |
||
| − | |[[File:RedWizardRobeBottom.png|centre|thumb|80x80px]] |
||
| + | {{GridItem|Checklist item id = |Quantity text = | Article name =Woodwhack Legionnaire Set#Shorts|Image=Wooden Shorts Large.png}} |
||
| − | |- |
||
| + | {{GridItem|Checklist item id = |Quantity text = | Article name =World Sculptor Set#Helmet|Image=World Sculptor Helmet Large.png}} |
||
| − | |[[File:SpikeoutHelmet.png|centre|thumb|80x80px]] |
||
| + | {{GridItem|Checklist item id = |Quantity text = | Article name =World Sculptor Set#Armor|Image=World Sculptor Armor Large.png}} |
||
| − | |[[File:SpikeoutChestpiece.png|centre|thumb|80x80px]] |
||
| + | {{GridItem|Checklist item id = |Quantity text = | Article name =World Sculptor Set#Platelegs|Image=World Sculptor Platelegs Large.png}} |
||
| − | |[[File:SpikeoutLegs.png|centre|thumb|80x80px]] |
||
| + | {{GridItem|Checklist item id = |Quantity text = | Article name =Yaaxil Flame|Image=Yaaxil Flame.png}} |
||
| − | |- |
||
| + | {{GridItem|Checklist item id = |Quantity text = | Article name =Zhuulaczar Set#Crown|Image=Zhuu.png}} |
||
| − | |[[File:Spellbound Mage Hood.png|thumb|80x80px|centre]] |
||
| + | {{GridItem|Checklist item id = |Quantity text = | Article name =Zhuulaczar Set#Armored Body|Image=ZhuuTorso.png}} |
||
| − | |[[File:Spellbound Mage Battledress.png|thumb|80x80px|centre]] |
||
| + | {{GridItem|Checklist item id = |Quantity text = | Article name =Zhuulaczar Set#Legs|Image=ZhuuLegs.png}} |
||
| − | |[[File:Spellbound Mage Battleskirt.png|thumb|80x80px|centre]] |
||
| + | </div> |
||
| − | |- |
||
| − | |[[File:Springtwig Eye.png|centre|thume|80x80px]] |
||
| − | |[[File:Springtwig Torso.png|centre|thume|80x80px]] |
||
| − | |[[File:Springtwig Legs.png|centre|thume|80x80px]] |
||
| − | |- |
||
| − | |[[File:The Earth King Regalia.png|centre|thumb|80x80px]] |
||
| − | |[[File:Platebody of the Earth King Regalia.png|centre|thumb|80x80px]] |
||
| − | |[[File:Platelegs of the Earth King Regalia.png|centre|thumb|80x80px]] |
||
| − | |- |
||
| − | |[[File:TombProwlerHat.png|thumb|80x80px|centre]] |
||
| − | |[[File:TombProwlerTorso.png|thumb|80x80px|centre]] |
||
| − | |[[File:TombProwlerLegs.png|thumb|80x80px|centre]] |
||
| − | |- |
||
| − | |[[File:Tower Armor Platebody.png|thumb|80x80px|centre]] |
||
| − | |[[File:Tower Armor Platelegs.png|thumb|80x90px|centre]] |
||
| − | | |
||
| − | |- |
||
| − | |[[File:VoidMonsterMask.png|centre|thumb|80x80px]] |
||
| − | |[[File:VoidMonsterTorso.png|centre|thumb|80x80px]] |
||
| − | |[[File:VoidMonsterLegs.png|centre|thumb|80x80px]] |
||
| − | |- |
||
| − | |[[File:Von Jerry's Hat of Illusion.png|centre|thumb|80x80px]] |
||
| − | | |
||
| − | | |
||
| − | |- |
||
| − | |[[File:Wolfram Leader Helmet.png|centre|thumb|80x80px]] |
||
| − | |[[File:Wolfram Leader Platebody.png|centre|thumb|80x80px]] |
||
| − | |[[File:Wolfram Leader Platelegs.png|centre|thumb|80x80px]] |
||
| − | |- |
||
| − | |[[File:Woodwhack Legionnaire Headpiece.png|centre|thumb|80x80px]] |
||
| − | |[[File:Woodwhack Legionnaire Chestpiece.png|centre|thumb|80x80px]] |
||
| − | |[[File:Wooden Shorts.png|centre|thumb|80x80px]] |
||
| − | |- |
||
| − | |[[File:World Sculptor's Helmet.png|centre|thumb|80x80px]] |
||
| − | |[[File:World Sculptor's Armor.png|centre|thumb|80x80px]] |
||
| − | |[[File:World Sculptor's Platelegs.png|centre|thumb|80x80px]] |
||
| − | |- |
||
| − | |[[File:Yaaxil Flame.png|centre|thumb|80x80px]] |
||
| − | | |
||
| − | | |
||
| − | |- |
||
| − | |[[File:Zhuu.png|thumb|80x80px|centre|link=http://fantastic-frontier-roblox.wikia.com/wiki/File:Zhuu.png]] |
||
| − | |[[File:ZhuuTorso.png|thumb|80x80px|centre|link=http://fantastic-frontier-roblox.wikia.com/wiki/File:ZhuuTorso.png]] |
||
| − | |[[File:ZhuuLegs.png|thumb|80x80px|centre|link=http://fantastic-frontier-roblox.wikia.com/wiki/File:ZhuuLegs.png]] |
||
| − | |} |
||
| − | |- |
||
| − | |[[Back Equipment]] |
||
| − | | |
||
| − | * [[Dreamnet]] |
||
| − | * Eyes of the Sword |
||
| − | * Odd Cape |
||
| − | * Ranger's Backpack |
||
| − | | |
||
| − | {| class="article-table" |
||
| − | |[[File:Dreamnet.png|centre|thumb|80x80px]] |
||
| − | |[[File:Eyes of the Sword.png|centre|thumb|80x80px]] |
||
| − | |[[File:Odd Cape.png|centre|thumb|80x80px]] |
||
| − | |- |
||
| − | |[[File:Ranger's Backpack.png|centre|thumb|80x80px]] |
||
| − | | |
||
| − | | |
||
| − | |} |
||
| − | |- |
||
| − | |[[Clothing]] |
||
| − | | |
||
| − | * The Shirt with the Big Pocket |
||
| − | | |
||
| − | {| class="article-table" |
||
| − | |[[File:The Shirt with the Big Pocket.png|centre|thumb|80x80px]] |
||
| − | |} |
||
| − | |- |
||
| − | |[[Consumables]] |
||
| − | | |
||
| − | * 5-100 Greater Dungeon Candies |
||
| − | * 25-100 Lesser Dungeon Candies |
||
| − | | |
||
| − | {| class="article-table" |
||
| − | |[[File:Greater Dungeon Candy.png|centre|thumb|80x80px]] |
||
| − | |[[File:Lesser Dungeon Candy.png|thumb|80x80px|centre]] |
||
| − | |} |
||
| − | |- |
||
| − | |[[Feathers]] |
||
| − | | |
||
| − | * Keemal Feather |
||
| − | * Moneybird Feather |
||
| − | | |
||
| − | {| class="article-table" |
||
| − | |[[File:Moneybird Feather.png|centre|thumb|80x80px]] |
||
| − | |[[File:Keemal Feather.png|centre|thumb|80x80px]] |
||
| − | |} |
||
| − | |- |
||
| − | |[[Harvestables|Harvestable]] |
||
| − | | |
||
| − | * [[Traveler Plant]] |
||
| − | | |
||
| − | {| class="article-table" |
||
| − | |[[File:TravelerPlant-0.png|centre|thumb|80x80px]] |
||
| − | |} |
||
| − | |- |
||
| − | |[[Magic Weapons]] |
||
| − | | |
||
| − | * [[Darktoad Spellbook]] |
||
| − | * [[Firesoul Spellbook]] |
||
| − | | |
||
| − | {| class="article-table" |
||
| − | |[[File:DarktoadSpellbook.png|centre|thumb|80x80px]] |
||
| − | |[[File:FiresoulSpellbook.png|centre|thumb|80x80px]] |
||
| − | |} |
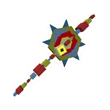
||
| − | |- |
||
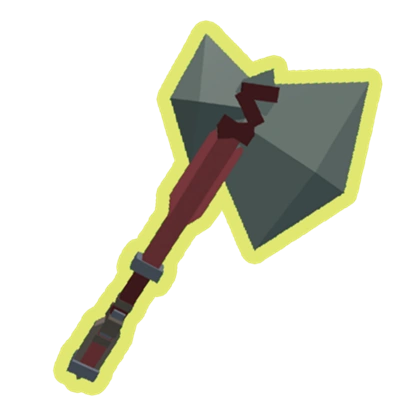
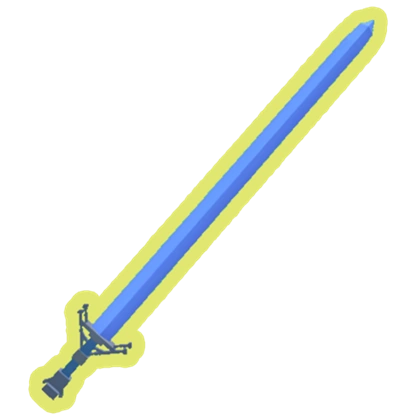
| − | |[[Melee Weapons]] |
||
| − | | |
||
| − | * Advanced Rapier |
||
| − | * [[Angel Greatsword]] |
||
| − | * [[Blade of the Throne]] |
||
| − | * Crypt Blade |
||
| − | * [[Demon Greatsword]] |
||
| − | * Grass Rapier |
||
| − | * [[Kotono]] |
||
| − | * Onyx Greatsword |
||
| − | * Power Axe |
||
| − | * [[Rusted Coin Scythe]] |
||
| − | |||
| − | * Ultrablade |
||
| − | | |
||
| − | {| class="article-table" |
||
| − | |[[File:Advanced Rapier.png|centre|thumb|80x80px]] |
||
| − | |[[File:Angel Greatsword.png|centre|thumb|80x80px]] |
||
| − | |[[File:Blade of the Throne.png|centre|thumb|80x80px]] |
||
| − | |- |
||
| − | |[[File:Crypt Blade.png|centre|thumb|80x80px]] |
||
| − | |[[File:Demon Greatsword.png|centre|thumb|80x80px]] |
||
| − | |[[File:Grass Rapier.png|centre|thumb|80x80px]] |
||
| − | |- |
||
| − | |[[File:Kotono.png|centre|thumb|80x80px]] |
||
| − | |[[File:Onyx Greatsword.png|centre|thumb|80x80px]] |
||
| − | |[[File:Power Axe.png|centre|thumb|80x80px]] |
||
| − | |- |
||
| − | |[[File:Rusted Coin Scythe.png|centre|thumb|80x80px]] |
||
| − | |[[File:Ultrablade.png|centre|thumb|80x80px]] |
||
| − | | |
||
| − | |} |
||
| − | |- |
||
| − | |[[Misc Equipment]] |
||
| − | | |
||
| − | * Big Orange Eyes |
||
| − | | |
||
| − | {| class="article-table" |
||
| − | |[[File:Big Orange Eyes.png|centre|thumb|80x80px]] |
||
| − | |} |
||
| − | |- |
||
| − | |[[Miscellaneous items]] |
||
| − | | |
||
| − | * Floor 20 Skip Ticket |
||
| − | |||
| − | * Floor 40 Skip Ticket |
||
| − | | |
||
| − | {| class="article-table" |
||
| − | |[[File:Floor 20 Skip Ticket.png|thumb|80x80px|centre]] |
||
| − | |[[File:Floor 40 Skip Ticket.png|centre|thumb|80x80px]] |
||
| − | |} |
||
| − | |- |
||
| − | |[[Monster Drops]] |
||
| − | | |
||
| − | * [[Esteemed Heirloom]] |
||
| − | * Far North Mask |
||
| − | * Genie's Rings |
||
| − | * Giant's Bone |
||
| − | * Nightmare Clock |
||
| − | * Spinner Rattle |
||
| − | * Thinker's Box |
||
| − | * [[Traveling Human Element]] |
||
| − | | |
||
| − | {| class="article-table" |
||
| − | |[[File:Esteemed Heirloom.png|centre|thumb|80x80px]] |
||
| − | |[[File:Far North Mask.png|centre|thumb|80x80px]] |
||
| − | |[[File:Genie Rings.png|centre|thumb|80x80px]] |
||
| − | |- |
||
| − | |[[File:GiantsBone.png|centre|thumb|80x80px]] |
||
| − | |[[File:Nightmare Clock.png|centre|thumb|80x80px]] |
||
| − | |[[File:Spinner Rattle.png|centre|thumb|80x80px]] |
||
| − | |- |
||
| − | |[[File:Thinker's Box.png|centre|thumb|80x80px]] |
||
| − | |[[File:Traveling Human Element.png|centre|thumb|80x80px]] |
||
| − | | |
||
| − | |} |
||
| − | |- |
||
| − | |[[Neck Equipment]] |
||
| − | | |
||
| − | * [[Tri-Color Necklace]] |
||
| − | | |
||
| − | {| class="article-table" |
||
| − | |[[File:Tri-Color Necklace.png|centre|thumb|80x80px]] |
||
| − | |} |
||
| − | |- |
||
| − | |[[Ores]] |
||
| − | | |
||
| − | * Onyx Bar |
||
| − | | |
||
| − | {| class="article-table" |
||
| − | |[[File:Onyx Bar.png|centre|thumb|80x80px]] |
||
| − | |} |
||
| − | |- |
||
| − | |[[Rifle/Ranged Weapons]] |
||
| − | | |
||
| − | * [[Dragon King's Lance]] |
||
| − | * [[Funky Driftlander|<nowiki/>]][[Funky Driftlander]] |
||
| − | * Hunting Rifle |
||
| − | | |
||
| − | {| class="article-table" |
||
| − | |[[File:Dragon King's Lance.png|centre|thumb|80x80px]] |
||
| − | |[[File:Funky Driftlander.png|centre|thumb|80x80px]] |
||
| − | |[[File:Hunter Rifle.png|centre|thumb|80x80px]] |
||
| − | |} |
||
| − | |- |
||
| − | |[[Ring Equipment]] |
||
| − | | |
||
| − | * [[Mud Ring]] |
||
| − | |||
| − | * [[Strange Creature Ring]] |
||
| − | | |
||
| − | {| class="article-table" |
||
| − | |[[File:Mud Ring.png|centre|thumb|80x80px]] |
||
| − | |[[File:Strange Creature Ring.png|centre|thumb|80x80px]] |
||
| − | |} |
||
| − | |} |
||
===<nowiki/>Deep Sea Treasure Chest Rewards=== |
===<nowiki/>Deep Sea Treasure Chest Rewards=== |
||
| − | + | <div class="grid-table"> |
|
| + | {{GridItem|Checklist item id = |Quantity text = | Article name =Aquatic Explorer Set#Helmet|Image=Aquatic Explorer Helmet Large.png}} |
||
| − | !Category |
||
| + | {{GridItem|Checklist item id = |Quantity text = | Article name =Aquatic Explorer Set#Armor|Image=Aquatic Explorer Armor Large.png}} |
||
| − | !List of Item(s) |
||
| + | {{GridItem|Checklist item id = |Quantity text = | Article name =Aquatic Explorer Set#Platelegs|Image=Aquatic Explorer Platelegs Large.png}} |
||
| − | !Preview(s) |
||
| + | {{GridItem|Checklist item id = |Quantity text = | Article name =Captain's Fishing Rod|Image=Captain's Fishing Rod.png}} |
||
| − | |- |
||
| + | {{GridItem|Checklist item id = |Quantity text = | Article name =Collector's Cap|Image=Collector's Cap - Red.png}} |
||
| − | |[[Armor]] |
||
| + | {{GridItem|Checklist item id = |Quantity text = | Article name =Forgotten Life Set#Skater Helm|Image=Helm of the Skater Large.png}} |
||
| − | | |
||
| + | {{GridItem|Checklist item id = |Quantity text = | Article name =Forgotten Life Set#Platebody|Image=Platebody of a Forgotten Life Large.png}} |
||
| − | * [[Aquatic Explorer Set]] |
||
| + | {{GridItem|Checklist item id = |Quantity text = | Article name =Forgotten Life Set#Platelegs|Image=Platelegs of a Forgotten Life Large.png}} |
||
| − | * [[Forgotten Life Set]] |
||
| + | {{GridItem|Checklist item id = |Quantity text = | Article name =New Voice Set#Helmet|Image=New Voice Helmet Large.png}} |
||
| − | * [[New Voice Set]] |
||
| + | {{GridItem|Checklist item id = |Quantity text = | Article name =New Voice Set#Platebody|Image=New Voice Platebody Large.png}} |
||
| − | * Puzzlehead |
||
| + | {{GridItem|Checklist item id = |Quantity text = | Article name =New Voice Set#Platelegs|Image=New Voice Platelegs Large.png}} |
||
| − | * [[Romo Set]] |
||
| + | {{GridItem|Checklist item id = |Quantity text = | Article name =Puzzlehead|Image=Puzzlehead.png}} |
||
| − | * Tall Anthony |
||
| + | {{GridItem|Checklist item id = |Quantity text = | Article name =Rich Man's Cap|Image=UYC.png}} |
||
| − | |||
| + | {{GridItem|Checklist item id = |Quantity text = | Article name =Romo Set#Helmet|Image=Romo Helmet Large.png}} |
||
| − | * Wisecrack Set |
||
| + | {{GridItem|Checklist item id = |Quantity text = | Article name =Romo Set#Torso|Image=Romo Torso Large.png}} |
||
| − | | |
||
| + | {{GridItem|Checklist item id = |Quantity text = | Article name =Romo Set#Robo-Legs|Image=Romo Robo-Legs Large.png}} |
||
| − | {| class="article-table" |
||
| + | {{GridItem|Checklist item id = |Quantity text = | Article name =Tall Anthony|Image=Tall Anthony.png}} |
||
| − | |[[File:Aquatic Explorer Helmet.png|centre|thumb|80x80px]] |
||
| + | {{GridItem|Checklist item id = |Quantity text = | Article name =Wisecrack Set#Skull|Image=Wisecrack Skull Large.png}} |
||
| − | |[[File:Aquatic Explorer Armor.png|centre|thumb|80x80px]] |
||
| + | {{GridItem|Checklist item id = |Quantity text = | Article name =Wisecrack Set#Torso|Image=Wisecrack Torso Large.png}} |
||
| − | |[[File:Aquatic Explorer Platelegs.png|centre|thumb|80x80px]] |
||
| + | {{GridItem|Checklist item id = |Quantity text = | Article name =Wisecrack Set#Leggings|Image=Wisecrack Leggings Large.png}} |
||
| − | |- |
||
| + | </div> |
||
| − | |[[File:Helm of the Skater.png|centre|thumb|80x80px]] |
||
| + | [[Category:1.10 (Fishing) Update]] |
||
| − | |[[File:Platebody Of a Forgotten Life.png|centre|thumb|80x80px]] |
||
| + | [[Category:Lists and Guides]] |
||
| − | |[[File:Platelegs of a Forgotten Life Large.png|centre|thumb|80x80px]] |
||
| − | |- |
||
| − | |[[File:Puzzlehead.png|centre|thumb|80x80px]] |
||
| − | |- |
||
| − | |[[File:New Voice Helmet.png|centre|thumb|80x80px]] |
||
| − | |[[File:New Voice Platebody.png|centre|thumb|80x80px]] |
||
| − | |[[File:New Voice Platelegs.png|none|thumb|80x80px]] |
||
| − | |- |
||
| − | |[[File:Romo Helmet.png|centre|thumb|80x80px]] |
||
| − | |[[File:Romo Torso.png|centre|thumb|80x80px]] |
||
| − | |[[File:Romo Robo-Legs.png|centre|thumb|80x80px]] |
||
| − | |- |
||
| − | |[[File:Tall Anthony.png|centre|thumb|80x80px]] |
||
| − | | |
||
| − | | |
||
| − | |- |
||
| − | |[[File:Wisecrack Skull.png|centre|thumb|80x80px]] |
||
| − | |[[File:Wisecrack Torso.png|centre|thumb|80x80px]] |
||
| − | |[[File:Wisecrack Leggings.png|centre|thumb|80x80px]] |
||
| − | |} |
||
| − | |- |
||
| − | |[[Clothing]] |
||
| − | | |
||
| − | * Collector's Cap |
||
| − | |||
| − | * Rich Man's Cap |
||
| − | | |
||
| − | {| class="article-table" |
||
| − | |[[File:Collector's Cap - Red.png|centre|thumb|80x80px]] |
||
| − | |[[File:UYC.png|centre|thumb|80x80px]] |
||
| − | |} |
||
| − | |- |
||
| − | |[[Fishing Rods]] |
||
| − | | |
||
| − | * Captain's Fishing Rod |
||
| − | | |
||
| − | {| class="article-table" |
||
| − | |[[File:Captain's Fishing Rod.png|centre|thumb|80x80px]] |
||
| − | |} |
||
| − | |}[[Category:Lists and Guides]] |
||
Revision as of 23:32, 22 March 2020
Treasure Chests are chests that can be obtained in the Frontier via fishing in a body of water. Different treasure chests will reward players different tiered-rewards when opened in the player's inventory. These chests will give items based on the rarity of the treasure chest that the player has obtained. As of the 1.10 Update, there are 3 tiers of treasure chests that can be obtained in the Frontier. Treasure chests may be obtainable by purchasing it from vendors. The only currently known treasure chest that can be purchased is the Deep Sea Treasure Chest. It can be purchased from Linkman the Junkman or Vhitmire. Linkman the Junkman sells the chest at a cheaper price of 3,200,000 gold, while Vhitmire sells the chest at a price of 3,400,000 gold. Treasure Chests may also be obtained from certain mobs, such as the Plasma Ghost, or obtained from quests such as Giant Toad's Tasks.
Technical
Treasure Chests have a random chance of being fished up, with this probability varying depending on which location you choose to fish. Such locations and probabilities are:
- Rabbit Hole: 10%
- Coasts: 3-4%
- Elsewhere: 2%
When you fish up a chest, the type of chest you would get is also a random process, with the probabilities being:
| Type | % Chance |
| |
60% |
| |
35% |
| |
5% |
Treasure Chests
| Treasure Chest |
| |
| Grand Treasure Chest |
| |
| Deep Sea Treasure Chest |
|
List of Rewards
Each treasure chest will reward players with various rewards based off on the tier of the treasure chest. For example, all of the possible rewards of the Treasure Chest will be below the List of Rewards (Treasure Chest), all of the possible rewards of the Grand Treasure Chest will be below the List of Rewards (Grand Treasure Chest), and so forth. If you would like to see the reward chances for the Deep Sea Treasure Chest, please click this link --> https://pastebin.com/edEuETpw. Unfortunately, we do not have the Treasure Chest nor the Grand Treasure Chest's percentages, however, you may refer to the Otherworld Tower rewards' pastebin list as a reference.
Treasure Chest Rewards


Grand Treasure Chest Rewards


Deep Sea Treasure Chest Rewards