No edit summary Tag: Visual edit |
m (Reverted edits by NoobDoStuff (talk) to last version by Cliffblight) |
||
| Line 179: | Line 179: | ||
==== <u>Floor 48 - Izziworld III</u> ==== |
==== <u>Floor 48 - Izziworld III</u> ==== |
||
| − | An AU version of [[Wonald Izzi Jackson]] will appear here, shortened down to [[Wonald Izzi]]. |
+ | An AU version of [[Wonald Izzi Jackson]] will appear here, shortened down to [[Wonald Izzi]]. |
==== <u>Floor 49 - You've Made a Mistake</u> ==== |
==== <u>Floor 49 - You've Made a Mistake</u> ==== |
||
Revision as of 06:29, 26 May 2019
Summary
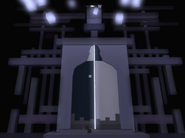
The Otherworld Tower is a dungeon instance that was introduced during the Otherworld Update, being comprised of 50 floors that the players can venture and progress through. The Otherworld Tower contains creatures that can naturally be found in the Frontier, as well as creatures that are not from the Frontier. The Otherworld Tower's entrance is located at The Grand Castle, a gate entrance that can be seen in The Town of Right and Wrong.
Information
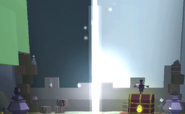
Warning William can be found next to the Otherworld Tower's gate entrance in The Town of Right and Wrong, acting as the 'guide' as to what the dungeon instance's about. Here is a list containing important and valuable information that the players should keep in mind while participating in the Otherworld Tower:
- There are 50 floors in total.
- The players can either do the dungeon instance on solo or play with others (maximum players being 4).
- The players have three lives. If all three lives are gone, the players will be kicked out of the dungeon and are unable to return back to their previous session.
- There is a boss that appears every five floors that the players manage to progress through.
- Players will reach a safe spot and earn loot after completing one set of five floors.
- The higher the floor, the better loot there is.
- Once the players are teleported to the Safe Zone, they have the option to leave the dungeon instance and keep the loot they possess or they could press their luck and continue to progress through the dungeon.
- If the players lose all three lives, the players will lose all of the loot they acquired so far, as well as any unprotected items in the players' inventories.
- Players who are poorly-equipped should not progress any further than Floor 12, although it is possible to surpass it without proper equipment.
Rewards
For every five floors a player beats, they will acquire one or more rewards. Players will be taken to a Safe Zone where they view their current loot via interacting with the Dungeon Rewards Chest, as well as having the option to leave the dungeon instance if the players want to keep their loot they have so far. Losing all three lives will result in the players losing all of their loots that they earned from the dungeon, as well as any unprotected items in their inventories. If the players acquired loot and have not died, they may collect the rewards outside of the Otherworld Tower (the purple treasure chest next to the entrance of the dungeon in The Town of Right and Wrong).
For more information about the Dungeon Rewards Chest and the rewards given to the players, click on this link provided next to this sentence: Dungeon Chest Rewards.

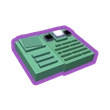
Floor 20 Skip Ticket
Skip Tickets

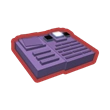
Floor 40 Skip Ticket
A skip ticket is an item used to skip certain floors within the Otherworld Tower. There are two variants of the skip tickets, the Floor 20 Skip Ticket and the Floor 40 Skip Ticket. In order for the skip ticket to work, the player must have it in their inventory upon entering the dungeon instance. From there, the players will have to interact with the portal in the initial spawn zone, which enables the skip ticket's effect. If the players used the Floor 20 Skip Ticket, they will be immediately taken to Floor 21. If the players used the Floor 40 Skip Ticket, they will be immediately taken to Floor 41. These skip tickets can be acquired from Linkman the Junkman and Strangeman.
- Floor 20 Skip Ticket - 50,000 gold (price)
- Floor 40 Skip Ticket - 150,000 gold (price)
Floors
Here is a list of all 50 floors, what mobs spawn in there, and any other additional information that players can use as an advantage while progressing through the dungeon instance.
For more information on how to progress through the dungeon instance with ease, please click the link next to this sentence: Dungeon Run Guide.
Floor 01 - The Way It Starts
The players will encounter an Ogre.
Floor 02 - Celery Dinner
A group of four Celleries will spawn on the platform. It is possible to acquire Cellery Antennaes upon killing them, serving as a small consumable that players can use to restore their health as they progress through the dungeon.
Floor 03 - Ratdog Rumble
A pack of three Rat Dogs will appear.
Floor 04 - Danger World
Two Dangerbats will appear. The floor is a small platform, limiting the space that the players can move around in. On occasions, it is possible to acquire Apples from the Dangerbats which will serve as a small consumable that can be used to restore health as the players progress through the dungeon.
Floor 05 - Red Ogre General
The first boss out of the 10 bosses in the dungeon instance will appear here. A larger and stronger variant of the Red Ogre, known as the Red Ogre General will appear here.
Floor 06 - We Three Bears
Two Black Bears and one Brown Bear will appear here.
Floor 07 - The Doll's Gambit
One Doll will appear here. The floor is a small platform, similar to that of Floor 4. It is recommended to lure the doll off using jump-boosting and flight equipment (Spider Stilts, Jump Boots, Mushroom Parasol, Wings, etc.)
Floor 08 - Antland
Three waves of ants will occur on this floor. Each wave will bring one Red Ant and one Black Ant.
Floor 09 - Izziworld I
An Izziworld Spitter will appear here. This floor is designed to look like an obstacle course.
Floor 10 - The Ghost of Antland
Three waves of Ghost Ants will occur on this floor. Each wave will bring three Ghost Ants. After the third wave is completed, a Large Ghost Ant will be summoned to the floor, serving as the second boss out of the 10 bosses that are found in the dungeon instance.
Floor 11 - Lost Brothers
One Shellmouth and one Forest Guardian will appear here.
Floor 12 - Mole Parade
A total of ten hostile Spore Moles will spawn on the floor. It is possible to acquire Pies and Giant's Corns from the mobs, serving as consumables that players can use as they progress through the dungeon.
Floor 13 - Monstrosity Mania
The floor is designed to look similar to that of an infinity sign. Two Monstrosities will appear here.
Floor 14 - Fear the Genie
A corrupted variant of the Primeval Genie will appear here. (Corrupted Genie)
Floor 15 - Wolf of the Tower
The third boss out of the 10 bosses in the dungeon instance will appear here. The Wolf of the Tower will be summoned to the floor.
Floor 16 - TOADS!
Three waves of Toads will occur on this floor. Each wave will bring 5 Toads. It is possible to acquire Eggplants from the mobs that could serve as consumables as the players progress through the dungeon.
Floor 17 - The Crocodile Gang
A total of three Croc Men will appear on this floor. After they are slain, a weaker variant of the Red Croc Man will spawn on the small platform.
Floor 18 - Hammer Foes
Two waves of Hammer Knights will occur in this floor. Each wave will summon three Hammer Knights onto the floor. It is possible to acquire Asparagus Slugs from the mobs, serving as consumables that players can use as they progress through the dungeon.
Floor 19 - Mr. Gumbo's Office
The floor is designed to look similar to that of an infinity sign. Four Gumboes will appear here.
Floor 20 - Petition Pete
The fourth boss out of the 10 bosses in the dungeon instance will appear here. The boss is known as Eyeball Pete. It is possible to acquire Pies, Eggplants, Plumbo Flowers, and/or Giant's Corns from the mob, serving as beneficial consumables as the players progress through the dungeon.
Floor 21 - Rough Road Ahead Rodeo
A total of 7 Rockrunners, also known as Menace Bears, will appear here. It is best to not lure it off the platform as they are infamously known for being the one mob that prevents players from progressing through the dungeon.
Floor 22 - Blue and Yellow Fellows
Three waves of Bluemen and Yellowmen will occur on this floor. Each wave will summon two Bluemen and two Yellowmen onto the floor.
Floor 23 - Izziworld II
Two Izziworld Spitters will appear here. Similar to Floor 9's floor, it is designed to look like a complex obstacle course.
Floor 24 - Two Eyeballs
A Two-Eyed Monstrosity will appear here.
Floor 25 - The Return of the Ghost of Antland and a New King
A total of three Ghost Ants and one Antland King will appear here. The Antland King acts as the fifth boss out of the 10 bosses in the dungeon instance.
Floor 26 - Criminal Alliance
A total of six pirates and four bandits will appear here. All of the bandits are comprised of one variant of the Bandit. There are 3 Green Pirates and 1 of each variant matching the main colors of the Frontier.
Floor 27 - No More Cellery
A Guardian Snibber will appear here.
Floor 28 - The Queensguard
Two Queensguards will appear here.
Floor 29 - Way of the Warlock
A Warlock will appear here. Players are unable to move around as the platform is rather small, similar to the Floor 4.
Floor 30 - Totality Jack
The sixth boss out of the 10 bosses in the dungeon instance will appear here. A mob known as Totality Jack will be summoned onto the floor.
Floor 31 - 18 Heads Looking at You
Two normal Walkers, two normal Forest Walkers, one Large Walker, and one Large Forest Walker will appear here.
Floor 32 - Thinking Time!
A yellow Thinker and a red Thinker will appear here.
Floor 33 - Strategic Benefits
Two Red Ogre Generals and a Red Ogre Strategist will appear here.
Floor 34 - Goblin Freakshow
Three Goblin Munsks will appear here.
Floor 35 - Zitrat Appears
The seventh boss out of the 10 bosses in the dungeon instance will appear here. A mob known as Zitrat will be summoned onto the floor.
Floor 36 - Remember the Dragon
A hostile Pygmy Dragon will appear here.
Floor 37 - Moose Punks
A Golden Moose Punk and a Silver Moose Punk will appear here.
Floor 38 - I am Home From Work
The Employer spawns here. It attacks the players by summoning Office Bots.
Floor 39 - CRAM THESE GHOSTS INSIDE MY HEAD
Two waves of Dark Ghosts and Ghosts will appear here. Each wave will summon 3 Dark Ghosts and 4 Ghosts onto the floor.
Floor 40 - The Poor Man Weeps
The eighth boss out of the 10 bosses in the dungeon instance will appear here. A mob known as the Weeping Man will be summoned onto the Floor and on occasions, the boss will summon Weeping Turrets.
Floor 41 - Soup
Five waves of different creatures will occur on this floor. A Sprunk Mage will appear on Wave 1. A Peppermint Alien will appear on Wave 2. Two Corrupted Pirates will appear on Wave 3. A Guardian Snibber will appear on Wave 4. Finally, an Otherworldly Batrider will appear on the final wave.
Floor 42 - If There Is a Limit, I Cannot Find it
A total of seven waves of Creeps will occur in this floor. Each wave will increase in number in the order: 1, 1, 2, 3, 5, 8, 13.
Floor 43 - The Antland They Don't Tell You About: Inside the Anthill
Two Corrupted Ants and a corrupted variant of the Antland King, also known as the Corrupted Antland King, will appear here.
Floor 44 - The Kingsguard
A total of three Kingsguards will appear here.
Floor 45 - These Rat Hands Hold Back Reality!
The ninth boss of the 10 bosses in the dungeon instance will appear here. The Kingrat, a mob with a massive health pool, will be summoned onto the floor.
Floor 46 - They Live in the Same House
Four waves of different creatures will occur on this floor. The first wave will include the Otherworldly Dollhunter. The second wave will include the Maleficent Jester. The third wave will include the Malevolent Doll. Lastly, the final wave will include all three monsters together.
Floor 47 - Teakettle Tony's Revelation in the Stars
Teakettle Tony will appear on this floor.
Floor 48 - Izziworld III
An AU version of Wonald Izzi Jackson will appear here, shortened down to Wonald Izzi.
Floor 49 - You've Made a Mistake
The second-to-last boss will appear here. The boss is dubbed 'The Mistake'.
Floor 50 - Soul of the Frontier
The final boss out of the 10 bosses in the dungeon instance will appear here. Mr.58 can be found here.
Trivia
- During the events of the Otherworld Update, it was possible to interact with Stick on Floor 35 and up to purchase consumables that will assist the players as they progress through the final floors of the dungeon instance. After the introduction of the 1.10 (Fishing) Update, Stick was taken out of the dungeon instance. Since then, players are forced to come prepared with other beneficial items beforehand.
- The Otherworld Tower was initially known as The Grand Castle when its doors were closed.
- An NPC named Hutch Firestarter mentions the tower's doors while interacting with him.


