m (Fixed up the Circus and Lost payouts a little.) Tag: Visual edit |
m (dident remove the k) Tag: Source edit |
||
| (42 intermediate revisions by 19 users not shown) | |||
| Line 3: | Line 3: | ||
=== '''Disclaimer''' === |
=== '''Disclaimer''' === |
||
| − | If you have recently started playing Fantastic Frontier, please '''DO NOT '''buy specific weapons and armors that will be mentioned in the following sentences. Any equipment that is made out of ores (Bronze, Iron, Cobalt, Titanium, Gold, and Onyx) |
+ | If you have recently started playing Fantastic Frontier, please '''DO NOT '''buy specific weapons and armors that will be mentioned in the following sentences. Any equipment that is made out of ores (Bronze, Iron, Cobalt, Titanium, Gold, and Onyx) is considered useless to the veteran players, as many of the moneymaking methods involve the presences of bosses and mobs which are difficult to take down with specific kind of weapons, usually melee weapons. These bosses and mobs are capable of killing players if they are not prepared, whether they have weak or strong armor sets. It is usually preferred for the players to save their gold for overpowered weapons, preferably [[Magic Weapons|magic weapons]] and/or [[Rifle/Ranged Weapons|rifle/ranged weapons]]. [[Melee Weapons|Melee weapons]] are still acceptable though on some occasions. |
=== '''List of Moneymaking Methods''' === |
=== '''List of Moneymaking Methods''' === |
||
| Line 9: | Line 9: | ||
Each moneymaking method will be categorized under certain levels. Here are the brief explanations for each level: |
Each moneymaking method will be categorized under certain levels. Here are the brief explanations for each level: |
||
| − | * Level 1 - Tedious moneymaking methods that consume a lot of the players' time. Not very beneficial and are |
+ | * Level 1 - Tedious moneymaking methods that consume a lot of the players' time. Not very beneficial and in most cases are not recommended to players. |
* Level 2 - Slightly better than Level 1 moneymaking methods, but still consumes a lot of time nonetheless. They are somewhat acceptable in some parts of the community, although only beneficial to beginner and mid-game players. |
* Level 2 - Slightly better than Level 1 moneymaking methods, but still consumes a lot of time nonetheless. They are somewhat acceptable in some parts of the community, although only beneficial to beginner and mid-game players. |
||
* Level 3 - Consumes an acceptable amount of time, satisfies some parts of the community, acceptable, and beneficial for beginner and mid-game players. Not so much for end-game players, although end-game players can still perform this type of method nonetheless. |
* Level 3 - Consumes an acceptable amount of time, satisfies some parts of the community, acceptable, and beneficial for beginner and mid-game players. Not so much for end-game players, although end-game players can still perform this type of method nonetheless. |
||
| Line 26: | Line 26: | ||
{| class="article-table" |
{| class="article-table" |
||
!Target(s) |
!Target(s) |
||
| − | |Bobber Mushroom |
+ | |[[Bobber Mushroom]] |
|- |
|- |
||
!Viable Location(s) |
!Viable Location(s) |
||
| Line 32: | Line 32: | ||
|- |
|- |
||
!Can be Performed When |
!Can be Performed When |
||
| − | | |
+ | |The player has proper jump-boosting/flight equipment in order to travel through The Pits, as well as a powerful weapon (melee/ranged/magic) to protect themselves from mobs and a good armor set. |
|- |
|- |
||
!Strategy |
!Strategy |
||
| Line 44: | Line 44: | ||
{| class="article-table" |
{| class="article-table" |
||
!Target(s) |
!Target(s) |
||
| − | |Ancient Cobalt Knight, Cobalt Bar |
+ | |[[Ancient Cobalt Knight]], Cobalt Bar |
|- |
|- |
||
!Viable Location(s) |
!Viable Location(s) |
||
| Line 50: | Line 50: | ||
|- |
|- |
||
!Can be Performed When |
!Can be Performed When |
||
| − | | |
+ | |The player is able to go to Starry Point and kill it without dying from other mobs. |
|- |
|- |
||
!Strategy |
!Strategy |
||
| − | |Use your surroundings to your advantage, especially the rocks. |
+ | |Use your surroundings to your advantage, especially the rocks. Try to stand on the other side of a rock and get him stuck and proceed to range/mage him. |
|} |
|} |
||
|[[File:Cobaltknight2.png|centre|thumb|143x143px]][[File:Cobalt Bar.png|centre|thumb|80x80px]] |
|[[File:Cobaltknight2.png|centre|thumb|143x143px]][[File:Cobalt Bar.png|centre|thumb|80x80px]] |
||
| Line 62: | Line 62: | ||
{| class="article-table" |
{| class="article-table" |
||
!Target(s) |
!Target(s) |
||
| − | |Dull Frog, Dull Frog Crystals |
+ | |[[Dull Frog]], [[Dull Frog Crystals]] |
|- |
|- |
||
!Viable Location(s) |
!Viable Location(s) |
||
| Line 72: | Line 72: | ||
|- |
|- |
||
!Can be Performed When |
!Can be Performed When |
||
| − | | |
+ | |The player acquires a ranged and/or magic weapon. |
|- |
|- |
||
!Strategy |
!Strategy |
||
| Line 84: | Line 84: | ||
{| class="article-table" |
{| class="article-table" |
||
!Target(s) |
!Target(s) |
||
| − | |Golem, Golem Core |
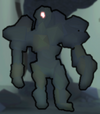
+ | |[[Golem]], [[Golem Core]] |
|- |
|- |
||
!Viable Location(s) |
!Viable Location(s) |
||
| Line 90: | Line 90: | ||
|- |
|- |
||
!Can be Performed When |
!Can be Performed When |
||
| − | |The |
+ | |The player has proper flight and/or jump-boosting equipment, a decent armor set, and a ranged/magic weapon. |
|- |
|- |
||
!Strategy |
!Strategy |
||
| − | |Use your surroundings to your advantage, especially the rocks. |
+ | |Use your surroundings to your advantage, especially the rocks. Get him stuck on a object and use your ranged/magic weapon. |
|} |
|} |
||
|[[File:Golem Card Image.png|centre|thumb|114x114px]][[File:GolemCore.png|thumb|80x80px|centre]] |
|[[File:Golem Card Image.png|centre|thumb|114x114px]][[File:GolemCore.png|thumb|80x80px|centre]] |
||
| Line 102: | Line 102: | ||
{| class="article-table" |
{| class="article-table" |
||
!Target(s) |
!Target(s) |
||
| − | |Lakethistle |
+ | |[[Lakethistle]] |
|- |
|- |
||
!Viable Location(s) |
!Viable Location(s) |
||
| Line 108: | Line 108: | ||
|- |
|- |
||
!Can be Performed When |
!Can be Performed When |
||
| + | |The player acquires jump-boosting and/or speed-boosting equipment. |
||
| − | |the player feels ready to explore. |
||
|- |
|- |
||
!Strategy |
!Strategy |
||
| Line 116: | Line 116: | ||
|2,000 Gold |
|2,000 Gold |
||
|- |
|- |
||
| + | |Onyxpected Money |
||
| ⚫ | |||
| |
| |
||
{| class="article-table" |
{| class="article-table" |
||
!Target(s) |
!Target(s) |
||
| − | |Ancient Onyx Knight, Onyx Bar |
+ | |[[Ancient Onyx Knight]], Onyx Bar |
|- |
|- |
||
!Viable Location(s) |
!Viable Location(s) |
||
| Line 126: | Line 126: | ||
|- |
|- |
||
!Can be Performed When |
!Can be Performed When |
||
| − | | |
+ | |The player acquires a ranged and/or magic weapon. Melee weapons are also acceptable, although it should have some sorts of special ability that can be used from afar. |
|- |
|- |
||
!Strategy |
!Strategy |
||
| − | |Use flight and/or jump-boosting equipment to your advantage. |
+ | |Use flight and/or jump-boosting equipment to your advantage. Use your terrain to your advantage and get him stuck. Lead him off the edge of the map and get him on the beach and range/magic him from up above. |
|} |
|} |
||
|[[File:Ancient Onyx Knight Card.png|centre|thumb|143x143px]][[File:Onyx Bar.png|centre|thumb|80x80px]] |
|[[File:Ancient Onyx Knight Card.png|centre|thumb|143x143px]][[File:Onyx Bar.png|centre|thumb|80x80px]] |
||
| Line 138: | Line 138: | ||
{| class="article-table" |
{| class="article-table" |
||
!Target(s) |
!Target(s) |
||
| − | |Rozier Flower |
+ | |[[Rozier Flower]] |
|- |
|- |
||
!Viable Location(s) |
!Viable Location(s) |
||
| Line 144: | Line 144: | ||
|- |
|- |
||
!Can be Performed When |
!Can be Performed When |
||
| + | |The player acquires jump-boosting and/or speed-boosting equipment. |
||
| − | |the players are capable of exploring the Frontier. |
||
|- |
|- |
||
!Strategy |
!Strategy |
||
| Line 156: | Line 156: | ||
{| class="article-table" |
{| class="article-table" |
||
!Target(s) |
!Target(s) |
||
| − | |Shell, Sandy Coral |
+ | |[[Shell]], [[Sandy Coral]] |
|- |
|- |
||
!Viable Location(s) |
!Viable Location(s) |
||
| Line 170: | Line 170: | ||
|- |
|- |
||
!Can be Performed When |
!Can be Performed When |
||
| + | |Preferably when the player acquires jump-boosting and/or speed-boosting equipment. |
||
| − | |the players want to. |
||
|- |
|- |
||
!Strategy |
!Strategy |
||
| Line 190: | Line 190: | ||
{| class="article-table" |
{| class="article-table" |
||
!Target(s) |
!Target(s) |
||
| − | |Purple Balloon Mushroom, Yellow Balloon Mushroom |
+ | |[[Purple Balloon Mushroom]], [[Yellow Balloon Mushroom]] |
|- |
|- |
||
!Viable Location(s) |
!Viable Location(s) |
||
| Line 198: | Line 198: | ||
|- |
|- |
||
!Can be Performed When |
!Can be Performed When |
||
| − | |The |
+ | |The player is able to acquire decent armor/equipment to venture further out of Topple Town. |
|- |
|- |
||
!Strategy |
!Strategy |
||
| Line 210: | Line 210: | ||
{| class="article-table" |
{| class="article-table" |
||
!Target(s) |
!Target(s) |
||
| − | |Eyeball Alien, Alien Trinket |
+ | |[[Eyeball Alien]], [[Alien Trinket]] |
|- |
|- |
||
!Viable Location(s) |
!Viable Location(s) |
||
| Line 216: | Line 216: | ||
|- |
|- |
||
!Can be Performed When |
!Can be Performed When |
||
| − | |The |
+ | |The player acquires proper armor sets and equipment in order to slay the primary target of this method. |
|- |
|- |
||
!Strategy |
!Strategy |
||
| Line 228: | Line 228: | ||
{| class="article-table" |
{| class="article-table" |
||
!Target(s) |
!Target(s) |
||
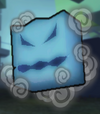
| − | |Ghost, Ghostly Remains |
+ | |[[Ghost]], [[Ghostly Remains]] |
|- |
|- |
||
!Viable Location(s) |
!Viable Location(s) |
||
| Line 236: | Line 236: | ||
|- |
|- |
||
!Can be Performed When |
!Can be Performed When |
||
| − | | |
+ | |The player acquires a ranged and/or magic weapon. |
|- |
|- |
||
!Strategy |
!Strategy |
||
| Line 248: | Line 248: | ||
{| class="article-table" |
{| class="article-table" |
||
!Target(s) |
!Target(s) |
||
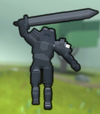
| − | |Ancient Iron Knight, Iron Bar |
+ | |[[Ancient Iron Knight]], Iron Bar |
|- |
|- |
||
!Viable Location(s) |
!Viable Location(s) |
||
| Line 256: | Line 256: | ||
|- |
|- |
||
!Can be Performed When |
!Can be Performed When |
||
| − | | |
+ | |The player acquires a ranged and/or magic weapon and/or a proper armor set that will be durable against the knight's attacks. |
|- |
|- |
||
!Strategy |
!Strategy |
||
| − | |Dodge its attack using flight and/or jump-boosting equipment. |
+ | |Dodge its attack using flight and/or jump-boosting equipment. Use your surrounding terrain to get him stuck and range/mage him. |
|} |
|} |
||
|[[File:Ancient Iron Knight Card.png|thumb|114x114px|centre]][[File:Iron Bar.png|centre|thumb|80x80px]] |
|[[File:Ancient Iron Knight Card.png|thumb|114x114px|centre]][[File:Iron Bar.png|centre|thumb|80x80px]] |
||
| Line 268: | Line 268: | ||
{| class="article-table" |
{| class="article-table" |
||
!Target(s) |
!Target(s) |
||
| − | |Lumoore Mushroom |
+ | |[[Lumoore Mushroom]] |
|- |
|- |
||
!Viable Location(s) |
!Viable Location(s) |
||
| Line 274: | Line 274: | ||
|- |
|- |
||
!Can be Performed When |
!Can be Performed When |
||
| − | | |
+ | |The player acquires proper armor sets that they think will be effective and durable while exploring Greenhorn Grove. |
|- |
|- |
||
!Strategy |
!Strategy |
||
| Line 286: | Line 286: | ||
{| class="article-table" |
{| class="article-table" |
||
!Target(s) |
!Target(s) |
||
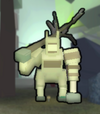
| − | |Ogre, Ogre Bone |
+ | |[[Ogre]], [[Ogre Bone]] |
|- |
|- |
||
!Viable Location(s) |
!Viable Location(s) |
||
| Line 292: | Line 292: | ||
|- |
|- |
||
!Can be Performed When |
!Can be Performed When |
||
| − | | |
+ | |The player has decent armor sets/equipment and a weapon that can kill the Ogres quickly. |
|- |
|- |
||
!Strategy |
!Strategy |
||
| − | |Dodge its attacks when the Ogre is about to unleash it. |
+ | |Dodge its attacks when the Ogre is about to unleash it. Ogres are slow so back up while firing with a ranged/magic weapon, be cautious for other ogres that might spawn behind you. |
|} |
|} |
||
|[[File:Ogre Card Image.png|centre|thumb|100x100px]][[File:OgreBone.png|centre|thumb|80x80px]] |
|[[File:Ogre Card Image.png|centre|thumb|100x100px]][[File:OgreBone.png|centre|thumb|80x80px]] |
||
| Line 304: | Line 304: | ||
{| class="article-table" |
{| class="article-table" |
||
!Target(s) |
!Target(s) |
||
| − | |Blue Pirate, Red Pirate, Yellow Pirate, Treasure Rags |
+ | |[[Pirate|Blue Pirate, Red Pirate, Yellow Pirate]], [[Treasure Rags]] |
|- |
|- |
||
!Viable Location(s) |
!Viable Location(s) |
||
| Line 310: | Line 310: | ||
|- |
|- |
||
!Can be Performed When |
!Can be Performed When |
||
| − | | |
+ | |The player acquires proper equipment, armor, and/or weapons in order to defeat the mobs with ease. |
|- |
|- |
||
!Strategy |
!Strategy |
||
| Line 322: | Line 322: | ||
{| class="article-table" |
{| class="article-table" |
||
!Target(s) |
!Target(s) |
||
| − | |Forest Guardian, Radiant Sapling |
+ | |[[Forest Guardian]], [[Radiant Sapling]] |
|- |
|- |
||
!Viable Location(s) |
!Viable Location(s) |
||
| Line 328: | Line 328: | ||
|- |
|- |
||
!Can be Performed When |
!Can be Performed When |
||
| − | | |
+ | |The player acquires a melee/ranged/magic weapon that can be used to quickly kill the mob. |
|- |
|- |
||
!Strategy |
!Strategy |
||
| Line 340: | Line 340: | ||
{| class="article-table" |
{| class="article-table" |
||
!Target(s) |
!Target(s) |
||
| − | |Spurtle Mushroom |
+ | |[[Spurtle Mushroom]] |
|- |
|- |
||
!Viable Location(s) |
!Viable Location(s) |
||
| Line 350: | Line 350: | ||
|- |
|- |
||
!Can be Performed When |
!Can be Performed When |
||
| − | |players acquire proper jump-boosting/flight equipment, as well as armor and a weapon that will be used to defend from mobs' attacks. |
+ | |The players acquire proper jump-boosting/flight equipment, as well as armor and a weapon that will be used to defend from mobs' attacks. |
|- |
|- |
||
!Strategy |
!Strategy |
||
| Line 362: | Line 362: | ||
{| class="article-table" |
{| class="article-table" |
||
!Target(s) |
!Target(s) |
||
| − | |Ancient Titanium Knight, Titanium Bar |
+ | |[[Ancient Titanium Knight]], Titanium Bar |
|- |
|- |
||
!Viable Location(s) |
!Viable Location(s) |
||
| Line 368: | Line 368: | ||
|- |
|- |
||
!Can be Performed When |
!Can be Performed When |
||
| − | | |
+ | |The player acquires a ranged/magic weapon that can kill it from afar or a melee weapon that can demolish it quickly. |
|- |
|- |
||
!Strategy |
!Strategy |
||
| Line 376: | Line 376: | ||
|~100,000 Gold |
|~100,000 Gold |
||
|- |
|- |
||
| + | |Improvised Troll Dentist |
||
| − | |Trolls |
||
| |
| |
||
{| class="article-table" |
{| class="article-table" |
||
!Target(s) |
!Target(s) |
||
| − | |Forest Troll, Troll Tooth |
+ | |[[Forest Troll]], [[Troll Tooth]] |
|- |
|- |
||
!Viable Location(s) |
!Viable Location(s) |
||
| Line 388: | Line 388: | ||
|- |
|- |
||
!Can be Performed When |
!Can be Performed When |
||
| − | | |
+ | |The player has decent equipment, armor, and weapons. |
|- |
|- |
||
!Strategy |
!Strategy |
||
| Line 400: | Line 400: | ||
{| class="article-table" |
{| class="article-table" |
||
!Target(s) |
!Target(s) |
||
| − | |Walker, Mandibles |
+ | |[[Walker]], [[Mandibles]] |
|- |
|- |
||
!Viable Location(s) |
!Viable Location(s) |
||
| Line 406: | Line 406: | ||
|- |
|- |
||
!Can be Performed When |
!Can be Performed When |
||
| − | | |
+ | |The player has decent equipment, armor, and weapons. |
|- |
|- |
||
!Strategy |
!Strategy |
||
| − | |Use the terrains to your advantage and/or trigger their attacks and strike them at the right moment. |
+ | |Use the terrains to your advantage and/or trigger their attacks and strike them at the right moment. Use equipment that has speed and jump boost to dodge them easily. |
|} |
|} |
||
|[[File:Walker Card Image.png|centre|thumb|100x100px]][[File:Mandibles-1.png|centre|thumb|80x80px]] |
|[[File:Walker Card Image.png|centre|thumb|100x100px]][[File:Mandibles-1.png|centre|thumb|80x80px]] |
||
| Line 417: | Line 417: | ||
==== Level 3 ==== |
==== Level 3 ==== |
||
{| class="article-table" |
{| class="article-table" |
||
| + | |+ |
||
!Alias |
!Alias |
||
!Details |
!Details |
||
| Line 426: | Line 427: | ||
{| class="article-table" |
{| class="article-table" |
||
!Target(s) |
!Target(s) |
||
| − | |Boomba Mushroom |
+ | |[[Boomba Mushroom]] |
|- |
|- |
||
!Viable Location(s) |
!Viable Location(s) |
||
| Line 432: | Line 433: | ||
|- |
|- |
||
!Can be Performed When |
!Can be Performed When |
||
| − | | |
+ | |The player acquires jump-boosting and/or speed-boosting equipment. |
|- |
|- |
||
!Strategy |
!Strategy |
||
| Line 444: | Line 445: | ||
{| class="article-table" |
{| class="article-table" |
||
!Target(s) |
!Target(s) |
||
| − | |Brain Mushroom |
+ | |[[Brain Mushroom]] |
|- |
|- |
||
!Viable Location(s) |
!Viable Location(s) |
||
| Line 450: | Line 451: | ||
|- |
|- |
||
!Can be Performed When |
!Can be Performed When |
||
| − | | |
+ | |The player acquires jump-boosting and/or speed-boosting equipment. |
|- |
|- |
||
!Strategy |
!Strategy |
||
| Line 462: | Line 463: | ||
{| class="article-table" |
{| class="article-table" |
||
!Target(s) |
!Target(s) |
||
| − | |Sun Flower, Moon Flower |
+ | |[[Sun Flower]], [[Moon Flower]] |
|- |
|- |
||
!Viable Location(s) |
!Viable Location(s) |
||
| Line 468: | Line 469: | ||
|- |
|- |
||
!Can be Performed When |
!Can be Performed When |
||
| − | | |
+ | |The player is able to afford Captain Finnegan's service to travel to [[The Town of Right and Wrong]] in order to arrive at the fields. |
|- |
|- |
||
!Strategy |
!Strategy |
||
| Line 480: | Line 481: | ||
{| class="article-table" |
{| class="article-table" |
||
!Target(s) |
!Target(s) |
||
| − | |Primeval Genie, Genie's Rings |
+ | |[[Primeval Genie]], [[Genie's Rings]] |
|- |
|- |
||
!Viable Location(s) |
!Viable Location(s) |
||
| Line 486: | Line 487: | ||
|- |
|- |
||
!Can be Performed When |
!Can be Performed When |
||
| − | | |
+ | |The player acquires a good ranged and/or magic weapon. |
|- |
|- |
||
!Strategy |
!Strategy |
||
| Line 498: | Line 499: | ||
{| class="article-table" |
{| class="article-table" |
||
!Target(s) |
!Target(s) |
||
| − | |Fantastic Dragon, Pygmy Dragon, Dragon Dice |
+ | |[[Fantastic Dragon]], [[Pygmy Dragon]], [[Dragon Dice]] |
|- |
|- |
||
!Viable Location(s) |
!Viable Location(s) |
||
| Line 504: | Line 505: | ||
|- |
|- |
||
!Can be Performed When |
!Can be Performed When |
||
| − | |The |
+ | |The player acquires a ranged and/or magic weapon, as well as proper jump-boosting/flight equipment. Melee weapons are also acceptable, although it is suggested to have some sorts of special abilities that will take out large portions of its health. |
|- |
|- |
||
!Strategy |
!Strategy |
||
| − | |Use props and objects to your advantage to avoid its attacks. |
+ | |Use props and objects to your advantage to avoid its attacks. Climb up on a tree and shoot from above to avoid being hit by any of it's attacks. |
|} |
|} |
||
|[[File:Fantastic Dragon Card Image.png|centre|thumb|100x100px]][[File:Dragon Dice.png|centre|thumb|80x80px]] |
|[[File:Fantastic Dragon Card Image.png|centre|thumb|100x100px]][[File:Dragon Dice.png|centre|thumb|80x80px]] |
||
| Line 516: | Line 517: | ||
{| class="article-table" |
{| class="article-table" |
||
!Target(s) |
!Target(s) |
||
| − | |Dark Ghost, Ghostly Chunks |
+ | |[[Dark Ghost]], Ghostly Chunks |
|- |
|- |
||
!Viable Location(s) |
!Viable Location(s) |
||
| Line 538: | Line 539: | ||
{| class="article-table" |
{| class="article-table" |
||
!Target(s) |
!Target(s) |
||
| − | |Emerald |
+ | |[[Emerald]] |
|- |
|- |
||
!Viable Location(s) |
!Viable Location(s) |
||
| Line 544: | Line 545: | ||
|- |
|- |
||
!Can be Performed When |
!Can be Performed When |
||
| − | |The |
+ | |The player acquires proper equipment, armor, weapon, and a pickaxe. |
|- |
|- |
||
!Strategy |
!Strategy |
||
|Have a pickaxe and use jump-boosting and/or flight equipment to your advantage. |
|Have a pickaxe and use jump-boosting and/or flight equipment to your advantage. |
||
| + | Server hopping is also viable and increases your emerald collection speed. |
||
| − | Players should also keep in mind to smelt the gold ores into gold bars in order to get the full benefit. |
||
| + | |||
|} |
|} |
||
| − | |[[File:Emerald |
+ | |[[File:Emerald.png|centre|thumb|80x80px]] |
| + | |~300,000 Gold Without Serverhopping 1,000,000 to 1,500,000 Gold Serverhopping |
||
| − | |~300,000 Gold |
||
|- |
|- |
||
|Golden Peak |
|Golden Peak |
||
| Line 558: | Line 560: | ||
{| class="article-table" |
{| class="article-table" |
||
!Target(s) |
!Target(s) |
||
| − | |Ancient Golden Knight, Gold Bar |
+ | |[[Ancient Gold Knight|Ancient Golden Knight]], Gold Bar |
| + | |||
|- |
|- |
||
!Viable Location(s) |
!Viable Location(s) |
||
| + | |||
|[[Celestial Peak]] |
|[[Celestial Peak]] |
||
|- |
|- |
||
!Can be Performed When |
!Can be Performed When |
||
| − | |The |
+ | |The player acquires proper jump-boosting and/or flight equipment and/or when the player acquires ranged and/or magic weapons. |
|- |
|- |
||
| − | !Strategy |
+ | ! Strategy |
| − | |Dodge its attacks with the assistance of flight and/or jump-boosting equipment. |
+ | |Dodge its attacks with the assistance of flight and/or jump-boosting equipment. Use your terrain to your advantage to trap the Ancient Golden Knight. |
|} |
|} |
||
|[[File:Ancient Gold Knight Card.png|centre|thumb|114x114px]][[File:Gold Bar.png|centre|thumb|80x80px]] |
|[[File:Ancient Gold Knight Card.png|centre|thumb|114x114px]][[File:Gold Bar.png|centre|thumb|80x80px]] |
||
| Line 577: | Line 581: | ||
{| class="article-table" |
{| class="article-table" |
||
!Target(s) |
!Target(s) |
||
| − | |Hungry Flower |
+ | |[[Hungry Flower]] |
|- |
|- |
||
!Viable Location(s) |
!Viable Location(s) |
||
| Line 583: | Line 587: | ||
|- |
|- |
||
!Can be Performed When |
!Can be Performed When |
||
| − | |The player is capable of traveling to The Town of Right and Wrong and/or have decent armor and weapons to protect them from mobs. |
+ | | The player is capable of traveling to [[The Town of Right and Wrong]] and/or have decent armor and weapons to protect them from mobs. |
|- |
|- |
||
| − | !Strategy |
+ | !Strategy |
| − | |None |
+ | | None |
|} |
|} |
||
|[[File:Hungry Flower.png|centre|thumb|80x80px]] |
|[[File:Hungry Flower.png|centre|thumb|80x80px]] |
||
| − | |42,000 Gold |
+ | |42,000 Gold |
|- |
|- |
||
| − | |Ice See You |
+ | | Ice See You |
| |
| |
||
{| class="article-table" |
{| class="article-table" |
||
!Target(s) |
!Target(s) |
||
| − | |Snowball Mushroom, Icem Mushroom, Ice Knight, Ice Shards |
+ | |[[Snowball Mushroom]], [[Icem Mushroom]], [[Ice Knight]], [[Ice Shards]] |
|- |
|- |
||
!Viable Location(s) |
!Viable Location(s) |
||
| Line 601: | Line 605: | ||
|- |
|- |
||
!Can be Performed When |
!Can be Performed When |
||
| − | | |
+ | |The player has decent equipment, armor, and/or weapons in order to venture Frigid Waste (PvP) - infamous for its large number of mobs. |
| + | |||
|- |
|- |
||
!Strategy |
!Strategy |
||
| Line 613: | Line 618: | ||
{| class="article-table" |
{| class="article-table" |
||
!Target(s) |
!Target(s) |
||
| − | |Monstrosity, Eye of Monstrosity |
+ | |[[Monstrosity]], [[Eye of Monstrosity]] |
|- |
|- |
||
| − | !Viable Location(s) |
+ | ! Viable Location(s) |
|[[Blackrock Mountain]] |
|[[Blackrock Mountain]] |
||
| Line 621: | Line 626: | ||
|- |
|- |
||
!Can be Performed When |
!Can be Performed When |
||
| − | | |
+ | |The player acquires good enough equipment and ranged/magic weapons. |
|- |
|- |
||
!Strategy |
!Strategy |
||
| Line 629: | Line 634: | ||
|~130,000 Gold |
|~130,000 Gold |
||
|- |
|- |
||
| − | |I Mustache a Question |
+ | | I Mustache a Question |
| + | |||
| |
| |
||
{| class="article-table" |
{| class="article-table" |
||
!Target(s) |
!Target(s) |
||
| + | |||
| − | |Mushtache Mushroom |
+ | |[[Mushtache Mushroom]] |
|- |
|- |
||
!Viable Location(s) |
!Viable Location(s) |
||
| Line 640: | Line 647: | ||
|- |
|- |
||
!Can be Performed When |
!Can be Performed When |
||
| − | | |
+ | |The player has decent armor/equipment to explore The Maze Wood. |
|- |
|- |
||
!Strategy |
!Strategy |
||
| Line 646: | Line 653: | ||
|} |
|} |
||
|[[File:Mustache Mushroom.png|centre|thumb|80x80px]] |
|[[File:Mustache Mushroom.png|centre|thumb|80x80px]] |
||
| − | |70,000 Gold |
+ | |70,000 Gold |
|- |
|- |
||
|Ruby Digger |
|Ruby Digger |
||
| Line 652: | Line 659: | ||
{| class="article-table" |
{| class="article-table" |
||
!Target(s) |
!Target(s) |
||
| − | |Ruby |
+ | |[[Ruby]] |
|- |
|- |
||
!Viable Location(s) |
!Viable Location(s) |
||
| Line 658: | Line 665: | ||
|- |
|- |
||
!Can be Performed When |
!Can be Performed When |
||
| + | |The player acquires a good pickaxe, and jump-boosting and/or speed-boosting equipment to lure the Red Ants away. |
||
| − | |the players acquire a pickaxe. |
||
|- |
|- |
||
!Strategy |
!Strategy |
||
| − | |Use flight and/or jump-boosting equipment. |
+ | |Use flight and/or jump-boosting equipment. |
|} |
|} |
||
|[[File:Ruby.png|centre|thumb|80x80px]] |
|[[File:Ruby.png|centre|thumb|80x80px]] |
||
|60,000 Gold |
|60,000 Gold |
||
|- |
|- |
||
| − | |Spider's Precious Jewels |
+ | |Spider's Precious Jewels |
| |
| |
||
{| class="article-table" |
{| class="article-table" |
||
!Target(s) |
!Target(s) |
||
| − | |Corrupted Wizard, Bag of Gems |
+ | |[[Corrupted Wizard]], [[Bag of Gems]] |
|- |
|- |
||
!Viable Location(s) |
!Viable Location(s) |
||
| Line 676: | Line 683: | ||
|- |
|- |
||
!Can be Performed When |
!Can be Performed When |
||
| − | | |
+ | |The player is able to acquire overpowered weapons, preferably ranged and/or magic weapons. |
|- |
|- |
||
!Strategy |
!Strategy |
||
| − | |[ |
+ | |[https://youtu.be/CLcxR7p1D3Q Corrupted Wizard Tutorial] |
|} |
|} |
||
|[[File:Corrupted Wizard Card Image.png|centre|thumb|100x100px]][[File:Bag of Gems.png|centre|thumb|80x80px]] |
|[[File:Corrupted Wizard Card Image.png|centre|thumb|100x100px]][[File:Bag of Gems.png|centre|thumb|80x80px]] |
||
| Line 689: | Line 696: | ||
{| class="article-table" |
{| class="article-table" |
||
!Target(s) |
!Target(s) |
||
| − | |Clamstack |
+ | |[[Clamstack]] |
|- |
|- |
||
!Viable Location(s) |
!Viable Location(s) |
||
| Line 699: | Line 706: | ||
|- |
|- |
||
!Can be Performed When |
!Can be Performed When |
||
| − | | |
+ | |The player acquires proper jump-boosting and/or speed-equipment, armor, and/or weapons. |
|- |
|- |
||
!Strategy |
!Strategy |
||
| Line 705: | Line 712: | ||
|} |
|} |
||
|[[File:Clamstack.png|centre|thumb|80x80px]] |
|[[File:Clamstack.png|centre|thumb|80x80px]] |
||
| − | |50,000 Gold |
+ | | 50,000 Gold |
|- |
|- |
||
|Targeted |
|Targeted |
||
| Line 711: | Line 718: | ||
{| class="article-table" |
{| class="article-table" |
||
!Target(s) |
!Target(s) |
||
| − | |Target Mushroom |
+ | |[[Target Mushroom]] |
|- |
|- |
||
!Viable Location(s) |
!Viable Location(s) |
||
| Line 717: | Line 724: | ||
|- |
|- |
||
!Can be Performed When |
!Can be Performed When |
||
| − | | |
+ | |The player acquires flight and/or jump-boosting equipment. |
|- |
|- |
||
!Strategy |
!Strategy |
||
| Line 724: | Line 731: | ||
|[[File:Target Mushroom.png|centre|thumb|80x80px]] |
|[[File:Target Mushroom.png|centre|thumb|80x80px]] |
||
|54,000 Gold |
|54,000 Gold |
||
| + | |- |
||
| ⚫ | |||
| + | | |
||
| + | {| class="article-table" |
||
| + | !Target(s) |
||
| + | |[[Blackrock Giant]], [[Giant's Bone]] |
||
| + | |- |
||
| + | !Viable |
||
| + | Location(s) |
||
| + | |[[Farm Fortress]] |
||
| + | |- |
||
| + | !Can be |
||
| + | Performed |
||
| + | |||
| + | When |
||
| + | |The player acquires |
||
| + | ether magic/ranged |
||
| + | |||
| + | weapon with decent |
||
| + | |||
| + | damage. |
||
| + | |- |
||
| + | !Strategy |
||
| + | |Stay at the borders of [[Farm Fortress]] [Aka fences] and camp while going around the area. |
||
| + | |} |
||
| + | |[[File:GiantsBone.png|centre|thumb|70x70px]][[File:Blackrock Giant Card Image.png|centre|thumb|70x70px]] |
||
| + | |400,000 |
||
| + | |||
| + | Gold |
||
|} |
|} |
||
| − | ==== |
+ | ====Level 4==== |
{| class="article-table" |
{| class="article-table" |
||
|- |
|- |
||
| Line 738: | Line 774: | ||
{| class="article-table" |
{| class="article-table" |
||
!Target(s) |
!Target(s) |
||
| − | |Inspector, Inspector's Hat |
+ | |[[Inspector]], [[Inspector's Hat]] |
|- |
|- |
||
!Viable Location(s) |
!Viable Location(s) |
||
| Line 748: | Line 784: | ||
|- |
|- |
||
!Can be Performed When |
!Can be Performed When |
||
| − | | |
+ | |The player acquires end-game weapons and armor sets that will benefit them. |
|- |
|- |
||
!Strategy |
!Strategy |
||
| Line 756: | Line 792: | ||
|~2,000,000 Gold |
|~2,000,000 Gold |
||
|- |
|- |
||
| + | | Deep Down the Rabbit Hole |
||
| − | |Paralyzing Parasite |
||
| |
| |
||
{| class="article-table" |
{| class="article-table" |
||
!Target(s) |
!Target(s) |
||
| − | |Parasite, Site Exposed, |
+ | |[[Parasite]], [[Site Exposed]], [[Plain Fishmask|Plain FishMask]], [[Tall Anthony (Armor)|Tall Anthony]] |
|- |
|- |
||
!Viable Location(s) |
!Viable Location(s) |
||
| Line 766: | Line 802: | ||
|- |
|- |
||
!Can be Performed When |
!Can be Performed When |
||
| − | | |
+ | |The player has obtained end-game equipments that can kill the Parasite in a set amount of time. |
|- |
|- |
||
!Strategy |
!Strategy |
||
| − | |[https:// |
+ | |[https://youtu.be/SiJlNv5-fRo Parasite Tutorial] |
|} |
|} |
||
|[[File:Parasite Card New Image.png|centre|thumb|150x150px]] |
|[[File:Parasite Card New Image.png|centre|thumb|150x150px]] |
||
| − | |~ |
+ | |~400,000 to 1,100,000 (If your fishing) |
|- |
|- |
||
|Magma Brain Surgery |
|Magma Brain Surgery |
||
| Line 778: | Line 814: | ||
{| class="article-table" |
{| class="article-table" |
||
!Target(s) |
!Target(s) |
||
| + | |||
| − | |Magma Brain, Magma Brain Core, Tri-Color Necklace, Greater Dungeon Candy |
+ | |[[Magma Brain]], [[Magma Brain Core]], [[Tri-Color Necklace]], [[Greater Dungeon Candy]] |
|- |
|- |
||
| − | !Viable Location(s) |
+ | !Viable Location(s) |
| + | |||
|[[Pit Depths]] |
|[[Pit Depths]] |
||
|- |
|- |
||
!Can be Performed When |
!Can be Performed When |
||
| + | |||
| − | | |
+ | |The player has obtained decent ranged and/or magic weapons, specifically ones that are expensive and is capable of inflicting tons of damage. |
|- |
|- |
||
!Strategy |
!Strategy |
||
| − | |[ |
+ | |[https://youtu.be/lx-uY8QKWeU Magma Brain Tutorial] |
|} |
|} |
||
|[[File:Magma Brain Card Image.png|centre|thumb|100x100px]][[File:Magma Brain Core.png|centre|thumb|80x80px]] |
|[[File:Magma Brain Card Image.png|centre|thumb|100x100px]][[File:Magma Brain Core.png|centre|thumb|80x80px]] |
||
|~1,000,000 Gold |
|~1,000,000 Gold |
||
|- |
|- |
||
| + | |Show Cancled |
||
| − | |Cricket Farm |
||
| |
| |
||
{| class="article-table" |
{| class="article-table" |
||
!Target(s) |
!Target(s) |
||
| − | |The Cricket, Traveling Flea Circus, Emperor's Cape, Maskhat, Lasting Flower |
+ | |[[The Cricket]], [[Traveling Flea Circus]], [[Emperor's Cape]], [[Maskhat]], [[Lasting Flower]] |
|- |
|- |
||
| − | !Viable Location(s) |
+ | !Viable Location(s) |
| + | |||
|[[The Theatre]] |
|[[The Theatre]] |
||
|- |
|- |
||
!Can be Performed When |
!Can be Performed When |
||
| − | |After player has obtained the Theatre Key, it is suggested that the player should try their best to reach end-game and acquire end-game content. |
+ | |After player has obtained the [[Theatre Key]], it is suggested that the player should try their best to reach end-game and acquire end-game content. |
|- |
|- |
||
!Strategy |
!Strategy |
||
| + | |Players who are skilled at dodging can battle the Cricket at extremely close range in order to keep it from using its ranged attacks. Players can also circle the Cricket when its ranged attacks are used, so that they can keep attacking throughout. If a player has a weapon which attacks through barriers they can go to the other side of the theatre curtain and attack. It is recommended to use [https://fantastic-frontier-roblox.fandom.com/wiki/Blade_of_the_Throne Blade of the Throne] as other weapons require the player to get much closer to the curtain risking being caught in the explosive radius of the missiles. |
||
| − | |Varies (your choice) |
||
|} |
|} |
||
|[[File:The_Cricket.png|centre|thumb]] |
|[[File:The_Cricket.png|centre|thumb]] |
||
|~500,000 Gold |
|~500,000 Gold |
||
|- |
|- |
||
| − | |Otherworld Tower Session |
+ | | Otherworld Tower Session |
| |
| |
||
{| class="article-table" |
{| class="article-table" |
||
| Line 817: | Line 857: | ||
|- |
|- |
||
!Viable Location(s) |
!Viable Location(s) |
||
| + | |||
|[[Otherworld Tower]] |
|[[Otherworld Tower]] |
||
|- |
|- |
||
!Can be Performed When |
!Can be Performed When |
||
| + | |||
| − | |Any time, although it is suggested that the |
+ | |Any time, although it is suggested that the player should try their best to reach end-game and acquire end-game content. It is also advised to work as a team. |
|- |
|- |
||
!Strategy |
!Strategy |
||
| Line 826: | Line 868: | ||
|} |
|} |
||
|[[File:Otherworld.PNG|centre|thumb|271x271px]] |
|[[File:Otherworld.PNG|centre|thumb|271x271px]] |
||
| + | |~4,100,100 gold per hour (floors 41-50) |
||
| − | |>1 Gold to 280,000,000 Gold (though this hasn't been achieved) |
||
| + | |||
|- |
|- |
||
| − | |Noble Blue Flower Farm |
+ | | Noble Blue Flower Farm |
| |
| |
||
{| class="article-table" |
{| class="article-table" |
||
| − | !Target(s) |
+ | !Target(s) |
| + | |||
| − | |Noble Blue Flower, Beans |
+ | |[[Noble Blue Flower]], [[The Beans|Beans]] |
|- |
|- |
||
!Viable Location(S) |
!Viable Location(S) |
||
| Line 838: | Line 882: | ||
|- |
|- |
||
!Can be Performed when |
!Can be Performed when |
||
| + | |||
| − | | |
+ | |The player has enough money to buy the seed from [[Mr. Sims|Mr. Sim]] or [[Green Golem]]. |
|- |
|- |
||
!Strategy |
!Strategy |
||
| + | |When harvesting, it is recommended to pick the "Power" option for safe profit -making. (More details about the four options can be found [[Noble Blue Flower (Plant)#Rewards from the Four Options|here]].) |
||
| − | |None |
||
|} |
|} |
||
|[[File:NobleFlower2.png|centre|thumb|225x225px]] |
|[[File:NobleFlower2.png|centre|thumb|225x225px]] |
||
|~ x1.5 gold spent to buy seed(s) |
|~ x1.5 gold spent to buy seed(s) |
||
|- |
|- |
||
| − | |Gift Tree Farm |
+ | | Gift Tree Farm |
| |
| |
||
{| class="article-table" |
{| class="article-table" |
||
| − | !Target(s) |
+ | !Target(s) |
| − | |Gift Tree, Gift Fruit |
+ | |[[Gift Tree]], [[Gift Fruit]] |
|- |
|- |
||
!Viable Location(S) |
!Viable Location(S) |
||
| Line 856: | Line 901: | ||
|- |
|- |
||
!Can be Performed when |
!Can be Performed when |
||
| − | | |
+ | |The player has enough money to buy the seed from [[Mr. Sims|Mr. Sim]]. |
|- |
|- |
||
!Strategy |
!Strategy |
||
| − | |Only buy seeds for 1.9m and do not open the Gift Fruit unless you know what you're doing! |
+ | | Only buy seeds for 1.9m and do not open the Gift Fruit unless you know what you're doing! |
| + | |||
|} |
|} |
||
|[[File:GiftTreeThePlantRoom2.png|centre|thumb|200x200px]] |
|[[File:GiftTreeThePlantRoom2.png|centre|thumb|200x200px]] |
||
| − | | |
+ | |3,500,000N to 1,400,000N, where N is the number of trees |
| + | |||
|- |
|- |
||
|Lost Farm |
|Lost Farm |
||
| Line 874: | Line 921: | ||
|- |
|- |
||
!Can be Performed When |
!Can be Performed When |
||
| − | | |
+ | |The player has obtained the [[Hidden Key]], and is able to acquire end-game armor and weapons. |
| + | |||
|- |
|- |
||
!Strategy |
!Strategy |
||
| + | | Have a player come with you and jump over the Lost and bait it with [[Mushroom Parasol|parasol]]. Keep in mind standing on it's head will result in you being flung off. |
||
| − | |Varies (your choice) |
||
| + | Or if your doing this solo stand on the door frame and kill the [[Phantom|Phantoms]] as they spawn while killing [[The Lost (Monster)]] |
||
|} |
|} |
||
|[[File:The Lost.png|centre|thumb|200x200px]] |
|[[File:The Lost.png|centre|thumb|200x200px]] |
||
| + | |~8,400,000 gold per hour |
||
| − | |~54,000 Gold to 63,000,000 Gold (though this hasn't been achieved) |
||
|- |
|- |
||
|Circus Farm |
|Circus Farm |
||
| Line 889: | Line 938: | ||
|- |
|- |
||
!Viable Location(s) |
!Viable Location(s) |
||
| + | |||
|[[Ratboy's Nightmare Dungeon]] |
|[[Ratboy's Nightmare Dungeon]] |
||
|- |
|- |
||
| − | !Can be Performed When |
+ | ! Can be Performed When |
| − | | |
+ | |The player has unlocked [[The Vault|the vault]], and is able to acquire end-game armor and weapons. |
|- |
|- |
||
!Strategy |
!Strategy |
||
| + | |||
|[[Ratboy's Nightmare Dungeon|Nightmare Dungeon Guide]] |
|[[Ratboy's Nightmare Dungeon|Nightmare Dungeon Guide]] |
||
|} |
|} |
||
|[[File:Circus Boss.gif|centre|thumb|120x120px]] |
|[[File:Circus Boss.gif|centre|thumb|120x120px]] |
||
| + | |6,300,000(Gph) without skips, 9,500,000(Gph) if you know how to one cycle and 12,800,000(Gph) with only skips. |
||
| − | |~117,000 gold to 180,000,000 gold (though this hasn't been achieved) |
||
|} |
|} |
||
| − | <nowiki/> |
||
| + | |||
| − | === |
+ | ===''Note''=== |
''Note: If there is a farming method that is not found on this list, please comment below and provide a summary of what it is about. From there, a wiki contributor will implement into the list, further expanding the variety of farming methods to farm gold. If the article is semi-protected and you can edit it, go ahead and add to the list of the various farming methods.'' |
''Note: If there is a farming method that is not found on this list, please comment below and provide a summary of what it is about. From there, a wiki contributor will implement into the list, further expanding the variety of farming methods to farm gold. If the article is semi-protected and you can edit it, go ahead and add to the list of the various farming methods.'' |
||
[[Category:Lists and Guides]] |
[[Category:Lists and Guides]] |
||
Latest revision as of 14:25, 20 June 2023
Overview
The List of Moneymaking Methods is a list of many farming methods that all players from all backgrounds can do while participating in the world of Fantastic Frontier. While not being a guide, each section will simply give you brief details about your main targets, the location of where the method takes place, the farming method as to when it can be performed, and for some farming methods, strategies.
Disclaimer
If you have recently started playing Fantastic Frontier, please DO NOT buy specific weapons and armors that will be mentioned in the following sentences. Any equipment that is made out of ores (Bronze, Iron, Cobalt, Titanium, Gold, and Onyx) is considered useless to the veteran players, as many of the moneymaking methods involve the presences of bosses and mobs which are difficult to take down with specific kind of weapons, usually melee weapons. These bosses and mobs are capable of killing players if they are not prepared, whether they have weak or strong armor sets. It is usually preferred for the players to save their gold for overpowered weapons, preferably magic weapons and/or rifle/ranged weapons. Melee weapons are still acceptable though on some occasions.
List of Moneymaking Methods
A list that compiles the many farming methods that players can participate in to acquire large amounts of gold. They will be briefly explained as to how it works, where it takes place, and so forth. Some methods are widely known among the community, while other methods remain in the dust.
Each moneymaking method will be categorized under certain levels. Here are the brief explanations for each level:
- Level 1 - Tedious moneymaking methods that consume a lot of the players' time. Not very beneficial and in most cases are not recommended to players.
- Level 2 - Slightly better than Level 1 moneymaking methods, but still consumes a lot of time nonetheless. They are somewhat acceptable in some parts of the community, although only beneficial to beginner and mid-game players.
- Level 3 - Consumes an acceptable amount of time, satisfies some parts of the community, acceptable, and beneficial for beginner and mid-game players. Not so much for end-game players, although end-game players can still perform this type of method nonetheless.
- Level 4 - Worthy of the player's time and effort, satisfies all, if not, most parts of the community, widely acceptable, and highly beneficial for all players of all backgrounds.
Level 1
| Alias | Details | Target(s) | Total # of Gold | ||||||||
|---|---|---|---|---|---|---|---|---|---|---|---|
| Bobbing to
The Pits |
|
20,000 Gold | |||||||||
| Cobalt's Point |
|
~20,000 Gold | |||||||||
| Dull Frog's Dissection |
|
~20,000 Gold | |||||||||
| Eroding Golems |
|
~184,000 Gold | |||||||||
| Lakethistle |
|
2,000 Gold | |||||||||
| Onyxpected Money |
|
~300,000 Gold | |||||||||
| Roze Up To Power |
|
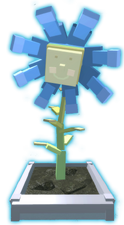
9,000 Gold | |||||||||
| Sally Collects Seashells on the Seashore |
|
10,000 Gold to 14,000 Gold |
Level 2
| Alias | Details | Target(s) | Total # of Gold | ||||||||
|---|---|---|---|---|---|---|---|---|---|---|---|
| Balloon Hunt |
|
10,000 Gold to 24,000 gold | |||||||||
| Conqueror of Aliens |
|
~90,000 Gold | |||||||||
| Ghost Busters |
|
~50,000 Gold | |||||||||
| Iron, I Run |
|
~2,500 Gold | |||||||||
| Loom More! |
|
20,000 Gold | |||||||||
| Ogre Bones |
|
~40,000 Gold | |||||||||
| Reign of the Pirates |
|
~66,000 Gold | |||||||||
| Sapling of the Fallen |
|
~70,000 Gold | |||||||||
| Sprouting Turtles |
|
50,000 Gold | |||||||||
| Titaniumic |
|
~100,000 Gold | |||||||||
| Improvised Troll Dentist |
|
~42,000 Gold | |||||||||
| Walker's Walk to Death |
|
~78,000 Gold |
Level 3
| Alias | Details | Target(s) | Total # of Gold | ||||||||
|---|---|---|---|---|---|---|---|---|---|---|---|
| Boom, Money! |
|
60,000 Gold | |||||||||
| Brain Harvest |
|
190,000 Gold | |||||||||
| Celestial Flowerpicking |
|
40,000 Gold | |||||||||
| Cast A Wish! |
|
~120,000 Gold | |||||||||
| Fantastic Farming |
|
160,000 Gold | |||||||||
| Ghost Busters: The Sequel |
|
~88,000 Gold | |||||||||
| Golden Emeralds |
|
~300,000 Gold Without Serverhopping 1,000,000 to 1,500,000 Gold Serverhopping | |||||||||
| Golden Peak |
|
~160,000 Gold | |||||||||
| Hungry For Flowers |
|
42,000 Gold | |||||||||
| Ice See You |
|
 |
70,000-100,000 gold | ||||||||
| Monstrosity Mania |
|
~130,000 Gold | |||||||||
| I Mustache a Question |
|
70,000 Gold | |||||||||
| Ruby Digger |
|
60,000 Gold | |||||||||
| Spider's Precious Jewels |
|
~500,000 Gold | |||||||||
| Stack of Clams |
|
50,000 Gold | |||||||||
| Targeted |
|
54,000 Gold | |||||||||
| Giant Collection |
|
400,000
Gold |
Level 4
| Alias | Details | Target(s) | Total # of Gold | ||||||||
|---|---|---|---|---|---|---|---|---|---|---|---|
| Inspection |
|
~2,000,000 Gold | |||||||||
| Deep Down the Rabbit Hole |
|
~400,000 to 1,100,000 (If your fishing) | |||||||||
| Magma Brain Surgery |
|
~1,000,000 Gold | |||||||||
| Show Cancled |
|
~500,000 Gold | |||||||||
| Otherworld Tower Session |
|
~4,100,100 gold per hour (floors 41-50) | |||||||||
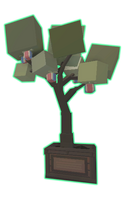
| Noble Blue Flower Farm |
|
~ x1.5 gold spent to buy seed(s) | |||||||||
| Gift Tree Farm |
|
3,500,000N to 1,400,000N, where N is the number of trees | |||||||||
| Lost Farm |
|
~8,400,000 gold per hour | |||||||||
| Circus Farm |
|
6,300,000(Gph) without skips, 9,500,000(Gph) if you know how to one cycle and 12,800,000(Gph) with only skips. |
Note
Note: If there is a farming method that is not found on this list, please comment below and provide a summary of what it is about. From there, a wiki contributor will implement into the list, further expanding the variety of farming methods to farm gold. If the article is semi-protected and you can edit it, go ahead and add to the list of the various farming methods.


