m (Added a small notice for pastebin list recording reward percentages. For some reasons, it's not in here but it is now.) Tag: Visual edit |
m (Final correction) Tag: Visual edit |
||
| (13 intermediate revisions by 2 users not shown) | |||
| Line 12: | Line 12: | ||
=== List of Dungeon Rewards === |
=== List of Dungeon Rewards === |
||
| − | The list of dungeon rewards that are given to the players every 5 floors or so. It is listed alphabetically |
+ | The list of dungeon rewards that are given to the players every 5 floors or so. It is listed alphabetically. |
<div class="grid-table">{{GridItem|Checklist item id = |Quantity text =|Article name =Abandoned_Flower |Image=Abandoned_Flower.png}} |
<div class="grid-table">{{GridItem|Checklist item id = |Quantity text =|Article name =Abandoned_Flower |Image=Abandoned_Flower.png}} |
||
{{GridItem|Checklist item id = |Quantity text =|Article name =Advanced_Rapier |Image=Advanced_Rapier.png}} |
{{GridItem|Checklist item id = |Quantity text =|Article name =Advanced_Rapier |Image=Advanced_Rapier.png}} |
||
| ⚫ | |||
| ⚫ | |||
{{GridItem|Checklist item id = |Quantity text =|Article name =Angel_Greatsword |Image=Angel_Greatsword.png}} |
{{GridItem|Checklist item id = |Quantity text =|Article name =Angel_Greatsword |Image=Angel_Greatsword.png}} |
||
| ⚫ | |||
{{GridItem|Checklist item id = |Quantity text =|Article name =Angry_Bushdweller |Image=AngryBushdweller.png}} |
{{GridItem|Checklist item id = |Quantity text =|Article name =Angry_Bushdweller |Image=AngryBushdweller.png}} |
||
{{GridItem|Checklist item id = |Quantity text =|Article name =Antennae |Image=Antennae.png}} |
{{GridItem|Checklist item id = |Quantity text =|Article name =Antennae |Image=Antennae.png}} |
||
| Line 28: | Line 25: | ||
{{GridItem|Checklist item id = |Quantity text =|Article name =Bignose_Angler |Image=Bignose_Angler.png}} |
{{GridItem|Checklist item id = |Quantity text =|Article name =Bignose_Angler |Image=Bignose_Angler.png}} |
||
{{GridItem|Checklist item id = |Quantity text =|Article name =Big_Orange_Eyes |Image=Big_Orange_Eyes.png}} |
{{GridItem|Checklist item id = |Quantity text =|Article name =Big_Orange_Eyes |Image=Big_Orange_Eyes.png}} |
||
| ⚫ | |||
{{GridItem|Checklist item id = |Quantity text =|Article name =Black_Dragonbird_Feather |Image=Black_Dragonbird_Feather.png}} |
{{GridItem|Checklist item id = |Quantity text =|Article name =Black_Dragonbird_Feather |Image=Black_Dragonbird_Feather.png}} |
||
{{GridItem|Checklist item id = |Quantity text =|Article name =Black_Suit_Pants |Image=Black_Suit_Pants.png}} |
{{GridItem|Checklist item id = |Quantity text =|Article name =Black_Suit_Pants |Image=Black_Suit_Pants.png}} |
||
| Line 34: | Line 30: | ||
{{GridItem|Checklist item id = |Quantity text =|Article name =Black_Supershoes |Image=BlackSupershoes.png}} |
{{GridItem|Checklist item id = |Quantity text =|Article name =Black_Supershoes |Image=BlackSupershoes.png}} |
||
{{GridItem|Checklist item id = |Quantity text =|Article name =Blade_of_the_Throne |Image=Blade_of_the_Throne.png}} |
{{GridItem|Checklist item id = |Quantity text =|Article name =Blade_of_the_Throne |Image=Blade_of_the_Throne.png}} |
||
| ⚫ | |||
{{GridItem|Checklist item id = |Quantity text =|Article name =Blue_Ogrefish |Image=Blue_Ogrefish.png}} |
{{GridItem|Checklist item id = |Quantity text =|Article name =Blue_Ogrefish |Image=Blue_Ogrefish.png}} |
||
{{GridItem|Checklist item id = |Quantity text =|Article name =Blue_Wizard_Set#Hat |Image=BlueWizardHat.png}} |
{{GridItem|Checklist item id = |Quantity text =|Article name =Blue_Wizard_Set#Hat |Image=BlueWizardHat.png}} |
||
| ⚫ | |||
| ⚫ | |||
{{GridItem|Checklist item id = |Quantity text =|Article name =Bonefish |Image=Bonefish.png}} |
{{GridItem|Checklist item id = |Quantity text =|Article name =Bonefish |Image=Bonefish.png}} |
||
{{GridItem|Checklist item id = |Quantity text =|Article name =Boomba_Mushroom |Image=Boomba_Mushroom.png}} |
{{GridItem|Checklist item id = |Quantity text =|Article name =Boomba_Mushroom |Image=Boomba_Mushroom.png}} |
||
| Line 53: | Line 46: | ||
{{GridItem|Checklist item id = |Quantity text =|Article name =Clownbird_Feather |Image=ClownbirdFeather-0.png}} |
{{GridItem|Checklist item id = |Quantity text =|Article name =Clownbird_Feather |Image=ClownbirdFeather-0.png}} |
||
{{GridItem|Checklist item id = |Quantity text =|Article name =Ores#Bars |Image=Cobalt_Bar.png}} |
{{GridItem|Checklist item id = |Quantity text =|Article name =Ores#Bars |Image=Cobalt_Bar.png}} |
||
| ⚫ | |||
{{GridItem|Checklist item id = |Quantity text =|Article name = Crabsuit_Set#Headgear|Image=Crabsuit_Headgear.png}} |
{{GridItem|Checklist item id = |Quantity text =|Article name = Crabsuit_Set#Headgear|Image=Crabsuit_Headgear.png}} |
||
{{GridItem|Checklist item id = |Quantity text =|Article name = Crabsuit_Set#Legs|Image=Crabsuit_Legs.png}} |
{{GridItem|Checklist item id = |Quantity text =|Article name = Crabsuit_Set#Legs|Image=Crabsuit_Legs.png}} |
||
| Line 60: | Line 52: | ||
{{GridItem|Checklist item id = |Quantity text =|Article name = Croc_Rags|Image=Croc_Rags.png}} |
{{GridItem|Checklist item id = |Quantity text =|Article name = Croc_Rags|Image=Croc_Rags.png}} |
||
{{GridItem|Checklist item id = |Quantity text =|Article name = Crypt_Blade|Image=Crypt_Blade_Large.png}} |
{{GridItem|Checklist item id = |Quantity text =|Article name = Crypt_Blade|Image=Crypt_Blade_Large.png}} |
||
| ⚫ | |||
| ⚫ | |||
{{GridItem|Checklist item id = |Quantity text =|Article name = Dark_Hunter_Set#Legs|Image=DarkHunterLegs.png}} |
{{GridItem|Checklist item id = |Quantity text =|Article name = Dark_Hunter_Set#Legs|Image=DarkHunterLegs.png}} |
||
{{GridItem|Checklist item id = |Quantity text =|Article name = Dark_Hunter_Set#Top|Image=DarkHunterTop.png}} |
{{GridItem|Checklist item id = |Quantity text =|Article name = Dark_Hunter_Set#Top|Image=DarkHunterTop.png}} |
||
| Line 71: | Line 61: | ||
{{GridItem|Checklist item id = |Quantity text =|Article name = Dragon_King%27s_Lance|Image=Dragon_King%27s_Lance.png}} |
{{GridItem|Checklist item id = |Quantity text =|Article name = Dragon_King%27s_Lance|Image=Dragon_King%27s_Lance.png}} |
||
{{GridItem|Checklist item id = |Quantity text =|Article name = Emerald|Image=Emerald.png}} |
{{GridItem|Checklist item id = |Quantity text =|Article name = Emerald|Image=Emerald.png}} |
||
| ⚫ | |||
{{GridItem|Checklist item id = |Quantity text =|Article name = Esteemed_Heirloom|Image=Esteemed_Heirloom_Large.png}} |
{{GridItem|Checklist item id = |Quantity text =|Article name = Esteemed_Heirloom|Image=Esteemed_Heirloom_Large.png}} |
||
| ⚫ | |||
{{GridItem|Checklist item id = |Quantity text =|Article name = Extinction_Bank|Image=Extinction_Bank_Large.png}} |
{{GridItem|Checklist item id = |Quantity text =|Article name = Extinction_Bank|Image=Extinction_Bank_Large.png}} |
||
{{GridItem|Checklist item id = |Quantity text =|Article name = Eye_of_Monstrosity|Image=Eye_Of_Monstrosity.png}} |
{{GridItem|Checklist item id = |Quantity text =|Article name = Eye_of_Monstrosity|Image=Eye_Of_Monstrosity.png}} |
||
| Line 101: | Line 89: | ||
{{GridItem|Checklist item id = |Quantity text =|Article name = Giant%27s_Bone|Image=GiantsBone.png}} |
{{GridItem|Checklist item id = |Quantity text =|Article name = Giant%27s_Bone|Image=GiantsBone.png}} |
||
{{GridItem|Checklist item id = |Quantity text =|Article name = Giant_Mushroom_Stump|Image=Giant_Mushroom_Stump.png}} |
{{GridItem|Checklist item id = |Quantity text =|Article name = Giant_Mushroom_Stump|Image=Giant_Mushroom_Stump.png}} |
||
| ⚫ | |||
| − | {{GridItem|Checklist item id = |Quantity text =|Article name = Glow_Feather|Image=Glowbird_Feather.png}} |
||
{{GridItem|Checklist item id = |Quantity text =|Article name = Ores|Image=Gold_Ore.png}} |
{{GridItem|Checklist item id = |Quantity text =|Article name = Ores|Image=Gold_Ore.png}} |
||
{{GridItem|Checklist item id = |Quantity text =|Article name = Gold_Rapier|Image=Gold_Rapier.png}} |
{{GridItem|Checklist item id = |Quantity text =|Article name = Gold_Rapier|Image=Gold_Rapier.png}} |
||
| Line 111: | Line 97: | ||
{{GridItem|Checklist item id = |Quantity text =|Article name = Greater_Dungeon_Candy|Image=Greater_Dungeon_Candy_Large.png}} |
{{GridItem|Checklist item id = |Quantity text =|Article name = Greater_Dungeon_Candy|Image=Greater_Dungeon_Candy_Large.png}} |
||
{{GridItem|Checklist item id = |Quantity text =|Article name = Greater_Storms_Spellbook|Image=StormsSpellbook.png}} |
{{GridItem|Checklist item id = |Quantity text =|Article name = Greater_Storms_Spellbook|Image=StormsSpellbook.png}} |
||
| − | {{GridItem|Checklist item id = |Quantity text =|Article name = Green_Cape|Image=Green_Cape.png}} |
||
| − | {{GridItem|Checklist item id = |Quantity text =|Article name = Green_Crystal_Amulet|Image=Green_Crystal_Amulet.png}} |
||
{{GridItem|Checklist item id = |Quantity text =|Article name = Grey_Supershoes|Image=GreySupershoes.png}} |
{{GridItem|Checklist item id = |Quantity text =|Article name = Grey_Supershoes|Image=GreySupershoes.png}} |
||
| − | {{GridItem|Checklist item id = |Quantity text =|Article name = Guardian_Set#Helmet|Image=GuardianHelmet.png}} |
||
| − | {{GridItem|Checklist item id = |Quantity text =|Article name = Guardian_Set#Legs|Image=GuardianLegs.png}} |
||
| − | {{GridItem|Checklist item id = |Quantity text =|Article name = Guardian_Set#Lower%20Legs|Image=GuardianBoots.png}} |
||
| − | {{GridItem|Checklist item id = |Quantity text =|Article name = Guardian_Set#Torso|Image=GuardianTorso.png}} |
||
{{GridItem|Checklist item id = |Quantity text =|Article name = Guild_Knight_Set#Helmet|Image=Guild%20Knight%20Helmet%20Large.png}} |
{{GridItem|Checklist item id = |Quantity text =|Article name = Guild_Knight_Set#Helmet|Image=Guild%20Knight%20Helmet%20Large.png}} |
||
{{GridItem|Checklist item id = |Quantity text =|Article name = Guild_Knight_Set#Platebody|Image=Guild%20Knight%20Platebody%20Large.png}} |
{{GridItem|Checklist item id = |Quantity text =|Article name = Guild_Knight_Set#Platebody|Image=Guild%20Knight%20Platebody%20Large.png}} |
||
{{GridItem|Checklist item id = |Quantity text =|Article name = Guild_Knight_Set#Platelegs|Image=Guild%20Knight%20Platelegs%20Large.png}} |
{{GridItem|Checklist item id = |Quantity text =|Article name = Guild_Knight_Set#Platelegs|Image=Guild%20Knight%20Platelegs%20Large.png}} |
||
{{GridItem|Checklist item id = |Quantity text =|Article name = Hammer_Scraps|Image=Hammer_Scraps.png}} |
{{GridItem|Checklist item id = |Quantity text =|Article name = Hammer_Scraps|Image=Hammer_Scraps.png}} |
||
| − | {{GridItem|Checklist item id = |Quantity text =|Article name = Forgotten_Life_Set#Skater%20Helm|Image=Helm%20of%20the%20Skater%20Large.png#Skater%20Helm}} |
||
| − | {{GridItem|Checklist item id = |Quantity text =|Article name = Hightower_Ring|Image=Hightower_Ring.png}} |
||
{{GridItem|Checklist item id = |Quantity text =|Article name = Hungry_Flower|Image=Hungry_Flower.png}} |
{{GridItem|Checklist item id = |Quantity text =|Article name = Hungry_Flower|Image=Hungry_Flower.png}} |
||
{{GridItem|Checklist item id = |Quantity text =|Article name = Hunting_Rifle|Image=Hunter_Rifle.png}} |
{{GridItem|Checklist item id = |Quantity text =|Article name = Hunting_Rifle|Image=Hunter_Rifle.png}} |
||
| Line 134: | Line 112: | ||
{{GridItem|Checklist item id = |Quantity text =|Article name = Krunkston_Four|Image=Krunkston_Four_Large.png}} |
{{GridItem|Checklist item id = |Quantity text =|Article name = Krunkston_Four|Image=Krunkston_Four_Large.png}} |
||
{{GridItem|Checklist item id = |Quantity text =|Article name = Lagoonneck_Fish|Image=Lagoonneck_Fish_Large.png}} |
{{GridItem|Checklist item id = |Quantity text =|Article name = Lagoonneck_Fish|Image=Lagoonneck_Fish_Large.png}} |
||
| − | {{GridItem|Checklist item id = |Quantity text =|Article name = Lagoon_Spirit_Set#Head|Image=LagoonSpiritHead.png}} |
||
{{GridItem|Checklist item id = |Quantity text =|Article name = Lagoon_Spirit_Set#Legs|Image=LagoonSpiritLegs.png}} |
{{GridItem|Checklist item id = |Quantity text =|Article name = Lagoon_Spirit_Set#Legs|Image=LagoonSpiritLegs.png}} |
||
{{GridItem|Checklist item id = |Quantity text =|Article name = Lagoon_Spirit_Set#Torso|Image=LagoonSpiritTorso.png}} |
{{GridItem|Checklist item id = |Quantity text =|Article name = Lagoon_Spirit_Set#Torso|Image=LagoonSpiritTorso.png}} |
||
| Line 143: | Line 120: | ||
{{GridItem|Checklist item id = |Quantity text =|Article name = Moneybird_Feather|Image=Moneybird_Feather.png}} |
{{GridItem|Checklist item id = |Quantity text =|Article name = Moneybird_Feather|Image=Moneybird_Feather.png}} |
||
{{GridItem|Checklist item id = |Quantity text =|Article name = Monster_Mask|Image=Monster_Mask.png}} |
{{GridItem|Checklist item id = |Quantity text =|Article name = Monster_Mask|Image=Monster_Mask.png}} |
||
| − | {{GridItem|Checklist item id = |Quantity text =|Article name = Moon_Mushroom|Image=Moon_Mushroom.png}} |
||
{{GridItem|Checklist item id = |Quantity text =|Article name = Mud_Ring|Image=Mud_Ring.png}} |
{{GridItem|Checklist item id = |Quantity text =|Article name = Mud_Ring|Image=Mud_Ring.png}} |
||
{{GridItem|Checklist item id = |Quantity text =|Article name = Munsk_Chompers|Image=Munsk_Chompers.png}} |
{{GridItem|Checklist item id = |Quantity text =|Article name = Munsk_Chompers|Image=Munsk_Chompers.png}} |
||
| − | {{GridItem|Checklist item id = |Quantity text =|Article name = Mushroom_Parasol|Image=Mushroom_Parasol_Large.png}} |
||
{{GridItem|Checklist item id = |Quantity text =|Article name = Mushtache_Mushroom|Image=Mustache_Mushroom.png}} |
{{GridItem|Checklist item id = |Quantity text =|Article name = Mushtache_Mushroom|Image=Mustache_Mushroom.png}} |
||
{{GridItem|Checklist item id = |Quantity text =|Article name = Nightmare_Clock|Image=Nightmare_Clock_Large.png}} |
{{GridItem|Checklist item id = |Quantity text =|Article name = Nightmare_Clock|Image=Nightmare_Clock_Large.png}} |
||
| Line 169: | Line 144: | ||
{{GridItem|Checklist item id = |Quantity text =|Article name = Pipe_Rifle|Image=Pipe_Rifle.png}} |
{{GridItem|Checklist item id = |Quantity text =|Article name = Pipe_Rifle|Image=Pipe_Rifle.png}} |
||
{{GridItem|Checklist item id = |Quantity text =|Article name = Forgotten_Life_Set#Platebody|Image=Platebody%20of%20a%20Forgotten%20Life%20Large.png#Platebody}} |
{{GridItem|Checklist item id = |Quantity text =|Article name = Forgotten_Life_Set#Platebody|Image=Platebody%20of%20a%20Forgotten%20Life%20Large.png#Platebody}} |
||
| − | {{GridItem|Checklist item id = |Quantity text =|Article name = The_Earth_King_Regalia_Set#|Image=The%20Earth%20King%20Regalia%20Large.png}} |
||
{{GridItem|Checklist item id = |Quantity text =|Article name = Forgotten_Life_Set#Platelegs|Image=Platelegs%20of%20a%20Forgotten%20Life%20Large.png}} |
{{GridItem|Checklist item id = |Quantity text =|Article name = Forgotten_Life_Set#Platelegs|Image=Platelegs%20of%20a%20Forgotten%20Life%20Large.png}} |
||
| ⚫ | |||
| ⚫ | |||
{{GridItem|Checklist item id = |Quantity text =|Article name = The_Earth_King_Regalia_Set#Platelegs|Image=The%20Earth%20King%20Regalia%20Platelegs%20Large.png}} |
{{GridItem|Checklist item id = |Quantity text =|Article name = The_Earth_King_Regalia_Set#Platelegs|Image=The%20Earth%20King%20Regalia%20Platelegs%20Large.png}} |
||
| − | {{GridItem|Checklist item id = |Quantity text =|Article name = Plumbo_Flower|Image=PlumboFlower.png}} |
||
{{GridItem|Checklist item id = |Quantity text =|Article name = Poison_Construct_Set#Helmet|Image=Poison%20Construct%20Helmet%20Large.png}} |
{{GridItem|Checklist item id = |Quantity text =|Article name = Poison_Construct_Set#Helmet|Image=Poison%20Construct%20Helmet%20Large.png}} |
||
{{GridItem|Checklist item id = |Quantity text =|Article name = Poison_Construct_Set#Legs|Image=Poison%20Construct%20Legs%20Large.png}} |
{{GridItem|Checklist item id = |Quantity text =|Article name = Poison_Construct_Set#Legs|Image=Poison%20Construct%20Legs%20Large.png}} |
||
| Line 184: | Line 159: | ||
{{GridItem|Checklist item id = |Quantity text =|Article name = Razed_General_Set#Legs|Image=Razed%20General%20Legs.png}} |
{{GridItem|Checklist item id = |Quantity text =|Article name = Razed_General_Set#Legs|Image=Razed%20General%20Legs.png}} |
||
{{GridItem|Checklist item id = |Quantity text =|Article name = Razed_General_Set#Torso|Image=Razed%20General%20Torso.png}} |
{{GridItem|Checklist item id = |Quantity text =|Article name = Razed_General_Set#Torso|Image=Razed%20General%20Torso.png}} |
||
| − | {{GridItem|Checklist item id = |Quantity text =|Article name = Red_Cape|Image=Red_Cape.png}} |
||
{{GridItem|Checklist item id = |Quantity text =|Article name = Red_Clapper|Image=Red_Clapper_Large.png}} |
{{GridItem|Checklist item id = |Quantity text =|Article name = Red_Clapper|Image=Red_Clapper_Large.png}} |
||
{{GridItem|Checklist item id = |Quantity text =|Article name = Red_Supershoes|Image=RedSupershoes.png}} |
{{GridItem|Checklist item id = |Quantity text =|Article name = Red_Supershoes|Image=RedSupershoes.png}} |
||
| − | {{GridItem|Checklist item id = |Quantity text =|Article name = |
+ | {{GridItem|Checklist item id = |Quantity text =|Article name = Red Wizard Set#Top|Image=RedWizardRobeTop.png}} |
| − | {{GridItem|Checklist item id = |Quantity text =|Article name = Red_Wizard_Set#Bottom|Image=RedWizardRobeBottom.png}} |
||
| − | {{GridItem|Checklist item id = |Quantity text =|Article name = Red_Wizard_Set#Top|Image=RedWizardRobeTop.png}} |
||
| − | {{GridItem|Checklist item id = |Quantity text =|Article name = Rednal_Feather|Image=RednalFeather.png}} |
||
{{GridItem|Checklist item id = |Quantity text =|Article name = Rich_Man%27s_Delight|Image=Rich_Man%27s_Delight_Large.png}} |
{{GridItem|Checklist item id = |Quantity text =|Article name = Rich_Man%27s_Delight|Image=Rich_Man%27s_Delight_Large.png}} |
||
| − | {{GridItem|Checklist item id = |Quantity text =|Article name = Ring_of_Power|Image=Ring_of_Power.png}} |
||
{{GridItem|Checklist item id = |Quantity text =|Article name = Rotted_King%27s_Set#Escort|Image=Rotted%20King%27s%20Mask%20Large.png}} |
{{GridItem|Checklist item id = |Quantity text =|Article name = Rotted_King%27s_Set#Escort|Image=Rotted%20King%27s%20Mask%20Large.png}} |
||
{{GridItem|Checklist item id = |Quantity text =|Article name = Rotted_King%27s_Set#Mask|Image=Rotted%20King%27s%20Escort%20Large.png}} |
{{GridItem|Checklist item id = |Quantity text =|Article name = Rotted_King%27s_Set#Mask|Image=Rotted%20King%27s%20Escort%20Large.png}} |
||
| Line 199: | Line 169: | ||
{{GridItem|Checklist item id = |Quantity text =|Article name = Rusted_Coin_Scythe|Image=Rusted_Coin_Scythe_Large.png}} |
{{GridItem|Checklist item id = |Quantity text =|Article name = Rusted_Coin_Scythe|Image=Rusted_Coin_Scythe_Large.png}} |
||
{{GridItem|Checklist item id = |Quantity text =|Article name = Ores|Image=2b6c4d8973d31b0d66e7afe2a4fabfad.png}} |
{{GridItem|Checklist item id = |Quantity text =|Article name = Ores|Image=2b6c4d8973d31b0d66e7afe2a4fabfad.png}} |
||
| − | {{GridItem|Checklist item id = |Quantity text =|Article name = Seer%27s_Pendant_I|Image=Seer%27s_Pendant_I.png}} |
||
| − | {{GridItem|Checklist item id = |Quantity text =|Article name = Seer%27s_Pendant_II|Image=Seer%27s_Pendant_II.png}} |
||
| − | {{GridItem|Checklist item id = |Quantity text =|Article name = Shades|Image=Shades.png}} |
||
{{GridItem|Checklist item id = |Quantity text =|Article name = Shockjaw|Image=Shockjaw_Large.png}} |
{{GridItem|Checklist item id = |Quantity text =|Article name = Shockjaw|Image=Shockjaw_Large.png}} |
||
{{GridItem|Checklist item id = |Quantity text =|Article name = Spellbound_Mage_Set#Battledress|Image=Spellbound%20Mage%20Battledress%20Large.png}} |
{{GridItem|Checklist item id = |Quantity text =|Article name = Spellbound_Mage_Set#Battledress|Image=Spellbound%20Mage%20Battledress%20Large.png}} |
||
{{GridItem|Checklist item id = |Quantity text =|Article name = Spellbound_Mage_Set#Battleskirt|Image=Spellbound%20Mage%20Battleskirt%20Large.png}} |
{{GridItem|Checklist item id = |Quantity text =|Article name = Spellbound_Mage_Set#Battleskirt|Image=Spellbound%20Mage%20Battleskirt%20Large.png}} |
||
{{GridItem|Checklist item id = |Quantity text =|Article name = Spellbound_Mage_Set#Hood|Image=Spellbound%20Mage%20Hood%20Large.png}} |
{{GridItem|Checklist item id = |Quantity text =|Article name = Spellbound_Mage_Set#Hood|Image=Spellbound%20Mage%20Hood%20Large.png}} |
||
| − | {{GridItem|Checklist item id = |Quantity text =|Article name = Spider_Stilts|Image=SpiderStilts.png}} |
||
{{GridItem|Checklist item id = |Quantity text =|Article name = Spikeout_Set#Chestpiece|Image=SpikeoutChestpiece.png}} |
{{GridItem|Checklist item id = |Quantity text =|Article name = Spikeout_Set#Chestpiece|Image=SpikeoutChestpiece.png}} |
||
{{GridItem|Checklist item id = |Quantity text =|Article name = Spikeout_Set#Helmet|Image=SpikeoutHelmet.png}} |
{{GridItem|Checklist item id = |Quantity text =|Article name = Spikeout_Set#Helmet|Image=SpikeoutHelmet.png}} |
||
| Line 219: | Line 185: | ||
{{GridItem|Checklist item id = |Quantity text =|Article name = Strangeman%27s_Shell|Image=StrangemansShell.png}} |
{{GridItem|Checklist item id = |Quantity text =|Article name = Strangeman%27s_Shell|Image=StrangemansShell.png}} |
||
{{GridItem|Checklist item id = |Quantity text =|Article name = Straw_Trinket|Image=Straw_Trinket-0.png}} |
{{GridItem|Checklist item id = |Quantity text =|Article name = Straw_Trinket|Image=Straw_Trinket-0.png}} |
||
| − | {{GridItem|Checklist item id = |Quantity text =|Article name = i/The_Forgotten_Things_Set#Armor|Image=The%20Armor%20of%20Forgotten%20Things%20Large.png}} |
||
| − | {{GridItem|Checklist item id = |Quantity text = |Article name = The_Earth_King_Regalia_Set#Crown|Image=The%20Earth%20King%20Regalia%20Large.png}} |
||
{{GridItem|Checklist item id = |Quantity text = |Article name = The_Forgotten_Things_Set#Mask|Image=The%20Mask%20of%20Forgotten%20Things%20Large.png}} |
{{GridItem|Checklist item id = |Quantity text = |Article name = The_Forgotten_Things_Set#Mask|Image=The%20Mask%20of%20Forgotten%20Things%20Large.png}} |
||
| ⚫ | |||
{{GridItem|Checklist item id = |Quantity text = |Article name = The_Forgotten_Things_Set#Platelegs|Image=The%20Platelegs%20of%20Forgotten%20Things%20Large.png}} |
{{GridItem|Checklist item id = |Quantity text = |Article name = The_Forgotten_Things_Set#Platelegs|Image=The%20Platelegs%20of%20Forgotten%20Things%20Large.png}} |
||
{{GridItem|Checklist item id = |Quantity text = |Article name = The_Shirt_with_the_Big_Pocket|Image=The_Shirt_With_The_Big_Pocket_Large.png}} |
{{GridItem|Checklist item id = |Quantity text = |Article name = The_Shirt_with_the_Big_Pocket|Image=The_Shirt_With_The_Big_Pocket_Large.png}} |
||
| Line 239: | Line 204: | ||
{{GridItem|Checklist item id = |Quantity text = |Article name = Tri-Color_Necklace|Image=Tri-Color_Necklace.png}} |
{{GridItem|Checklist item id = |Quantity text = |Article name = Tri-Color_Necklace|Image=Tri-Color_Necklace.png}} |
||
{{GridItem|Checklist item id = |Quantity text = |Article name = Ultrablade|Image=Ultrablade.png}} |
{{GridItem|Checklist item id = |Quantity text = |Article name = Ultrablade|Image=Ultrablade.png}} |
||
| − | {{GridItem|Checklist item id = |Quantity text = |Article name = Vital_Pendant|Image=Vital_Pendant.png}} |
||
{{GridItem|Checklist item id = |Quantity text = |Article name = Void_Lord_Set#Chestpiece|Image=Void%20Lord%20Chestpiece%20Large.png}} |
{{GridItem|Checklist item id = |Quantity text = |Article name = Void_Lord_Set#Chestpiece|Image=Void%20Lord%20Chestpiece%20Large.png}} |
||
{{GridItem|Checklist item id = |Quantity text = |Article name = Void_Lord_Set#Helmet|Image=Void%20Lord%20Helmet%20Large.png}} |
{{GridItem|Checklist item id = |Quantity text = |Article name = Void_Lord_Set#Helmet|Image=Void%20Lord%20Helmet%20Large.png}} |
||
| Line 249: | Line 213: | ||
{{GridItem|Checklist item id = |Quantity text = |Article name = Water_Gem|Image=WaterGem.png}} |
{{GridItem|Checklist item id = |Quantity text = |Article name = Water_Gem|Image=WaterGem.png}} |
||
{{GridItem|Checklist item id = |Quantity text = |Article name = Weatherbird_Feather|Image=WeatherbirdFeather.png}} |
{{GridItem|Checklist item id = |Quantity text = |Article name = Weatherbird_Feather|Image=WeatherbirdFeather.png}} |
||
| − | {{GridItem|Checklist item id = |Quantity text = |Article name = White_Cape|Image=White_Cape.png}} |
||
{{GridItem|Checklist item id = |Quantity text = |Article name = Wisecrack_Set#Leggings|Image=Wisecrack%20Leggings%20Large.png}} |
{{GridItem|Checklist item id = |Quantity text = |Article name = Wisecrack_Set#Leggings|Image=Wisecrack%20Leggings%20Large.png}} |
||
{{GridItem|Checklist item id = |Quantity text = |Article name = Wisecrack_Set#Skull|Image=Wisecrack%20Skull%20Large.png}} |
{{GridItem|Checklist item id = |Quantity text = |Article name = Wisecrack_Set#Skull|Image=Wisecrack%20Skull%20Large.png}} |
||
| Line 265: | Line 228: | ||
{{GridItem|Checklist item id = |Quantity text =|Article name = Yaaxil_Crest|Image=Yaaxil_Crest.png}} |
{{GridItem|Checklist item id = |Quantity text =|Article name = Yaaxil_Crest|Image=Yaaxil_Crest.png}} |
||
{{GridItem|Checklist item id = |Quantity text =|Article name = Yaaxil_Flame|Image=Yaaxil_Flame.png}} |
{{GridItem|Checklist item id = |Quantity text =|Article name = Yaaxil_Flame|Image=Yaaxil_Flame.png}} |
||
| − | {{GridItem|Checklist item id = |Quantity text =|Article name = Yellow_Cape|Image=Yellow_Cape.png}} |
||
{{GridItem|Checklist item id = |Quantity text =|Article name = Zhuulaczar_Set#Armored_Body|Image=ZhuuTorso.png}} |
{{GridItem|Checklist item id = |Quantity text =|Article name = Zhuulaczar_Set#Armored_Body|Image=ZhuuTorso.png}} |
||
{{GridItem|Checklist item id = |Quantity text =|Article name = Zhuulaczar_Set#Crown|Image=Zhuu.png}} |
{{GridItem|Checklist item id = |Quantity text =|Article name = Zhuulaczar_Set#Crown|Image=Zhuu.png}} |
||
| Line 284: | Line 246: | ||
{{GridItem|Checklist item id = |Quantity text =|Article name =Detour_Cone|Image=Detour_Cone.png}} |
{{GridItem|Checklist item id = |Quantity text =|Article name =Detour_Cone|Image=Detour_Cone.png}} |
||
{{GridItem|Checklist item id = |Quantity text =|Article name =Dragon King's Lance |Image=Dragon King's Lance.png}} |
{{GridItem|Checklist item id = |Quantity text =|Article name =Dragon King's Lance |Image=Dragon King's Lance.png}} |
||
| ⚫ | |||
{{GridItem|Checklist item id = |Quantity text =|Article name = Forgotten_Feather|Image=ForgottenFeather.png}} |
{{GridItem|Checklist item id = |Quantity text =|Article name = Forgotten_Feather|Image=ForgottenFeather.png}} |
||
{{GridItem|Checklist item id = |Quantity text =|Article name =Skip Tickets|Image=Floor 40 Skip Ticket.png}} |
{{GridItem|Checklist item id = |Quantity text =|Article name =Skip Tickets|Image=Floor 40 Skip Ticket.png}} |
||
| Line 290: | Line 253: | ||
{{GridItem|Checklist item id = |Quantity text =|Article name =Frontier_Stargun|Image=Frontier_Stargun.png}} |
{{GridItem|Checklist item id = |Quantity text =|Article name =Frontier_Stargun|Image=Frontier_Stargun.png}} |
||
{{GridItem|Checklist item id = |Quantity text =|Article name =Funky_Driftlander|Image=Funky Driftlander.png}} |
{{GridItem|Checklist item id = |Quantity text =|Article name =Funky_Driftlander|Image=Funky Driftlander.png}} |
||
| − | {{GridItem|Checklist item id = |Quantity text =|Article name = Furnace_Mummy_Set#Helmet|Image=FurnaceMummyHelmet.png}} |
||
{{GridItem|Checklist item id = |Quantity text =|Article name = Furnace_Mummy_Set#Platebody|Image=FurnaceMummyPlatebody.png}} |
{{GridItem|Checklist item id = |Quantity text =|Article name = Furnace_Mummy_Set#Platebody|Image=FurnaceMummyPlatebody.png}} |
||
{{GridItem|Checklist item id = |Quantity text =|Article name = Furnace_Mummy_Set#Platelegs|Image=FurnaceMummyPlatelegs.png}} |
{{GridItem|Checklist item id = |Quantity text =|Article name = Furnace_Mummy_Set#Platelegs|Image=FurnaceMummyPlatelegs.png}} |
||
| Line 300: | Line 262: | ||
{{GridItem|Checklist item id = |Quantity text =|Article name = Gauntlet_Fury_Set#Platelegs|Image=Gauntlet%20Fury%20Platelegs%20Large.png}} |
{{GridItem|Checklist item id = |Quantity text =|Article name = Gauntlet_Fury_Set#Platelegs|Image=Gauntlet%20Fury%20Platelegs%20Large.png}} |
||
{{GridItem|Checklist item id = |Quantity text = 25-50|Article name =Greater Dungeon Candy|Image=Greater Dungeon Candy.png}} |
{{GridItem|Checklist item id = |Quantity text = 25-50|Article name =Greater Dungeon Candy|Image=Greater Dungeon Candy.png}} |
||
| − | {{GridItem|Checklist item id = |Quantity text =|Article name = |
+ | {{GridItem|Checklist item id = |Quantity text =|Article name = Guild_Knight_Set#Helmet|Image=Guild%20Knight%20Helmet%20Large.png}} |
| ⚫ | |||
| ⚫ | |||
{{GridItem|Checklist item id = |Quantity text =|Article name = Knight%27s_Army_Set#Core|Image=Knight%27s%20Army%20Core%20Large.png}} |
{{GridItem|Checklist item id = |Quantity text =|Article name = Knight%27s_Army_Set#Core|Image=Knight%27s%20Army%20Core%20Large.png}} |
||
{{GridItem|Checklist item id = |Quantity text =|Article name = Knight%27s_Army_Set#Platebody|Image=Knight%27s%20Army%20Platebody%20Large.png}} |
{{GridItem|Checklist item id = |Quantity text =|Article name = Knight%27s_Army_Set#Platebody|Image=Knight%27s%20Army%20Platebody%20Large.png}} |
||
| Line 312: | Line 276: | ||
{{GridItem|Checklist item id = |Quantity text =|Article name = Forgotten_Life_Set#Platebody|Image=Platebody%20of%20a%20Forgotten%20Life%20Large.png#Platebody}} |
{{GridItem|Checklist item id = |Quantity text =|Article name = Forgotten_Life_Set#Platebody|Image=Platebody%20of%20a%20Forgotten%20Life%20Large.png#Platebody}} |
||
{{GridItem|Checklist item id = |Quantity text =|Article name = Forgotten_Life_Set#Platelegs|Image=Platelegs%20of%20a%20Forgotten%20Life%20Large.png}} |
{{GridItem|Checklist item id = |Quantity text =|Article name = Forgotten_Life_Set#Platelegs|Image=Platelegs%20of%20a%20Forgotten%20Life%20Large.png}} |
||
| ⚫ | |||
| ⚫ | |||
| ⚫ | |||
{{GridItem|Checklist item id = |Quantity text =|Article name = Poison_Construct_Set#Helmet|Image=Poison%20Construct%20Helmet%20Large.png}} |
{{GridItem|Checklist item id = |Quantity text =|Article name = Poison_Construct_Set#Helmet|Image=Poison%20Construct%20Helmet%20Large.png}} |
||
{{GridItem|Checklist item id = |Quantity text =|Article name = Poison_Construct_Set#Legs|Image=Poison%20Construct%20Legs%20Large.png}} |
{{GridItem|Checklist item id = |Quantity text =|Article name = Poison_Construct_Set#Legs|Image=Poison%20Construct%20Legs%20Large.png}} |
||
{{GridItem|Checklist item id = |Quantity text =|Article name = Poison_Construct_Set#Torso|Image=Poison%20Construct%20Torso%20Large.png}} |
{{GridItem|Checklist item id = |Quantity text =|Article name = Poison_Construct_Set#Torso|Image=Poison%20Construct%20Torso%20Large.png}} |
||
| − | {{GridItem|Checklist item id = |Quantity text =|Article name = Razed_General_Set#Hat|Image=Razed%20General%20Hat.png}} |
||
{{GridItem|Checklist item id = |Quantity text =|Article name = Razed_General_Set#Legs|Image=Razed%20General%20Legs.png}} |
{{GridItem|Checklist item id = |Quantity text =|Article name = Razed_General_Set#Legs|Image=Razed%20General%20Legs.png}} |
||
{{GridItem|Checklist item id = |Quantity text =|Article name = Razed_General_Set#Torso|Image=Razed%20General%20Torso.png}} |
{{GridItem|Checklist item id = |Quantity text =|Article name = Razed_General_Set#Torso|Image=Razed%20General%20Torso.png}} |
||
| Line 324: | Line 290: | ||
{{GridItem|Checklist item id = |Quantity text =|Article name = Spellbound_Mage_Set#Battleskirt|Image=Spellbound%20Mage%20Battleskirt%20Large.png}} |
{{GridItem|Checklist item id = |Quantity text =|Article name = Spellbound_Mage_Set#Battleskirt|Image=Spellbound%20Mage%20Battleskirt%20Large.png}} |
||
{{GridItem|Checklist item id = |Quantity text =|Article name = Spellbound_Mage_Set#Hood|Image=Spellbound%20Mage%20Hood%20Large.png}} |
{{GridItem|Checklist item id = |Quantity text =|Article name = Spellbound_Mage_Set#Hood|Image=Spellbound%20Mage%20Hood%20Large.png}} |
||
| ⚫ | |||
| ⚫ | |||
| ⚫ | |||
{{GridItem|Checklist item id = |Quantity text =|Article name = i/The_Forgotten_Things_Set#Armor|Image=The%20Armor%20of%20Forgotten%20Things%20Large.png}} |
{{GridItem|Checklist item id = |Quantity text =|Article name = i/The_Forgotten_Things_Set#Armor|Image=The%20Armor%20of%20Forgotten%20Things%20Large.png}} |
||
{{GridItem|Checklist item id = |Quantity text = |Article name = The_Forgotten_Things_Set#Mask|Image=The%20Mask%20of%20Forgotten%20Things%20Large.png}} |
{{GridItem|Checklist item id = |Quantity text = |Article name = The_Forgotten_Things_Set#Mask|Image=The%20Mask%20of%20Forgotten%20Things%20Large.png}} |
||
| Line 331: | Line 300: | ||
{{GridItem|Checklist item id = |Quantity text = |Article name = The_Vengeful_Visage_Set#Bottoms|Image=The%20Vengeful%20Visage%20Bottoms%20Large.png}} |
{{GridItem|Checklist item id = |Quantity text = |Article name = The_Vengeful_Visage_Set#Bottoms|Image=The%20Vengeful%20Visage%20Bottoms%20Large.png}} |
||
{{GridItem|Checklist item id = |Quantity text = |Article name = The_Vengeful_Visage_Set#Top|Image=The%20Vengeful%20Visage%20Top%20Large.png}} |
{{GridItem|Checklist item id = |Quantity text = |Article name = The_Vengeful_Visage_Set#Top|Image=The%20Vengeful%20Visage%20Top%20Large.png}} |
||
| − | {{GridItem|Checklist item id = |Quantity text =|Article name = |
+ | {{GridItem|Checklist item id = |Quantity text = |Article name = Tower_Armor_Platebody|Image=Tower_Armor_Platebody_Large.png}} |
| ⚫ | |||
{{GridItem|Checklist item id = |Quantity text =|Article name = Traveler Plant|Image=TravelerPlant-0.png}} |
{{GridItem|Checklist item id = |Quantity text =|Article name = Traveler Plant|Image=TravelerPlant-0.png}} |
||
{{GridItem|Checklist item id = |Quantity text =|Article name = Traveling Human Element|Image=Traveling Human Element.png}} |
{{GridItem|Checklist item id = |Quantity text =|Article name = Traveling Human Element|Image=Traveling Human Element.png}} |
||
Revision as of 05:06, 29 March 2020
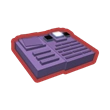
Dungeon Rewards Chest
This article will mainly discuss the list of the many rewards that can be obtained from the Otherworld Tower dungeon, located in The Town of Right and Wrong. Many of these items will be listed with their selling prices, as well as other information/details about the particular collectible/item obtained from the dungeon. Each item/collectible is given to the players if they successfully managed to complete every 5 floors.
Notices
- These will not include any drops that came from the dungeon mobs and is strictly meant for the rewards that are stored in the chest every 5 floors
- This article will also include the 'final' reward after the players managed to defeat Mr.58, also known as the Soul of the Frontier. These are often considered to be rare items, many of which are either beneficial or even perhaps, useless by some players.
- Keep in mind that more than one item can appear on both lists. For example, the Frontier Spellbook can be obtained as a final reward or as one of the many default rewards.
- For more information about the Otherworld Tower dungeon, click or press on the phrase, Otherworld Tower.
- Information regarding reward percentages can be accessed by clicking this link --> Pastebin List
List of Dungeon Rewards
The list of dungeon rewards that are given to the players every 5 floors or so. It is listed alphabetically.


List of Final Rewards
The list of 'final' rewards that are given to the players after returning to the Frontier. Rewarded to players after killing the final boss of the Otherworld Tower dungeon, Mr.58/Soul of the Frontier. In other words, a singular item given to the players as soon as they return to the Frontier.