mNo edit summary Tag: Visual edit |
(Added a 'fight' section and fixed some grammar and such.) Tag: Visual edit |
||
| Line 8: | Line 8: | ||
When you first join Fantastic Frontier, you'll probably have no idea on what you should do in the Frontier. The map appears to be massive and the players are free to do whatever they want in the Frontier. Your main goal at the start should be simple and something that you can handle. Good goals include getting the best gear and equipment in-game, become rich with tons of gold, or record every collectible in each section of the Itempedia. Once you've decided on the main goal that you want to focus on, you can get to work. |
When you first join Fantastic Frontier, you'll probably have no idea on what you should do in the Frontier. The map appears to be massive and the players are free to do whatever they want in the Frontier. Your main goal at the start should be simple and something that you can handle. Good goals include getting the best gear and equipment in-game, become rich with tons of gold, or record every collectible in each section of the Itempedia. Once you've decided on the main goal that you want to focus on, you can get to work. |
||
| − | If you are trying to focus on getting the best equipment and gears, you will need to obtain tons of gold. How exactly do you get gold? Well, there are many ways to obtain them. Easier, but time-consuming methods would include mining ores, harvesting, fishing, and slaying monsters. Out of these methods, harvesting plants and creatures will earn you the most, as the rarest plants can sell up to a million gold! |
+ | If you are trying to focus on getting the best equipment and gears, you will need to obtain tons of gold. How exactly do you get gold? Well, there are many ways to obtain them. Easier, but time-consuming methods would include mining ores, harvesting, fishing, and slaying monsters. Out of these methods, harvesting plants and creatures will earn you the most, as the rarest plants can sell up to a million gold! However, you will need luck and lots of patience to find these harvestables. Fishing is also noted to be an easy method, because many fishing locations are somewhat safe during both the day and night. Mining can also be a beneficial method if you want to craft ore-based armor sets to get an average armor set that provides some protection/defense. Slaying monsters is considered to be one of the better methods to obtain gold, but this goal cannot be reached until you are able to obtain decent gear and equipment. |
=== How Do I Earn Gold Fast? === |
=== How Do I Earn Gold Fast? === |
||
| Line 18: | Line 18: | ||
=== How Do I Sell? === |
=== How Do I Sell? === |
||
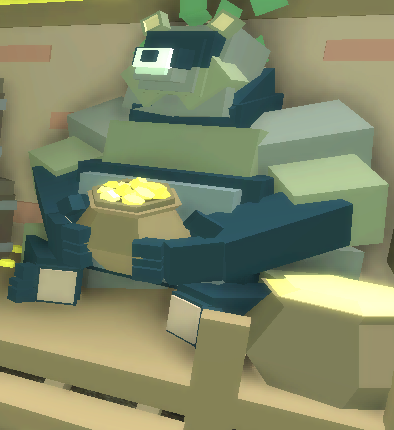
[[File:Big Box.png|thumb|157x157px|Big Box, the selling vendor at Topple Town.]] |
[[File:Big Box.png|thumb|157x157px|Big Box, the selling vendor at Topple Town.]] |
||
| − | To sell your loot that was collected during your adventures, you will need to visit one of the two sanctuaries of the Frontier; [[Topple Town]] or [[The Town of Right and Wrong]]. If you were to go to Topple Town, you must head to the entrance in front of [[Topple Hill]], and from there, you should find a big raccoon named [[Big Box]]. You are then expected to interact with Big Box in order to get a pop-up screen labeled as "Item Selling" where you can now sell your loots. The Sell button will sell the specific highlighted item that you selected, while the Sell All Button will sell the specific highlighted item that you had selected. For example, if you were to have 3 Ratdog Teeth and press/click the Sell All Button, it will automatically sell all of the Ratdog Teeth in your inventory. If you were to go to The Town of Right and Wrong, you must head to the fountain and look at the front entrance of the Illusionary Inn/The Inn Behind All Those Doors. You will then see a red panda known as [[Little Chelli]]. Just like Big Box, |
+ | To sell your loot that was collected during your adventures, you will need to visit one of the two sanctuaries of the Frontier; [[Topple Town]] or [[The Town of Right and Wrong]]. If you were to go to Topple Town, you must head to the entrance in front of [[Topple Hill]], and from there, you should find a big raccoon named [[Big Box]]. You are then expected to interact with Big Box in order to get a pop-up screen labeled as "Item Selling" where you can now sell your loots. The Sell button will sell the specific highlighted item that you selected, while the Sell All Button will sell the specific highlighted item that you had selected. For example, if you were to have 3 Ratdog Teeth and press/click the Sell All Button, it will automatically sell all of the Ratdog Teeth in your inventory. If you were to go to The Town of Right and Wrong, you must head to the fountain and look at the front entrance of the Illusionary Inn/The Inn Behind All Those Doors. You will then see a red panda known as [[Little Chelli]]. Just like Big Box, he is also a selling vendor that enables the player to sell their loot. Most items are typically sold around 10% of its original value. This does not, however, mean that you should keep items that you don't need, since most harvestables have no use other than to be sold, and there is no trade system in the game. |
=== Fishing === |
=== Fishing === |
||
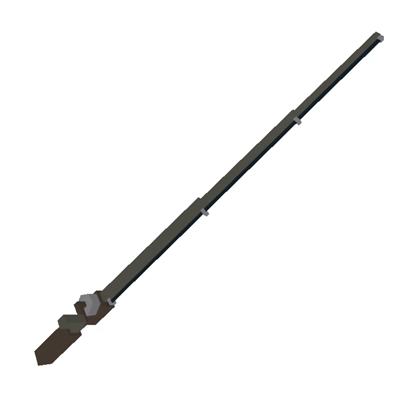
[[File:Basic Fishing Rod.png|left|thumb|104x104px|The basic fishing rod.]] |
[[File:Basic Fishing Rod.png|left|thumb|104x104px|The basic fishing rod.]] |
||
| − | If you plan on taking on the profession of fishing, you will need to have a fishing rod. Fishing is not a very reliable money source but is relatively safe. [[Fishing Rods]] can be purchased from two vendors; [[Luhr]] and [[Martin the Carp]]. Luhr sells the cheaper and basic rods that enable players to begin fishing while Martin the Carp sell the expensive and advanced rods that will better increase the catch rate, as well as getting rarer fishes. In order to find Luhr, the player is expected to head past Hunter Jack's shop. After passing by the shop, the player should take a left, instead of taking the bridge in order to find Luhr near the small docks of [[Topple Lake]]. Topple Lake contains a variety of common fishes, as well as having a few rare fishes lurking in the waters. The fishes that you are most likely to catch in Topple Lake would be the Stanfsih, Mudfish, and the Bass. You will still occasionally catch Sand Slimes and Conglomerates as well. In order to find rarer fishes, the player is expected to venture further into the Frontier, entering dangerous areas such as The Pits or the Frigid Waste. |
+ | If you plan on taking on the profession of fishing, you will need to have a fishing rod. Fishing is not a very reliable money source, but is relatively safe. [[Fishing Rods]] can be purchased from two vendors; [[Luhr]] and [[Martin the Carp]]. Luhr sells the cheaper and basic rods that enable players to begin fishing while Martin the Carp sell the expensive and advanced rods that will better increase the catch rate, as well as getting rarer fishes. In order to find Luhr, the player is expected to head past Hunter Jack's shop. After passing by the shop, the player should take a left, instead of taking the bridge in order to find Luhr near the small docks of [[Topple Lake]]. Topple Lake contains a variety of common fishes, as well as having a few rare fishes lurking in the waters. The fishes that you are most likely to catch in Topple Lake would be the Stanfsih, Mudfish, and the Bass. You will still occasionally catch Sand Slimes and Conglomerates as well. In order to find rarer fishes, the player is expected to venture further into the Frontier, entering dangerous areas such as The Pits or the Frigid Waste. |
[[File:Luhr.png|thumb|147x147px|Luhr at Topple Lake]] |
[[File:Luhr.png|thumb|147x147px|Luhr at Topple Lake]] |
||
In order to find Martin the Carp, the player is expected to head down into Rubble Spring, the place where the waterfall of Topple Lake enters, being lead into many streams and rivers. Martin the Carp can be found specifically in the spring (lake) of Rubble Spring, on his porch of the cottage. From there, players can purchase better fishing rods from Martin the Carp once they have enough gold. |
In order to find Martin the Carp, the player is expected to head down into Rubble Spring, the place where the waterfall of Topple Lake enters, being lead into many streams and rivers. Martin the Carp can be found specifically in the spring (lake) of Rubble Spring, on his porch of the cottage. From there, players can purchase better fishing rods from Martin the Carp once they have enough gold. |
||
| Line 29: | Line 29: | ||
=== Harvesting (Plant Picking) === |
=== Harvesting (Plant Picking) === |
||
| − | + | Harvestables are scattered throughout the Frontier, while players search for them in order to harvest them. This is considered to be one of the profitable methods of obtaining gold, but is not very reliable as rarer harvestables tend to based off on the player's 'luck'. There are a few good methods for harvesting harvestable that can earn you close to 100,000 gold. A suggested route is to head up to Topple Lake and go down the hill on the left side of the Ancient Castle/Stone/Forest Bridge. From there, you will find a cave passageway known as [[Clamstack Cave]] that may contain up to at least 12 Clamstacks that spawn inside the cave. Each Clamstack is sold for 2,500 gold, making it a quick profitable way to obtain gold. Another popular alternative is by heading to Celestial Field and can be accessed through ground travel. An easier way to get there is by taking the airship to The Town of Right and Wrong and head out to the fields, collecting Sun Flowers and Moon Flowers (which sell for 2,000 gold each) that are seen throughout the fields, although keep in mind that other mobs will attack you if you are not careful. |
|
=== Mining === |
=== Mining === |
||
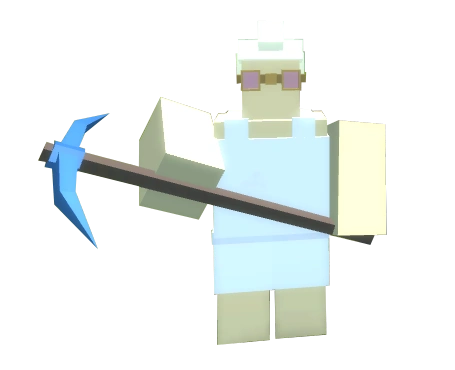
[[File:Character With Cobalt Pickaxe.PNG|thumb|138x138px|A player holding a Cobalt Pickaxe.]] |
[[File:Character With Cobalt Pickaxe.PNG|thumb|138x138px|A player holding a Cobalt Pickaxe.]] |
||
| − | If you plan on taking a profession of mining, you will need to have a pickaxe. [[Pickaxes]] can be purchased from [[Benny Oreman]] in his shop at Topple Town. In order to get there, it is expected for you to head up the slope behind the Red Ogre Inn and it would be the first building you will see on the right, marked with a pickaxe sign. The value of the pickaxe does not affect how many ores you will get or whether you can mine the ores or not |
+ | If you plan on taking a profession of mining, you will need to have a pickaxe. [[Pickaxes]] can be purchased from [[Benny Oreman]] in his shop at Topple Town. In order to get there, it is expected for you to head up the slope behind the Red Ogre Inn and it would be the first building you will see on the right, marked with a pickaxe sign. The value of the pickaxe does not affect how many ores you will get or whether you can mine the ores or not, but more expensive pickaxes tend to increase the mining speed. For this reason, it is suggested to buy a cheaper pickaxe if you are having trouble obtaining gold. In Topple Town, there are a couple of mines that players have access to; one mine can be found near the waterfall of Topple Lake, where the [[Ancient Miner]] is seen laying on the ground, one secret mine that is accessible by jumping into a leaf-covered gap behind several buildings leaning to the castle walls of the purchasable Castle Home or by entering the rock opening, and lastly, one behind Benny Oreman's shop, accessible by ladder and ground travel and is considered to be the safest mining spot out of the three. |
[[File:Gold Ore Unmined.png|thumb|132x132px|An unmined gold ore.]] |
[[File:Gold Ore Unmined.png|thumb|132x132px|An unmined gold ore.]] |
||
| − | Alternative mining spots that you can head to |
+ | Alternative mining spots that you can head to include [[Greenhorn Grove]] and [[Blackrock Mountain]]. Greenhorn Grove has a small mining area if the player takes the pathway leading downwards into the grove. This is considered to be slightly safer than heading to Blackrock Mountain, a place notorious for being infested by tons of mobs. Blackrock Mountain does have its benefits as it is home to the Black Ants and in that particular location, players are able to mine coals, emeralds, and gold ores, as well as other ores scattered throughout the areas of Blackrock Mountain. It is suggested to target gold, onyx, ruby, sapphire, and emerald deposits as these are worth the most. |
[[File:Topple Town Anvil.png|thumb|97x97px|The anvil seen in Topple Town.]] |
[[File:Topple Town Anvil.png|thumb|97x97px|The anvil seen in Topple Town.]] |
||
In order to make the most out of what you had mined, return back to Topple Town and head to the area where the blacksmith ([[Reus The Smith|Reus the Smith]]) can be found at. You can use the outdoor furnace provided in Topple Town and smelt the mined ores into bars with the usage of coals. You can also use the anvil to craft the bars into ore-based armor sets, although this will not increase the value after it had been crafted into an armor piece. Ruby, Sapphire, and Emerald cannot be smelted and is expected to be sold right away after finding Big Box or Little Chelli. |
In order to make the most out of what you had mined, return back to Topple Town and head to the area where the blacksmith ([[Reus The Smith|Reus the Smith]]) can be found at. You can use the outdoor furnace provided in Topple Town and smelt the mined ores into bars with the usage of coals. You can also use the anvil to craft the bars into ore-based armor sets, although this will not increase the value after it had been crafted into an armor piece. Ruby, Sapphire, and Emerald cannot be smelted and is expected to be sold right away after finding Big Box or Little Chelli. |
||
| Line 41: | Line 41: | ||
=== Armor === |
=== Armor === |
||
[[File:Bronze Helmet.png|thumb|108x108px|A bronze helmet.]] |
[[File:Bronze Helmet.png|thumb|108x108px|A bronze helmet.]] |
||
| − | [[Armor]] is considered to be controversial, as enemies tend to deal large amounts of damage, and even some of the better armor sets will not protect the wearer from |
+ | [[Armor]] is considered to be controversial, as enemies tend to deal large amounts of damage, and even some of the better armor sets will not protect the wearer from many hits inflicted upon by the enemies of the Frontier. While choosing an armor set or piece, it is suggested to first decide on what you want to become. There are three damage types to choose from: Melee, Ranged, and Magic. Once you have decided on a damage type that you want to specialize in, you should look for the armor set(s) suitable for that damage type, such as armor that boosts magic damage, or all types of damage. Using armor sets that only provide regeneration is not recommended, but could be beneficial due to the high amounts of damage inflicted by the enemies. |
| − | An armor piece that fits into the Feet slot that can provide benefits for the player is the Spider Stilts, a rare drop from the [[Corrupted Wizard]] (Spider Boss) at Blackrock Mountain, as these stilts provide 40 jump power and 4 |
+ | An strong armor piece that fits into the Feet slot that can provide benefits for the player is the Spider Stilts, a rare drop from the [[Corrupted Wizard]] (Spider Boss) at Blackrock Mountain, as these stilts provide 40 jump power, 7 walk speed and 4 armor. Jump Boots will also be suitable for beginner players if they plan on jumping over high-peaked areas or bumpy, rough landscapes. |
For armor sets, try focusing on the armor sets that will best be suited for your damage type. For example, magic users will focus on magic-based armor sets like the Wizard Robe sets, while ranged users will focus on ranged-based armor sets like the Dark Hunter set. |
For armor sets, try focusing on the armor sets that will best be suited for your damage type. For example, magic users will focus on magic-based armor sets like the Wizard Robe sets, while ranged users will focus on ranged-based armor sets like the Dark Hunter set. |
||
| − | It is not suggested to craft ore-based armor sets as it does not have any perks or eye-catching qualities that would benefit the players, deeming them as less useful than armor sets that are bought from vendors. |
+ | It is not suggested to craft or buy ore-based armor sets as it does not have any perks or eye-catching qualities that would benefit the players, deeming them as less useful than armor sets that are bought from vendors. ''The onyx set is far from the best set in the game!'' |
| + | |||
| + | Note that defence is calculated as damage reduction, in that your damage reduction is you defense times 90%, or 9/10. Therefore, the more armor you have in total, the more one point of defence will impact on the damage you take. Regeneration is calculated as a percentage of your maximum health regenerated per second. For example, if you have a regeneration of 1 and a maximum health of 200, you will regenerate 2 hp (1% of your maximum hp) per second. |
||
| + | |||
| + | === Fighting === |
||
| + | If you are new to this game, you will probably be very excited about purchasing a set of armor and a sword, and then venturing out into the great unknown to have epic fights against monsters, gaining loot and gear in the process. Unfortunately, to start Fantastic Frontier well, you will have to adopt a very different playing style, one that is different to the way you might play other, similar games. |
||
| + | |||
| + | The most important thing to know is that as a beginner, ''most mobs in the game will kill you in one hit'', making you lose all unequipped items in your inventory save for a select few such as ammo and firefly stones. If you see any non-humanoid figure, it would be in your best interests to 'run for the hills'. [[Warning Willy]] should not be ignored! |
||
| + | |||
| + | Unlike most other games on Roblox, you should probably not spend your money on any ore-based set or weapon. A greatsword of any tier won't help you much if your armor gives any less than 80 defence, which is not achieveable using any ore-based set. Instead, a ranged weapon should be your first priority, as it will give you a fighting chance against some of the weaker mobs. Hunter Jack will sell you a crossbow for 10,000 gold, which does 30 damage per hit. You can, of course, also save directly for a stronger weapon or even magic, but do know that the cheapest magic costs 750,000 gold and is not much stronger than the crossbow without damage boosts (its base damage is 60, the same as the crossbow if you use the bolts sold by [[Arbewhy]]). |
||
| + | |||
| + | Completing the [[Arnold Slime Quest]] will start you off nicely with a Pipe Rifle, a gun that does 140 damage per shot, which is normally worth 350,000 gold. Simply click on the link provided for a guide for that quest. |
||
| + | |||
| + | A general guide to fighting is as follows: |
||
| + | # Usually, the more health a mob has, the better its loot. It will usually be worth your time to kill a very tanky mob (unless that mob happens to be the [[Red Croc Man]]). |
||
| + | # Avoid getting hit at all costs. Even if you have a stronger set of armor than any ore-based set, a hit from a stronger mob will still take away a large portion of your maximum health. Health does not regenerate naturally! |
||
| + | # If a mob moves faster than you, you can bait out its attack, then quickly run backwards, giving you time and distance to run or attack back. |
||
| + | # All attacks consume stamina. You should manage your stamina carefully, especially if you need to sprint in order to outrun a mob. |
||
| + | # Fighting melee is, in essense, trading your health for the monster's, unless you are extremely skilled. Since monsters are usually much tankier than players, this is generally a bad deal. |
||
=== Damage Types === |
=== Damage Types === |
||
==== Melee, Ranged, or Magic? ==== |
==== Melee, Ranged, or Magic? ==== |
||
| − | Fantastic Frontier currently has three different playstyles: Melee, Ranged, and Magic. Due to how Fantastic Frontier is designed, magic is considered to be the best choice to go for, as its unlimited attacks and a decent amount of distance mean that most of the enemies can easily be defeated from a distance. If you had liked a cheaper form of ranged attacks, ranged weapons are the way to go |
+ | Fantastic Frontier currently has three different playstyles: Melee, Ranged, and Magic. Due to how Fantastic Frontier is designed, magic is considered to be the best choice to go for, as its unlimited attacks and a decent amount of distance mean that most of the enemies can easily be defeated from a distance. If you had liked a cheaper form of ranged attacks, ranged weapons are the way to go. However, the ammo will cost you tons of gold if used improperly. It should be noted that the ranged class will deal the highest damage per second with endgame weapons and armor, and so is considered the strongest class endgame. Melee is not advised for beginner players until they begin to understand and strategize while they are venturing in the Frontier. |
| − | Melee can still be better than magic in some ways. The daggers could dash with its long range to help avoid some attacks while getting one or two hits on your targets. Although having low damage, daggers can attack many enemies multiple times, up to five times if you are fortunate enough and a good dagger can deal more DPS (damage per second) than a greatsword. The basic daggers, from Bronze to Onyx, can be bought from [[Hunter Jack]] in Topple Town. |
+ | Melee can still be better than magic in some ways. The daggers could dash with its long range to help avoid some attacks while getting one or two hits on your targets. Although having low damage, daggers can attack many enemies multiple times, up to five times if you are fortunate enough and a good dagger can deal more DPS (damage per second) than a greatsword. The basic daggers, from Bronze to Onyx, can be bought from [[Hunter Jack]] in Topple Town. However, daggers will cease to be useful once you reach midgame due to their low damage. |
== Tips/Tricks == |
== Tips/Tricks == |
||
| Line 61: | Line 79: | ||
* Don't always go with a tanky route! |
* Don't always go with a tanky route! |
||
* Do not craft ore-based armor sets in order to gain benefits. |
* Do not craft ore-based armor sets in order to gain benefits. |
||
| − | * Do not use armor sets that do not benefit your damage type in any way. For example, do not wear melee-based armor sets if you are a magic user. |
+ | * Do not use armor sets that do not benefit your damage type in any way. For example, do not wear melee-based armor sets if you are a magic user, even if the armor gives more defence. |
* In order to teleport back to your home, open your Inventory and press the icon depicting a house. |
* In order to teleport back to your home, open your Inventory and press the icon depicting a house. |
||
[[Category:Lists and Guides]] |
[[Category:Lists and Guides]] |
||
Revision as of 07:57, 16 November 2018
Welcome, new players, to the Beginner's Guide!
This guide will educate you on how to get started in the game of Fantastic Frontier. These can range from gold farming methods that are considered safe for beginner players, to what equipment you should buy for your adventures, and to slay monsters with.
On a side note, players can complete the Arnold Slime Quest, providing the Pipe Rifle as a final reward for those who are looking forward to the ranged damage-type.
How To Begin
When you first join Fantastic Frontier, you'll probably have no idea on what you should do in the Frontier. The map appears to be massive and the players are free to do whatever they want in the Frontier. Your main goal at the start should be simple and something that you can handle. Good goals include getting the best gear and equipment in-game, become rich with tons of gold, or record every collectible in each section of the Itempedia. Once you've decided on the main goal that you want to focus on, you can get to work.
If you are trying to focus on getting the best equipment and gears, you will need to obtain tons of gold. How exactly do you get gold? Well, there are many ways to obtain them. Easier, but time-consuming methods would include mining ores, harvesting, fishing, and slaying monsters. Out of these methods, harvesting plants and creatures will earn you the most, as the rarest plants can sell up to a million gold! However, you will need luck and lots of patience to find these harvestables. Fishing is also noted to be an easy method, because many fishing locations are somewhat safe during both the day and night. Mining can also be a beneficial method if you want to craft ore-based armor sets to get an average armor set that provides some protection/defense. Slaying monsters is considered to be one of the better methods to obtain gold, but this goal cannot be reached until you are able to obtain decent gear and equipment.
How Do I Earn Gold Fast?
An in-depth guide can be found on the List of Moneymaking Methods, where the players can see the many viable farming methods that they can do while they are in the Frontier. In order to obtain more information on money-making methods, click on List of Moneymaking Methods.
How Do I Equip?
To equip an equipment or gear, the player must open up their inventory and click on the item that they had selected to equip by left-clicking. Then, right-click on the selected equipment and click on Equip. If this does not work, it is suggested to rejoin. If rejoining doesn't fix, it is suggested to play a different game for 5-10 minutes or so and then rejoin Fantastic Frontier and see if it works. If it does not work then try to spam the equip button after right clicking the item you want to equip.
How Do I Sell?
Big Box, the selling vendor at Topple Town.
To sell your loot that was collected during your adventures, you will need to visit one of the two sanctuaries of the Frontier; Topple Town or The Town of Right and Wrong. If you were to go to Topple Town, you must head to the entrance in front of Topple Hill, and from there, you should find a big raccoon named Big Box. You are then expected to interact with Big Box in order to get a pop-up screen labeled as "Item Selling" where you can now sell your loots. The Sell button will sell the specific highlighted item that you selected, while the Sell All Button will sell the specific highlighted item that you had selected. For example, if you were to have 3 Ratdog Teeth and press/click the Sell All Button, it will automatically sell all of the Ratdog Teeth in your inventory. If you were to go to The Town of Right and Wrong, you must head to the fountain and look at the front entrance of the Illusionary Inn/The Inn Behind All Those Doors. You will then see a red panda known as Little Chelli. Just like Big Box, he is also a selling vendor that enables the player to sell their loot. Most items are typically sold around 10% of its original value. This does not, however, mean that you should keep items that you don't need, since most harvestables have no use other than to be sold, and there is no trade system in the game.
Fishing
The basic fishing rod.
If you plan on taking on the profession of fishing, you will need to have a fishing rod. Fishing is not a very reliable money source, but is relatively safe. Fishing Rods can be purchased from two vendors; Luhr and Martin the Carp. Luhr sells the cheaper and basic rods that enable players to begin fishing while Martin the Carp sell the expensive and advanced rods that will better increase the catch rate, as well as getting rarer fishes. In order to find Luhr, the player is expected to head past Hunter Jack's shop. After passing by the shop, the player should take a left, instead of taking the bridge in order to find Luhr near the small docks of Topple Lake. Topple Lake contains a variety of common fishes, as well as having a few rare fishes lurking in the waters. The fishes that you are most likely to catch in Topple Lake would be the Stanfsih, Mudfish, and the Bass. You will still occasionally catch Sand Slimes and Conglomerates as well. In order to find rarer fishes, the player is expected to venture further into the Frontier, entering dangerous areas such as The Pits or the Frigid Waste.

Luhr at Topple Lake
In order to find Martin the Carp, the player is expected to head down into Rubble Spring, the place where the waterfall of Topple Lake enters, being lead into many streams and rivers. Martin the Carp can be found specifically in the spring (lake) of Rubble Spring, on his porch of the cottage. From there, players can purchase better fishing rods from Martin the Carp once they have enough gold.
A tip for those of you willing to spend 5,000 gold to travel to The Town of Right and Wrong via the Captain Finnegan's airship (Located up the left pathway by the pickaxe shop, or next to the armor shop in Topple Town) is that you can fish in the fountain located in The Town of Right and Wrong. Despite catching Sand Slimes and other common fishes in the fountain, there is a rare chance of reeling in a Jerryfish, a rare fish that is worth 100,000 gold if sold to a selling vendor (currently the fountain seems to be glitched).
Harvesting (Plant Picking)
Harvestables are scattered throughout the Frontier, while players search for them in order to harvest them. This is considered to be one of the profitable methods of obtaining gold, but is not very reliable as rarer harvestables tend to based off on the player's 'luck'. There are a few good methods for harvesting harvestable that can earn you close to 100,000 gold. A suggested route is to head up to Topple Lake and go down the hill on the left side of the Ancient Castle/Stone/Forest Bridge. From there, you will find a cave passageway known as Clamstack Cave that may contain up to at least 12 Clamstacks that spawn inside the cave. Each Clamstack is sold for 2,500 gold, making it a quick profitable way to obtain gold. Another popular alternative is by heading to Celestial Field and can be accessed through ground travel. An easier way to get there is by taking the airship to The Town of Right and Wrong and head out to the fields, collecting Sun Flowers and Moon Flowers (which sell for 2,000 gold each) that are seen throughout the fields, although keep in mind that other mobs will attack you if you are not careful.
Mining

A player holding a Cobalt Pickaxe.
If you plan on taking a profession of mining, you will need to have a pickaxe. Pickaxes can be purchased from Benny Oreman in his shop at Topple Town. In order to get there, it is expected for you to head up the slope behind the Red Ogre Inn and it would be the first building you will see on the right, marked with a pickaxe sign. The value of the pickaxe does not affect how many ores you will get or whether you can mine the ores or not, but more expensive pickaxes tend to increase the mining speed. For this reason, it is suggested to buy a cheaper pickaxe if you are having trouble obtaining gold. In Topple Town, there are a couple of mines that players have access to; one mine can be found near the waterfall of Topple Lake, where the Ancient Miner is seen laying on the ground, one secret mine that is accessible by jumping into a leaf-covered gap behind several buildings leaning to the castle walls of the purchasable Castle Home or by entering the rock opening, and lastly, one behind Benny Oreman's shop, accessible by ladder and ground travel and is considered to be the safest mining spot out of the three.


An unmined gold ore.
Alternative mining spots that you can head to include Greenhorn Grove and Blackrock Mountain. Greenhorn Grove has a small mining area if the player takes the pathway leading downwards into the grove. This is considered to be slightly safer than heading to Blackrock Mountain, a place notorious for being infested by tons of mobs. Blackrock Mountain does have its benefits as it is home to the Black Ants and in that particular location, players are able to mine coals, emeralds, and gold ores, as well as other ores scattered throughout the areas of Blackrock Mountain. It is suggested to target gold, onyx, ruby, sapphire, and emerald deposits as these are worth the most.


The anvil seen in Topple Town.
In order to make the most out of what you had mined, return back to Topple Town and head to the area where the blacksmith (Reus the Smith) can be found at. You can use the outdoor furnace provided in Topple Town and smelt the mined ores into bars with the usage of coals. You can also use the anvil to craft the bars into ore-based armor sets, although this will not increase the value after it had been crafted into an armor piece. Ruby, Sapphire, and Emerald cannot be smelted and is expected to be sold right away after finding Big Box or Little Chelli.
Armor
A bronze helmet.
Armor is considered to be controversial, as enemies tend to deal large amounts of damage, and even some of the better armor sets will not protect the wearer from many hits inflicted upon by the enemies of the Frontier. While choosing an armor set or piece, it is suggested to first decide on what you want to become. There are three damage types to choose from: Melee, Ranged, and Magic. Once you have decided on a damage type that you want to specialize in, you should look for the armor set(s) suitable for that damage type, such as armor that boosts magic damage, or all types of damage. Using armor sets that only provide regeneration is not recommended, but could be beneficial due to the high amounts of damage inflicted by the enemies.
An strong armor piece that fits into the Feet slot that can provide benefits for the player is the Spider Stilts, a rare drop from the Corrupted Wizard (Spider Boss) at Blackrock Mountain, as these stilts provide 40 jump power, 7 walk speed and 4 armor. Jump Boots will also be suitable for beginner players if they plan on jumping over high-peaked areas or bumpy, rough landscapes.
For armor sets, try focusing on the armor sets that will best be suited for your damage type. For example, magic users will focus on magic-based armor sets like the Wizard Robe sets, while ranged users will focus on ranged-based armor sets like the Dark Hunter set.
It is not suggested to craft or buy ore-based armor sets as it does not have any perks or eye-catching qualities that would benefit the players, deeming them as less useful than armor sets that are bought from vendors. The onyx set is far from the best set in the game!
Note that defence is calculated as damage reduction, in that your damage reduction is you defense times 90%, or 9/10. Therefore, the more armor you have in total, the more one point of defence will impact on the damage you take. Regeneration is calculated as a percentage of your maximum health regenerated per second. For example, if you have a regeneration of 1 and a maximum health of 200, you will regenerate 2 hp (1% of your maximum hp) per second.
Fighting
If you are new to this game, you will probably be very excited about purchasing a set of armor and a sword, and then venturing out into the great unknown to have epic fights against monsters, gaining loot and gear in the process. Unfortunately, to start Fantastic Frontier well, you will have to adopt a very different playing style, one that is different to the way you might play other, similar games.
The most important thing to know is that as a beginner, most mobs in the game will kill you in one hit, making you lose all unequipped items in your inventory save for a select few such as ammo and firefly stones. If you see any non-humanoid figure, it would be in your best interests to 'run for the hills'. Warning Willy should not be ignored!
Unlike most other games on Roblox, you should probably not spend your money on any ore-based set or weapon. A greatsword of any tier won't help you much if your armor gives any less than 80 defence, which is not achieveable using any ore-based set. Instead, a ranged weapon should be your first priority, as it will give you a fighting chance against some of the weaker mobs. Hunter Jack will sell you a crossbow for 10,000 gold, which does 30 damage per hit. You can, of course, also save directly for a stronger weapon or even magic, but do know that the cheapest magic costs 750,000 gold and is not much stronger than the crossbow without damage boosts (its base damage is 60, the same as the crossbow if you use the bolts sold by Arbewhy).
Completing the Arnold Slime Quest will start you off nicely with a Pipe Rifle, a gun that does 140 damage per shot, which is normally worth 350,000 gold. Simply click on the link provided for a guide for that quest.
A general guide to fighting is as follows:
- Usually, the more health a mob has, the better its loot. It will usually be worth your time to kill a very tanky mob (unless that mob happens to be the Red Croc Man).
- Avoid getting hit at all costs. Even if you have a stronger set of armor than any ore-based set, a hit from a stronger mob will still take away a large portion of your maximum health. Health does not regenerate naturally!
- If a mob moves faster than you, you can bait out its attack, then quickly run backwards, giving you time and distance to run or attack back.
- All attacks consume stamina. You should manage your stamina carefully, especially if you need to sprint in order to outrun a mob.
- Fighting melee is, in essense, trading your health for the monster's, unless you are extremely skilled. Since monsters are usually much tankier than players, this is generally a bad deal.
Damage Types
Melee, Ranged, or Magic?
Fantastic Frontier currently has three different playstyles: Melee, Ranged, and Magic. Due to how Fantastic Frontier is designed, magic is considered to be the best choice to go for, as its unlimited attacks and a decent amount of distance mean that most of the enemies can easily be defeated from a distance. If you had liked a cheaper form of ranged attacks, ranged weapons are the way to go. However, the ammo will cost you tons of gold if used improperly. It should be noted that the ranged class will deal the highest damage per second with endgame weapons and armor, and so is considered the strongest class endgame. Melee is not advised for beginner players until they begin to understand and strategize while they are venturing in the Frontier.
Melee can still be better than magic in some ways. The daggers could dash with its long range to help avoid some attacks while getting one or two hits on your targets. Although having low damage, daggers can attack many enemies multiple times, up to five times if you are fortunate enough and a good dagger can deal more DPS (damage per second) than a greatsword. The basic daggers, from Bronze to Onyx, can be bought from Hunter Jack in Topple Town. However, daggers will cease to be useful once you reach midgame due to their low damage.
Tips/Tricks
- Learn to dodge!
- Use a variety of weapons and equipment!
- Don't always go with a tanky route!
- Do not craft ore-based armor sets in order to gain benefits.
- Do not use armor sets that do not benefit your damage type in any way. For example, do not wear melee-based armor sets if you are a magic user, even if the armor gives more defence.
- In order to teleport back to your home, open your Inventory and press the icon depicting a house.